Smoke Detector: A Complete Informational Guide

smoke detector

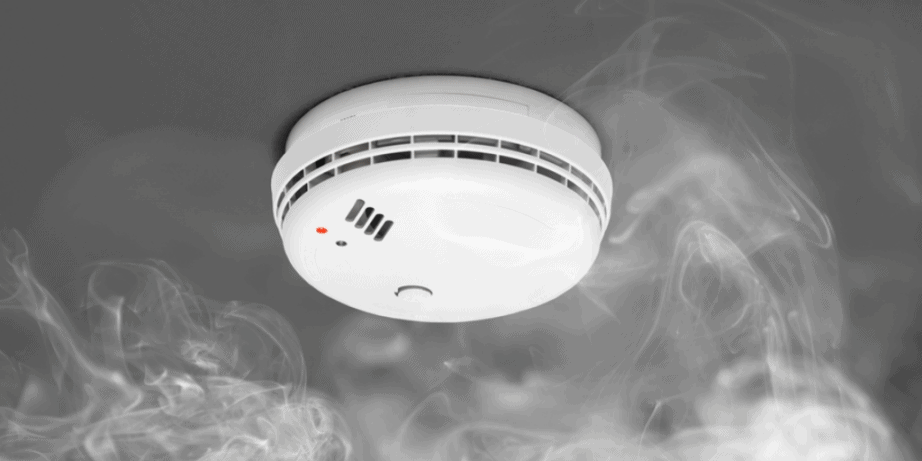
A smoke detector can save lives and relieve you from unnecessary stress. Imagine not being able to detect a fire in the middle of the night when you are fast asleep due to a malfunction. We know, even the imagination gets too frightening! To avoid serious damages and fire hazards like these, smoke detectors are an essential part of every household. According to surveys, a significant percentage of households that see accidents due to fires do not have smoke detectors installed. This affordable and economic equipment should be installed at the earliest for the safety of you and your family.

However, with so many choices and types out there, buying the right smoke detector might get a little overwhelming. In this article, we are going to clarify all your doubts and walk you through all the details involved in this buying process. Take a look at some of the most recommended smoke detectors that are efficient, durable, and quite popular with the people.

Types of Smoke Detector

Smoke detectors are majorly divided into two categories, wired and wireless forms. Although the wireless ones are much convenient, many people still prefer the conventional wired detectors. But in the end, it entirely depends on your requirements. However, read our blog, wired vs. wireless smoke detectors to know about their advantages in detail.

Ionized Smoke Detector

These smoke detectors have electrodes that produce a low current through the ionized air. In case of any presence of smoke, the alarm goes off, alerting the housemates. These are better in detecting small flames or fires too.

Photoelectric Smoke Detector

Photoelectric smoke detectors detect the fire through light. They have a light sensor and a light beam for the detection process. Generally, the light beam is away from the sensor, but when there is fire, the smoke particles scatter the beam. This causes some light to fall on the sensor and it signals the residents with an alarm.

In the below-mentioned section, we have tried to answer some of the most frequently asked questions. Read on to find out more about these gadgets.

Where to Install a Smoke Detector?

Smoke detectors are ideal for only specific locations and away from stoves, dishwashers, cloth dryers, and other products which generate heat. Since the natural tendency of the smoke is to rise vertically up, the best location for a smoke detector in the middle of the ceiling.

How to Install a Smoke Detector?

Typically, smoke detectors should be installed in every room of the home. But the most favored place is usually on the kitchen ceiling as most of the electric appliances are kept in a kitchen like a microwave, toaster, etc. Repeat the following steps to install:

  • The first step is to remove the mounting base from the detector.
  • Locate the place where you want to install the detector and take a small screwdriver to fasten the detector’s base at your selected location.
  • After the base is fit on the wall or ceiling, place the detector on top of the base and fasten the screws.

How Many Smoke Detectors Do I Need?

As mentioned before, smoke detectors should be placed in every room and outside every sleeping area. For instance, a two-story home with five bedrooms should have at least seven smoke detectors. There is no such thing as having too many smoke detectors so you can install as many as you want for the safety of your family.

How to Clean Smoke Detectors?

It is recommended to clean the smoke detectors every six months. For the cleaning process, you can remove the face of the unit and gently clean the detector’s insides by a vacuum cleaner. To clean the outside vents, you can use some detergent and damp cloth to remove the buildup. We have tried to cover more troubleshooting questions in our blog, to help you deal with smoke detectors efficiently.

How to Dispose off Smoke Detectors?

Photoelectric detectors can be disposed of without any extra measures as long as you have removed the battery. For ionization detectors, it is important to dispose of them carefully as they have radioactive material. You can either give them to local hazardous waste collection centers or send them back to the manufacturer. These small steps can contribute to a better environment. As a responsible citizen, it should be your duty to be vigilant.

Factors to Consider While Buying Smoke Detectors

Maintenance

Smoke detectors last for years and there is not much you need to do for their maintenance. The basic routine involves testing them every month to check their functioning. It is also recommended to clean them after regular intervals of time. Battery-powered ones have to be replaced with new batteries when the detector chirps indicating a low battery.

Interconnectivity

As most homes have more than three or four smoke detectors, it is advised to go with the variants that can be connected so that if one detector goes off, all the others go off as well, thus alarming everyone in the house.

Cost

Most smoke detectors cost you around USD 10 and are really affordable. However, if you want more features, the cost increases. Detectors that sense carbon dioxide (CO2) and carbon monoxide (CO) require more investment.

Detectors for Impaired Hearing

Some smoke detectors can emit loud noises for people who are partially hard of hearing. For instance, Kidde Smoke and Carbon Dioxide alarm is the best smoke detector in this category. Other detectors include visual warnings using strobe lights. The intensity of these lights is generally high and can wake up a sleeping person.

Conclusion

Do not shy away from buying smoke detectors. Only a few products in the market are so important. In fact, smoke detectors are a mandatory addition in households across the majority of the states in the Continental US. Abiding against them is a punishable offense with a heavy fine. These detectors can save your life and protect you from potential hazards. We hope this blog has been able to clarify your doubts about smoke detectors. 

For more buying options, head over to Bestviewsreveiws. They review & recommend some of the best products based on their quality, performance, and durability to simplify your buying process. So don’t forget to take a look, before you get hooked. Happy shopping to you!

Frozen Desserts and Ice Creams

frozen desserts and ice creams

We all love the sugar rush and a tingling sensation that follows eating frozen desserts and ice cream. These are like popsicles or sorbet and can make you feel good and full of energy. Frozen desserts and ice creams use frozen ingredients mixed with a liquid base. They are often easy to make and you can play with the flavors.

You can also prefer to make your homemade ice cream than going for the store-bought ones. Using an efficient ice cream maker will offer you delicious ice cream with the goodness of fresh ingredients. There are many types of ice cream makers for the summers offering the best of features. You can read about different types of ice cream makers in our blog.

Frozen Desserts Vs. Ice Creams

Ingredients

Many people think ice creams and frozen desserts are the same, but that is not the case. Frozen desserts contain vegetable oils, pasteurized milk, and sugar. Ice creams like Dovebar ice cream contain dairy fat, milk, and sugar.

Processing

Ice creams like Milk Bar Cornflake Chocolate Chip Ice Cream contain about 10% of dairy fat in the form of cream. You will have to add it separately to create that creamy effect. Frozen desserts like Magic Cup Dessert Butter Pecan Cup do not follow any such guidelines and are more sugary to taste. Depending on your taste and liking, you can choose either ice cream or a frozen dessert. Yogurts are often a popular choice to go for. Some people also prefer desserts that are lactose-free and gluten-free. They not only satisfy your taste buds but also keep your diet in check.

Ben & Jerry’s – Vermont’s Finest Ice Cream is an egg-free ice cream that is specially designed for vegetarians. This delicious coffee-flavored ice cream comes with espresso bean fudge chunks.

Labeling

The labels of frozen desserts can be confusing at times. They are more about flavors than the ingredients used. Some brands refer to frozen desserts as non-dairy ice creams but they are not ice creams in any way.  There has to be an SOI mark that says a minimum amount of Butter Fat and MSNF, or milk solids nonfat should be there to be called ice cream. The product should also have a certain density measured in weight per gallon to be called ice cream. Frozen desserts on the other hand do not require this SOI label.

Frozen dessert sandwiches also make a healthy and tasty snacking option. So Delicious frozen desserts sandwich‘s reviews claim that it is a plant-based frozen dessert sandwich suitable for today’s modern and busy lifestyle.

Why are Frozen Desserts Considered a Healthier Option?

Frozen desserts are low in calories and full of proteins. These features make them popular among people who have a sweet tooth but can’t afford to munch on calories. Some are also from natural flavors without any preservatives. They are light on your body and are healthy to consume occasionally. The customer reviews of So Delicious Dairy Free Cashewmilk Frozen Dessert claim that it is one of the best-rated frozen desserts available.

Making ice creams at home using an ice cream maker is a fun process. You can read our guide on ice cream makers in case you are looking for one.

On a Sweet Note

The option you go for should be based on the calories, fat content, and mood. No one wants to indulge in sweets and desserts that can make them unfit in the long run. Indulging in quality desserts will make you happy and keep your sugar levels from going high. It is important to remember that frozen desserts and ice creams are a treat and should never be used to replace a meal. You can also read our guide on how to use an ice cream maker if you want to make ice cream at home.

BestViewsReviews rates and reviews hundreds of frozen desserts and ice cream makers on the basis of their taste, quality, and sturdiness.

How to Microwave Bacon?

Bacon cooked in the microwave is almost everyone’s favorite breakfast option. Everyone enjoys these crunchy, salty, and smoky strips. It generally takes a long time to cook bacon to perfection on a standard skillet. Hot oil backsplashes accompany the perfect strips, but it wouldn’t be worth it. It’s almost like a regime to cook in a skillet and watch the progress. There are so many convenient ways to cook bacon that one can afford to give the traditional way a miss.

It is possible to cook the strips, causing no oil to be spatter. A simple method is outlined for cooking bacon in the oven. Microwaves are an essential part of today’s household. Several of these features are important to check when purchasing a microwave. Read our informative guide on the best microwaves.

Can you Microwave Bacon and Is it Healthy to Microwave Bacon?

The answer is definitely yes. The only requirement is that the bacon is placed between two layers of paper towels. It will absorb grease on the bottom and prevent grease splatter on the top. Cooking bacon in a microwave is the easiest method. It comes out perfectly crispy and evenly cooked. There’s no need for a special cooker for this.

It’s just as good for you as any other way. Microwave ovens are completely safe to use. Foods prepared in the microwave are as nutritious as those prepared in other ways. Microwaved bacon, according to recent studies, has less fat and calories than pan-fried. One reason for this is that in the microwave, your paper towels will absorb all the fatty bacon oil. Microwaving bacon appears to improve its nutritional profile. Read our blog on the best Low Profile Microwave to find out whether or not it is good for you.

How to Microwave Bacon?

Prepare the Oven

Preheat the oven with the rack placed within. Spread a baking sheet and line it with parchment paper. Make sure that the sheet extends outside and is bigger than the placing area. This will keep the oven clean while you are cooking the bacon.

Arrange the Strips

This is an important step to follow. Bacon strips that are not arranged properly will not cook properly, leaving them sticky. Cut 12 ounces into strips and arrange them next to each other to cook. Do not overlap them, as they might not cook properly.

Cooking Technique

Bake the strips for 12 -14 minutes on a baking sheet inside a preheated oven. It is recommended that thinner slices be cooked for 12 minutes, but thicker slices should be cooked for 14 minutes. During this time, you will see the bacon fat bubble up, but fortunately, there will be no splatters.

Take Out the Batch

Once the strips are ready, pull the batch out with tongs or a pair of cooking gloves. Transfer it to another dish lined with paper towels. The towels soak the excess oil, keeping the crispiness of the bacon. Once they are ready, don’t delay if you don’t want to lose on any of the crispiness and savor immediately. You can also team it with a hot and fluffy cheesy omelet for the perfect nutritious breakfast.

How Long does it Take to Cook a Rasher of Bacon in the Microwave?

The usual cooking time for a slice of bacon is roughly 1 minute. This time is a little less for thin slices, and for thick-cut slices, it is a little more. Just before you think the bacon is done, stop cooking it as it continues to crisp in the microwave. It is best to use this method when you only need a few slices of bacon, such as for a quick breakfast sandwich or crumbling over a salad. You can add more bacon layers to the microwave and cook them all at once. The bacon will not cook evenly and will take longer. Rather, just go with the oven-baked bacon option at that point.

Does microwaved Bacon Have Less Fat?

According to the Department of Agriculture, microwave-cooked bacon has 25 calories per slice. The pan-fried bacon has 42 calories per slice. The Microwaved bacon has 1.86 grams of total fat per slice and the Pan-fried bacon has 3.18 grams of total fat. Microwaving bacon between paper towels causes fat to absorb throughout the cooking process. This cooking method has a lower fat level. Microwaving bacon makes both the meat and the fat crispy. The Pan-frying produces a more classic bacon texture, with crispy fat and chewy meat.

Microwaving sweet potatoes reduces your cooking time by around 45 minutes. Read our blog on how to microwave sweet potatoes in many ways.

How to Reheat Bacon in the Microwave

Reheating bacon in the microwave is the most convenient method. You must keep in mind that reheating bacon for the entire family in the microwave may take several rounds. The following instructions will show you how to reheat cooked bacon in the microwave.

  • On a plate, arrange bacon strips in a single layer.
  • Using a paper towel, cover a plate.
  • Microwave on high for 20–60 seconds.
  • After one round, remove the bacon to ensure it is heated. If not, reheat for 20 seconds more.
  • Remove the pieces of bacon off the platter and set them on a paper towel to absorb any excess grease.
  • Serve and have fun.

Conclusion

Bacon has been a delicious snack or breakfast option for a long time. The dishes are easy to prepare, quick to cook, and require little attention. This food is best cooked in an oven because it is convenient for cooking large batches. The convection mechanism ensures a thoroughly cooked and crispy end product. It is time to make the switch from cooking bacon on the stovetop to cooking it in the oven for a better result.

BestViewsReviews helps you find the best countertop microwaves and top electric wall ovens on the market by rating and reviewing them on the basis of quality, convenience, and durability. Get unbiased, honest reviews of products before you buy.

Buying Ice Cream Makers: The Know-hows

ice cream makers

Being able to enjoy fresh and delicious homemade ice cream sounds really tempting, doesn’t it? Imagine being able to make one for yourself on a sunny day in the span of a very short time. You can add whichever ingredients you want and make it as rich and flavored as those fancy restaurants you love going to. All of these are possible with the help of an ice cream maker. Ice cream makers are here to satisfy your taste buds and make your summers a chilly affair! We will take you through this informational guide to help you bring the perfect ice cream maker home.

Is it Worth Buying an Ice Cream Maker?

This question can arise in the mind of any consumer while searching about ice cream makers. People often make ice creams at home using ingredients that may give them a similar taste but unfortunately, those methods take a lot of time. Sometimes even hours of hard work aren’t enough to prepare ice cream to taste like the ones we buy from the stores.  Well, ice cream makers are a lifesaver here! They help you make these delectable frozen desserts in very less time with the perfect consistency. No more worrying about the large crystal sizes of ice cream as an ice cream maker’s compressor freezes it entirely.

Some people often try ways to replicate the process of ice cream makers at home, using a churner that rapidly rotates to freeze the mix. The rotating blades rotate swiftly to mix the ingredients like ice cubes and rock salt to quicken the freezing process. Honestly, this might turn into a tedious science project and can take quite long. Also, the taste might be familiar but often not the same as the store-bought ones. Therefore, buying an ice maker is a win-win for you. You end up getting restaurant-quality ice cream without wasting too much of your precious time.

Which Ice Cream Maker Provides the Best Results?

The market has some amazing ice cream machines which are really efficient and can be used to make sorbets and frozen yogurts too. Cuisinart electric ice cream makers promise results within 20 minutes and are perfect for your homes! Hamilton and KitchenAid ice cream makers are equally good and are compatible with both tilt-head and bowl-lift style mixers making your mixing process really smooth and easy.

Factors to Consider While Buying an Ice Cream Maker

With so many products out there, this can be an overwhelming decision. Therefore, let us take a look at the factors that we have to consider while buying an ice cream maker.

Power Input

Ice cream makers are powered by electricity and vary as per the power of their motors. For commercial production, powerful motors are involved and for small-scale production, less powered motors are used. Therefore, understanding your requirement, the amount of electricity it will consume, and the type of motor is very important before investing in an ice cream maker. Nostalgia WICM4L Electric Ice Cream Maker and Nostalgia ICMP400BLUE 4-Quart Electric Ice Cream Maker are great options that require less power.

Size

The size depends on your consumption. If you are a larger family with frequent demand for ice cream, settling for a powerful ice cream maker is recommended but if you are someone with less consumption of ice cream, go for a smaller and compact size.

Convenience

Brands that provide extra bowls that can be easily detached and lifted are typically more convenient to use. Some ice cream makers also come with a digital panel which makes your process more comfortable by adjusting the settings accordingly. The demand for automated ones is more, as the hassle of checking repeatedly when the ice cream is ready is not there. Just feed in the ingredients and let the machine do its job. KitchenAid Ice Cream Maker can do the job very easily.

Cost

Manual ice cream makers can cost you as low as USD 100 but for makers with a faster compressor and powerful motor, the cost may range somewhere between USD 200 and USD 300. As the cost increases, so will the added features and options. Cuisinart ICE-70 Electronic Ice Cream Maker is a high end option for those that want the best.

Final Verdict

Ice cream makers can satisfy your sweet cravings anytime, making them your favorite appliance! You can even take the portable ones to your family get-togethers to enjoy the mouth-watering delight. Homemade ice creams can help you satisfy your sweet tooth be it in the middle of the night or whenever your sugar cravings hit an all-time high. Bring these makers home to sit down and enjoy your dessert with your family and friends and ride in some sugar-rush. Bestviewsreviews recommends and reviews some of the best products and lists the most popular ones based on their demand, performance, and durability in this category. Do have a look!

How to Use an Ice Cream Maker Machine

ice cream maker machine

Ice cream makers are popular appliances and a big hit during the summers. They eliminate all efforts of manual ice cream making. You can prepare your ice creams by using an ice cream maker machine. These machines can either come with an electric motor or feature a hand-cranking mechanism to prepare the highly-consistent mixture. They come in different variants like small-freezer units, built-in freezer machines, countertop models, and others. You can make homemade gelato, sorbet, frozen yogurt, etc with an ice cream maker by following a few simple steps.

How to Make Ice Cream With an Ice Cream Maker?

Get Your Mix Ready!

Mix all the ingredients you want to put into your Gelato to get the perfect taste. Pour milk, cream, and sugar along with the toppings inside the bowl, and do not forget to give them a nice stir. You can’t add the ingredients after your machine has begun its process as it might allow air bubbles to creep in. It is essential to prepare your list beforehand. You can also chill your mixture in the freezing bowl for an hour or two if you are not in a hurry.

Rock Salt/Gel Model Ice Cream Maker

Certain brands offer two machine variants; the rock salt model and the gel model. if you have a rock salt model at your home, then an essential step is to put some ice cubes and rock salt in the outer bucket of the machine, before it starts. You can skip this step altogether if you have a Gel Model. A gel model contains a cooling liquid inside its insulated walls. It is important for the maker to freeze for 10 hours before starting the process. Read the manual before for more clarity.

Set the Bowl

You can set the freezer bowl on the base once the Ice cream maker is ready. Make sure that the bowl is full up to 3/4th of its capacity. Overfilling the bowl might cause the contents to spill and your end product might not be that delicious.

Placing the Mixing Paddle

The mixing paddle is a removable part and should be placed in the middle of the freezing bowl with the circle side up. Usually, there is a designated marked place to put it. After securing the lid over the paddle, make sure the container is air-tight. Only then start the machine.

The Making Process

After switching ‘ON’ the machine, wait till the thickness and volume of your ice cream increase. Allow the paddle to keep working until the desired density is achieved. Ideally, the paddle should be allowed to work on the mix for 30 minutes.

Serve

Scrape the ice cream out with the help of a non-stick spatula as spatulas made of metal can scratch the insides of your bowl. Your ice cream is ready! Serve it immediately or store it in the freezer for later. Enjoy your Gelato by serving it into cornets or in a cup with some candies on top. Maybe add a dash of hot chocolate and nuts to savor this delectable dessert if you want some more flavor.

The Cuisinart ICE-20 is an electric ice-cream maker that produces up to 1.5 quarts in about 20 minutes. This model has got excellent reviews for its nonstick chamber that allows for quick cleanup. You can read through our blog to know all about electric ice cream makers.

How to Use an Ice Cream Maker Machine With Compressor

Ice cream makers with compressors are models that equip built-in compressors for cooling the ice cream mixture while churning. You do need to wait long for the cooling process. This allows you to prepare an ice cream that is ready to consume, once the chilling process is finished. You are only required to press the button and you will get the pre-frozen container to hold your mixture.

The reviews of Lello 4080 Musso Lussino show that it has a good capacity of freezing 3 quarts of ice cream or sorbet per hour. This model has a timer control feature for different frozen confections.

How Long Does Ice Cream Take to Freeze in Ice Cream Maker Machine?

It may take up to a couple of hours to freeze your ice creams. You should keep your bowls in the freezer for about 4 to 12 hours before making your ice cream batches. The pre-frozen container will help you make continuous batches without having to stop the churning process. Countertop freezer ice cream makers that come with a built-in freezer can freeze your mixture simultaneously.

How to Maintain the Ice Cream Maker Machine?

Maintaining an Ice Cream Maker is an important process. The machine should be cleaned carefully but after it has attained room temperature. You can rinse the bowl and other parts with warm soapy water, but be careful to not allow water into the motor. It is imperative to make sure that all the parts are dry and devoid of moisture. We suggest you read the manual for the cleaning process.

Reviews of Chef’n Sweet Spot Ice Cream Maker show that this model is easy to maintain because of its simple design that is easy to clean.

How Do You Know When Ice Cream is Done in Ice Cream Maker?

You can know if the ice cream is done by checking its thickness and consistency. It may take you around 20 to 40 minutes to make the ice cream in an ice cream maker like the top-selling Cuisinart 1.5 Quart Frozen Yogurt ICE-21P1. You should start checking if your ice cream is thickened enough after 25 minutes. You can keep it for a few extra minutes to achieve the firm soft-serve ice cream.

Conclusion

Ice Cream makers are summer essentials as with such machines, you can have Ice-Cream that will taste like the quality store-bought Ice cream every time you make it. You can also add your own flavors and top it with nuts and jam as you like. Compact ice cream makers offer us a convenience like never before and if you are someone who loves Ice Cream, then it will be a worthy purchase. Read our blog to know everything about compact ice cream makers.

BestViewsReviews rates and reviews hundreds of high-quality ice makers on the basis of customer satisfaction, convenience, and durability.

Exercise Bikes for Weight Loss: Get, Set, Fit!

Exercise Station

Using exercise bikes for weight loss is an effective way of shedding those extra pounds. It helps you in toning your leg muscles and making you shed all that unwanted fat. Exercise bikes are a good form of cardio and a safer alternative to many exercise equipment. It strengthens the lower body and improves your core. Many people combine Augmented Reality glasses with exercise bike sessions to get a realistic feel of cycling. Let us understand a bit more about exercise bikes.

How to Use Exercise Bikes for Weight Loss?

Consuming the appropriate level of calories and burning double of them results in better metabolism and weight loss. Practicing stationary bikes is a great option to get rid of the extra calories. An exercise bike burns about 290 calories in 30 minutes.

Many models come with adjustable speed options and various workouts to choose from. You lose out on calories and build strength in the body when you are training at high intensity. Browse through the leading list on BestViewsReviews. We review and recommend them based on color range, effectiveness, and build quality. There are many other benefits of using an exercise bike. Read our blog to know about them.

  • Sit on the exercise bike and adjust the seat. The toes should touch the pedal, but it shouldn’t be too comfortable. This way, you can pick up speed without getting tired
  • Start pedaling at a low intensity for 5 – 7 minutes
  • Increase your pace to medium power and pedal for 3-4 minutes
  • Pick the pace to high intensity and pedal for about 1-3 minutes
  • Alternate between medium and high for about 20 minutes
  • Decrease your speed to low intensity for 5 – 7 minutes

Is 30 Minutes a Day on Exercise Bikes Enough?

An exercise bike is an ideal way to burn calories if you’re trying to lose weight. A 30-minute ride on a stationary bike burns around 200 to 300 calories. If you can achieve this by your third week, then you will see results. For people with stubborn body muscles, increasing your time gradually to 45 minutes will show results. Experts suggest indoor cycling for at least 3 -4 days a week. Some light exercise should follow during the rest of the week.

You can play with the time by hearing some music. Tweak your usual workout by introducing interval training if you wish to see faster results. Pedal fast for a minute and then go slow for another. Repeat such sets to make exercise on your indoor bike efficient and fun.

Buy the Best Exercise Bikes

3G Cardio Elite RB Exercise Bike

The 3G Cardio Elite RB Exercise Bike with 16-level adjustable magnetic resistance is ideal for home use. The seat is adjustable and is perfect for users from 5’ and 6’5”. It’s suitable for men, women, and seniors. It has got good reviews for its easy-to-hold handlebar and a water bottle holder. The bike can store up to 4 user profiles and is flexible for different positions. The LCD shows how many calories your body burns.

Vanswe Recumbent Exercise Bike

The Vanswe Recumbent Exercise Bike is a great exercise bike for home, apartment, dorm room, or office. This indoor exercise bike helps you shed pounds, improve your health, and give you a lean and toned body. This is an indoor workout bike and is comfortable to ride and use. It has no impact on your joints and knees. It is ideal for those who suffer from bad knees, back pain, or knee arthritis. This is low-impact workout equipment that is safe for users of all ages.

Pooboo Magnetic Exercise Bikes

Reviews of Pooboo Magnetic Exercise Bike show that this bike has a nice and attractive design that folds easily. It is lightweight and you can take it with you around. It offers convenient storage and offer quick fold or unfolding. There is a magnetic resistance system that is built into the exercise bike. Changing any of the moving parts to alter the amount of resistance is not advisable. You have to pedal to make the bike move forward while picking up the speed you want.

DMASUN Exercise Bike

The DMASUN Exercise Bike is the perfect choice for your home workout. It features a solid steel frame construction with built-in transportation wheels for easy moving, a large LCD that shows the current speed, time, distance, calories, pulse, and adjustable magnetic resistance. This model has got good reviews for its comfortable seat and handlebars.

DeskCycle Under Desk Pedal Exerciser

Reviews of DeskCycle Under Desk Pedal Exerciser suggest that it is the best under-desk bike in the market. This bike is compact in size and will slide under desks as low as 27inches. It offers  8 calibrated resistance settings that allow you to adjust the workout intensity at your convenience. You can check variables like speed, time & distance on the 6 functions removable LCD display.

Recumbent exercise bikes have seats close to the ground with comfortable back support. Check out our blog to find the best recumbent exercise bike of 2022.

Conclusion

Investing in an exercise bike for weight loss is a great way to get back in shape. A good exercise bike will not just make you lose weight but also improve your health. It will help in toning your legs and improving your posture. Comfortable bikes for ample support to your lower body and support your back.

Buying the right exercise bike can be tough. Read our blog to know how to buy the best exercise bikes. Browse through to know your options.

BestViewsReviews rates and reviews hundreds of best exercise bikes and top-rated cycling bikes based on design, noise level, convenience and build quality.

Exercise Bikes for Seniors: The Best Way to Get Fit

Exercise Bikes for Seniors

Exercise Bikes for seniors come with comfortable seating, mounting, and riding options. Cycling is considered a recommended practice by health practitioners. You may experience joint pain as you age because of a decline in bone and muscle structure. This prevents you from staying active, resulting in a lazy body. Investing in an exercise bike is an excellent option to keep your aging body healthy and in shape.

Cycling is a low-impact exercise that reduces the strain on your muscles and joints. It works on your cardiovascular system to make your heart healthy. Some studies even show that cycling can slow down the process of aging in both men and women. We have a dedicated blog on the benefits of exercise bikes. Read through to know its advantages.

Are Exercise Bikes for Seniors Worth?

Yes, indoor cycles are suitable for seniors. Regular cycling has shown a slower decline in muscle and bone density. It also works to keep your immunity intact. Our thymus gland, which produces immune cells, shrinks as we age. Exercising regularly can help maintain the gland. Workout equipment like exercise bikes and treadmills allows you to increase your fitness regime. Cycling can improve strength, cholesterol, testosterone, and fat levels.

How Long is it Suitable to Ride Exercise Bikes for Seniors?

A daily session of 20 minutes is sufficient for the elderly and seniors. As per WHO, the elderly should exercise on an indoor bike for at least 150 minutes per week. They can switch between low, medium, and high intensity. The intensity depends on factors like bone health, knee condition, and leg pain.

Tips for Cycling on Exercise Bikes for Seniors

A medical condition like arthritis will limit your mobility as you age. Exercising on a cycling bike will regulate your heart rate and keep you fit. Read the tips below for maximum safety and results.

Protect Your Knees

You should ensure your form is correct when exercising on a bike. Keep your knees stable and sit back. You will experience discomfort when pedaling if you sit too close to the handlebars. Recumbent exercise bikes offer the best protection for your legs.

Keep Your Exercise Bikes in Good Shape

Saving money is a good idea, but if you have a bike that has been idle for a long, invest in a new exercise bike. You ought to have a professional examine the old one if you feel it will work. Safety should be prioritized due to the possibility of equipment malfunctions causing accidents.

Try Electric Exercise Bikes for Seniors

Consider an electric bike if you feel your body will not support your exercise routine. It will assist you in pedaling, relieving joint aches.

Take it Easy

It would help if you did not push yourself when exercising on an indoor bike. Improve your skills and endurance as per your body, and never ignore the pain. Make sure you visit a doctor and get advice on if cycling is suitable. It is important to introduce the machine to our bodies gradually so that they can adjust to it.

Maintaining the Balance

Go for an exercise bike like Pooboo Magnetic Exercise that comes with a sturdy body and comfortable seat. It will take the load off from your back and hands while offering stability.

Fuel Your Body

Consume some carbohydrates like a mashed potato before you step up on the exercise bike. Drink sufficient water before you exercise to avoid dehydration. Make sure you keep a water bottle handy or wear a hydration pack. You can also have something to munch on, like snack bars if you feel weak or dizzy.

How to Choose an Exercise Bike for Seniors

Prioritize Easy Mounting and Support

The bike should be simple to mount. It should be comfortable to ride for longer workout sessions. The bike should provide back support and improve your posture too. Good exercise bikes keep the feet firmly planted on the pedals for better grip while pedaling.

Focus on Seat Comfort

The seat should be spacious and comfortable. It should not be hard on your back and should offer better posture and support. Many models also come with padded seats for better comfort.

Check for a Smooth Ride

The smoothness of the ride is essential for maximum comfort. A clumsy ride is challenging on the knees and can result in injury. It is necessary to test the bike in the store to see how it works for you. You should look for products that come with returns on purchases if you are buying online.

Don’t Forget Safety

Heart rate monitors are essential for senior exercisers. They have pre-programmed workouts that are simple to follow and progress at a safe pace. Choose a console display that’s easy to use for navigation convenience.

Most Comfortable Exercise Bike for Seniors

3G Cardio Elite RB Exercise Bike

The reviews of the 3G Cardio Elite RB Exercise Bike show that this bike is an excellent solution for office workers, students, and seniors. It can help to improve circulation in your legs and remove stiffness and soreness. You can reduce the swelling in your legs and feet by exercising on this bike. This bike uses magnetic resistance and can withstand a total weight of up to 350 pounds.

Vanswe Recumbent Exercise Bike

Vanswe Recumbent Exercise Bike is designed for the comfort of people of all ages. This exercise bike is a great way to shed pounds and maintain a healthy weight for children, adults, senior citizens, and everyone. It features 16 levels of magnetic resistance and an LED monitor to showcase your workout variables. Reviews suggest that this bike is ideal workout equipment for different fitness goals.

Pooboo Indoor Cycling Bike

The Pooboo Indoor Cycling Bike offers multi-level adjustable magnetic resistance. It is an ideal exercise bike for seniors. This is an affordable bike that is easy to assemble and set up. It has a heavy-duty steel frame with a stable and safe design. This bike uses a belt drive mechanism for smooth and quiet workouts. The maximum weight handling capacity of this model is 20 pounds.

DeskCycle Under Desk Cycle

The reviews of DeskCycle Under Desk Cycle suggest it be a top-ranking compact under-desk design bike. This bike can help you achieve your fitness goals with ease, comfort, and efficiency. You can slide this bike under desks as low as 27inches. It features 8 calibrated resistance settings that let you adjust your workout intensity. The 6-function removable LCD display shows the time, speed, distance, and calories burned.

Conclusion

Exercise and age sometimes do not correlate with each other, and as you age, safety becomes a primary concern. A stationary exercise bike will offer you a safe option to work on yourself regardless of the time or the weather outside. Buying an exercise bike can be confusing. It is important to know what things to consider while buying an exercise bike.

Exercise bikes can also help you lose body weight and get back into shape. Read our blog to find the best exercise bikes to lose weight.

BestViewsReviews rates and reviews hundreds of stationary bikes based on build quality, ease of use, and durability.

The Absolute Chainsaw Chains Guide

chainsaw chains

The chain is the crucial element of a chainsaw device. This part demands special attention and regular maintenance to function well. The chainsaw chain varies on the basis of its size, type, and various other factors. You can find different chains like full chisel, semi-chisel, and low profile chains that solve different purposes. The specifications of the product can change with the varying usage. Measuring the chain and finding the best replacement might seem like an easy task, but the process of measurement isn’t that straightforward. You should consider a few pointers while replacing your chainsaw chain.

Features to Look for While Replacing Your Chainsaw Chains

Carbide Chain

This robust and durable material helps your chainsaw accomplish intensive tasks easily. Chains engineered from carbide can endure harsher environments. They do not wear out easily and are usually on the higher end of its cost. Workplaces that have a rougher environment should prefer carbide chainsaws.

Built-in Lubrication

Some chainsaws are designed in a way where they remain lubricated throughout the process. The grooves in the chain ensure that the lubricant stays on the teeth and ensures smooth operations. We suggest you take a look at the information guide of the Chainsaws if you are on the lookout for the best chainsaw.

Self-Sharpening Chainsaw Chain

Chain sharpening is a time-consuming process but one that has to be regularly done. Some chainsaws maintain their sharpness over prolonged usage with the help of their self-sharp mechanism. Understanding the parts of the Chainsaw and knowing how to reset the chainsaw chain will help in maintaining the chain and troubleshooting minor problems that might arise due to continuous use.

Low Vibration Chainsaw Chain

More vibrations account for more discomfort as intense vibrations may tire the sawyer easily. Complications like pain, numbness, and sensations may occur in the hands if your chain vibrates frequently. You can lessen the vibrations by introducing some space between the guide bar and the chain. It is good to prefer low-vibration chains while choosing the right chainsaw chain.

The reviews of Oregon S40 AdvanceCut suggest it as one of the best-selling chainsaw accessories in the market. It has a 3/8 inch low-profile pitch and offers smooth and fast operation with minimum kickback.

Parameters to Consider While Measuring Chainsaw Chains

Gauge

The main use of a gauge is to measure the thickness of the drive links. Drive links are the parts where the chainsaw enters the guide bars. Matching the right thickness will help it fit perfectly on the guide bar. The gauge value is usually mentioned on the guide bar.

Pitch

This parameter is the measure of how close the links are in a chain. You get the value of the pitch when you divide the distance between three rivets by two. This value is also mentioned on the guide bar.

The Oregon Poulan D70 has got good reviews for its easy compatibility with other models like Homelite, McCulloch, Poul, Echo – CS-452, CS-550EVL, and others.

Length

The number of drive links on your chainsaw is its length. You will have to count the number of links manually to obtain the value of the length. You can go with chains like BLACK+DECKER RC800 if you want a chain to fit perfectly with the 8 inches chainsaw.

Are There Different Grades of Chainsaw Chains?

Chainsaw chains like the high-quality Oregon R34 Advance come in different types based on cutter type and chain sequence. The cutters are mainly of three types; semi-chisel, chisel, and low-profile cutters. Chain sequence is the spacing provided between the cutters on the chain. The sequence can be standard, semi-skip, or fully skip. You can go with a full skip chain sequence to obtain clean and efficient cuts.

Does the Number of Links in a Chainsaw Chains Matter?

The answer is Yes. The higher number of links will result in more tension of chain during the operation. You can look for a fewer number of links to prevent excessive stretching. The bar length and chain type can help you know the number of links on your chain. A bar measuring 16″ in length may require 66 drive links. Reviews of Husqvarna 531300439 show that this model has the high-build quality and 72 links.

How Long Should Chainsaw Chains Last Before Sharpening?

A chainsaw chain often comes with high durability and can easily last for 5 to 7 years. Your chainsaw chain can also last for up to a decade or more if you are using it occasionally and with proper maintenance. You should consider replacing your chain once you reach the sharpening limit.

How Often Should You Sharpen Chainsaw Chains?

You should consider sharpening your chainsaw chain after several uses, but it depends on your usage too. The thumb rule is to sharpen your chains whenever they go dull while cutting. Some chains require sharpening after 8 to 10 uses while others work great for the complete season.

Conclusion

It is imperative to use the right chain whether you are looking for an electric or gas-powered chainsaw or other outdoor tools like leaf blowers. A wrong size chain may derail from the guide bar or may result in frequent kickbacks. This might be injurious to you. Using the right kind of chain will ensure that your chainsaw is in good condition. You can go through our blog to know all about chainsaw chains.

BestViewsReviews rates and reviews hundreds of chainsaw accessories on the basis of quality, durability, and convenience.

Chainsaw Oils: The Way to Maintain Your Chainsaw

chainsaw oils

Chainsaw bars and chains require constant maintenance. If these parts of your chainsaw wear out very quickly or they get non-uniform, then the chainsaw oils you use might be at fault here. For the chainsaw to function appropriately, it’s very important to oil it regularly. It prevents your blade from getting damaged and you from getting injured. Choosing the right oil can be really tricky. We’re here to simplify your buying process by this handy guide.

Common Myth about Chainsaw Oils

Chainsaws run with the help of oils that keeps the chain and the motor lubricated. Most people believe that the chainsaw oil is for reducing the friction between the blade and the surface we need to cut. Actually, the oil fills the grooves and lubricated them, which helps you operate your chainsaw at a much higher speed. However, sometimes, adding just adding lubrication is not enough, and thus resetting the chainsaw chain might help.

Standard Chainsaw Oils

Standard oils are petroleum-based and are very useful. Their consistency needs to be perfect for smooth operations. Brands like Stihl and Poulan have specially formulated chainsaw oils for the convenience of users. Petroleum-based oil varies because of the weight and is available for every weather condition.

Alternatives to Chainsaw Oils

Biodegradable oil

Apart from the traditionally available oils, chainsaws are compatible with biodegradable oils as well. Biodegradable oils are good for your skin as well as whichever oil you’re putting on your chainsaw touches your hand too. You need to be cautious about the type of oil you’re using for added comfort. Non-ergonomic oils can also trigger respiratory issues.

Vegetable Oil

If you’re looking for a pocket-friendly and ergonomic option, go with vegetable oil. Canola oil is used widely in the industry. Vegetable oil is also thinner. You should avoid using vegetable oil in the cold weather, though.

What to Avoid?

It’s vital to ensure that the type of oil you’re using is very fresh. You should never use recycled oil. Also, do not fill the reservoir while the chainsaw is running to maintain the longevity & keep your chainsaw in the best condition. Moreover, it is important to understand that operating the chainsaw in the right way will also ensure its smooth functioning over a period of time. Thus, make sure to read through our blog on tips to use the chainsaw the right way.

Conclusion

Now that you know everything about oils, your final purchase should become really easy. Be it any outdoor tools like chainsaw or leaf blowers, bio-degradable oils and vegetable oils are popularly preferred for improved function. You can reap the maximum benefits from your saw if you use the right oil. It is after all, the chainsaw oil that is going to keep the motor up and running.

If you are someone who is operating chainsaws for the first time and is looking to buy them, then head to bestviewsreveiws.com. They review & recommend some of the best products based on their quality, performance, and durability to simplify your buying process. So don’t forget to take a look, before you get hooked. Happy shopping to you!”

Your Ultimate Smartwatch Buying Guide

smartwatch

A smartwatch is a watch with additional functionality and connection. It is a wearable computing device that looks and functions similarly to a wristwatch. You just have to link this device with your smartphone. It then allows you to run apps and playback a variety of digital media. You can also get call and SMS notifications on your watch. Smartwatches have touchscreens that allow you to use functions such as a calculator, thermometer, and compass. These devices let you keep track of your health conditions and daily activities. It is important to know about their specifications and if they match your needs before buying a smartwatch.

Factors to Consider While Buying a Smartwatch

Compatibility

The OS and phone compatibility should be your key deciding feature. You won’t be able to use your watch if you don’t pay attention to this factor. Most smartwatches are compatible with smartphones from the same brand. Burxoe Smartwatches are compatible with both iOS and Android devices. Reviews of Apple Watch show that it works with iPhones only. The app for your watch comes preinstalled on your iPhone.

Display: OLED Vs. LCD

Your device might support a bright LCD or AMOLED display to enhance your viewing experience. The brightness feature is synced with the battery life. This is the reason, why many brands are coming up with solutions to extend your watch’s efficiency. The pros of going with OLED are that your device is going to be thinner. Apple Watch SE comes with a 44mm screen which is an ideal example of a hi-tech AMOLED display.

Touchscreen Feature

Going for a watch with a touchscreen display might seem like a no-brainer. Brands have also added functionalities that help you browse through your watch without any touch gestures. The crown and side button in Apple Watches helps you zoom in and scroll. Samsung Watches uses bezels to scroll through menus. A great buy with an amazing touchscreen interface is the Apple Series 3 smartwatch. It comes with a 38mm super-responsive touchscreen and advanced features.

Personalization

Brands allow you to swap the straps of your smartwatch. You can also go with various third-party options which help you enhance the look of your device. From the dial color to the finish, you can select whatever you like. You should always go with a thin and sleek design for added ease. Reviews of the IOWODO smartwatch show that it comes with an extra strap for personalization.

Smartwatch Applications

Your smart watch’s performance varies depending on the available applications. Apple and Google provide you with thousands of applications to choose from. You can use your smartwatch to pay using the different apps. Smartwatches also have apps that find your phone. Such applications will never let you lose your phone. One should always ensure that the applications they absolutely need are available in the watch.

Calling and Payments

Many smartwatches allow you to make calls even if your phone lies at home. They are also equipped with NFC chips to help you set up your payments. They save your credit and debit card information and you can pay through Apple Pay, Google Pay, and Samsung Pay. You should remember to pair your smartwatch with Bluetooth to make the call quality better. They will allow voice clarity and uninterrupted connection.

Battery Life

Most smartwatches last for a day or two without charging. Watches with fewer features last longer and some fitness watches even last for an entire week as well. According to your usage and requirements, go with a watch that has the best battery life.

Cost

Many smartwatches range between USD 50 to USD 1000. Apple watches with aluminum cases without a GPS scale are available for USD 400. For designer variants, the cost can scale up to as high as USD 2500. Depending upon your budget and requirements, go with a smartwatch that helps you in your daily routine.

Smartwatch FAQs

Do You have to Pay a Monthly Fee for a Smartwatch?

The answer is No. You do not need to pay for an extra plan or pay for anything extra. A smartwatch is a smart device that works in conjunction with your smartphone. You may link your smartwatch to your mobile device via Bluetooth or Wi-Fi. That is why it doesn’t require its own service plan. Some smartwatches that support cellular connectivity may require a separate plan to offer you premium features when you are away from your phone.

How Far Can a Smartwatch be From Your Phone?

You can keep your phone 30 feet away from your smartwatch if it is not connected to a WI-FI connection. Your smartphone can be anywhere if your smartwatch is connected to Wi-Fi and your phone has a Wi-Fi or cellular network connection. It’s also not necessary for the Wi-Fi network to be identical.

How Do I Connect my Smartwatch to the Internet?

To connect your smartwatch to the Internet, you need to first go to the connectivity option in the settings. You then need to tap on the Wi-Fi option and switch it to automatic. Then select the add network option and enter your password on your phone. Connect to your internet easily by following these steps.

How Long Does a Smartwatch Last?

The battery life of a smartwatch can be as long as two years. Reviews show that one should have the most recent version. It is also dependent on how the watch is cared for. A decent smartwatch can survive for 3–4 years before depreciating.

Traditional watches are classic and fashionable. They are mechanical nature timepieces that are driven by gears. You have the option to choose between a smartwatch or a traditional watch.

Conclusion

Smartwatches offer many benefits, from being your travel buddy to providing a plethora of health and fitness benefits, this device has slowly replaced wristwatches. It’s about time to evaluate if you want to invest in this powerful device. We hope that our smartwatch buying guide has helped you make a wise decision & you’ll be on your way to shop.

BestViewsRviews rates and reviews hundreds of best smartphones and smartwatches on the basis of their quality, durability, and features.