Pizza Cutter For Perfect Slices: How to Choose The Best

Pizza Cutter

Perfect pizza requires the right pizza cutter. It can make all the difference between simply good pizza and pizza perfection. However, every pizza lover should own a pizza cutter, but finding the most suitable one can be a challenging task. It is vital to consider several factors before deciding, such as size, shape, material, and comfort. Keeping these factors in mind can help you choose the right pizza cutter.

A countertop pizza oven is also a great appliance for you if you love having pizzas. You can go through our blog on countertop pizza ovens to know more about it.

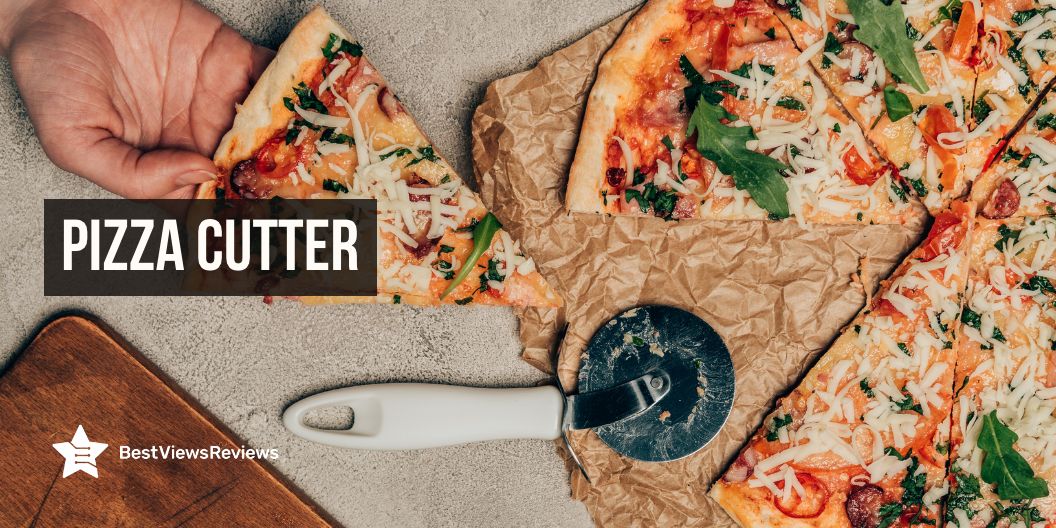
What is a pizza cutter called?

A pizza cutter, also known as a pizza wheel or rollerblade, is a kitchen tool for cutting pizza into slices. The cutter has a handle with a circular blade that you can use to quickly and easily slice through the pizza dough and topping without squashing the base.

How to Choose the Right Pizza Cutter?

Type of pizza cutter

The first consideration is the type of pizza cutter. Manual and electric are the two main types of pizza cutters. Manual pizza cutters are hand-held, usually with a wheel-like blade. They are typically less expensive and easy to use. Electric pizza cutters are more expensive but may be the better choice for heavy-duty tasks. They typically have a powerful motor and come with a variety of blades to suit different tasks.

Size

Pizza cutters come in a variety of sizes, from small handheld cutters to large wheel-styled cutters. Smaller handheld cutters are great for individual pizzas or smaller pies, while larger cutters are most suitable for large pizzas or pizzas with a thicker crust. The size of the cutter should be relative to the size of the pizza you plan to make so that you can make precise, consistent cuts with ease.

Ergonomic

When selecting a pizza cutter, it is essential to find one that is comfortable to grip and easy to operate. Look for a pizza cutter that has a handle that fits comfortably in your hand. The handle should be made of a material that is non-slip and features an ergonomic design to fit in your hand.

Blade sharpness

The blade of the pizza cutter must be sharp enough to cut through the pizza with ease. Look for a blade that is made of strong and durable material, such as stainless steel. The blade should be sharp enough to cut through the pizza easily without tearing or tearing the crust.

Best pizza cutter options to choose from

Rösle Stainless Steel Round-Handle Pizza Cutter

Rösle Stainless Steel Round-Handle Cutter features a firm-anchored wheel that ensures neat slicing of pizza. The high-quality stainless steel helps resists corrosion and makes it durable. It also equips an anti-slip handle that provides a firm grip and balance.

Innovative Pizza Cutter Wheel

Innovative Cutter Wheel’s reviews show that it features an ergonomic handle that provides leverage for convenient cutting. The built-in razor-sharp blade of this model effortlessly cuts through thick crusts and pizza toppings. This cutter also comes with a storage base that keeps the cutter securely stored when not in use.

OXO 1065872 Good Grips 4-inch Pizza Wheel and Cutter

OXO 1065872 Good Grips 4-inch Wheel and Cutter feature a slick surface that avoids sticking to cheese. Its built-in thumb guard and soft grip protect the hand from any harm. This cutter also features tapered wheel edges that offer effective cutting through toppings and thick crusts. It comes with slick metal blades that are great for non-stick pizza pans.

KitchenAid Gourmet Pizza Wheel

KitchenAid Gourmet Pizza Wheel comes with a finger guard that protects the blade and fingers. This model features an ergonomic handle that provides a comfortable grip and control. Its built-in sharp blade easily slices a variety of foods like pizza and brownies. Additionally, the high-quality stainless steel construction of this model offers durability.

Checkered Chef Pizza Cutter

Checkered Chef Pizza Cutter features an ultra-sharp blade that effortlessly cuts the pizza into 8 perfect slices. It comes with a protective cover that allows safe and secure storage. The material is dishwasher-safe that offers convenient cleaning and maintenance. It is designed for heavy use with little effort, for the perfect slice, every time.

Air fryer pizza rolls are a great recipe for people who love pizza but are fitness conscious as well. You can read through our other blog to know how to cook pizza rolls in an air fryer.

How to sharpen a pizza cutter?

  • Start by washing the cutter with warm, soapy water. This will help to remove any dirt or debris that may be stuck to the blade.
  • Dry the pizza cutting wheel with a clean towel or paper towel.
  • Insert a honing or sharpening rod into a vice. The rod should be slightly wider than the blade of the pizza cutter.
  • Place the pizza cutter blade against the honing rod and pull it towards you at a slight angle. Keep the blade at the same angle the entire time to ensure consistent sharpening.
  • Repeat the motion several times on each side of the blade.
  • Wipe off any debris from the blade with a clean cloth.
  • Test the sharpness of the blade by using it to cut a piece of paper. If it’s still too dull, repeat the sharpening process.
  • Once the blade is sharp, rinse the cutter in warm, soapy water and dry it with a clean cloth.

How do you cut a pizza without a cutter?

You can also use any kitchen knife to cut the pizzas. However, it is important to ensure the knife is sharp and to use a sawing motion when cutting the pizza.

  • Start by placing the pizza on a cutting board.
  • Place your hand on top of the pizza and press down gently to keep it from moving.
  • Using a sharp kitchen knife, start at one end of the pizza and make a sawing motion with the knife, slicing through the pizza.
  • Continue making the sawing motion until you reach the other end of the pizza.
  • Once you have cut the pizza, use a spatula to remove each slice from the cutting board.

What is a scizza cutter?

A scizza cutter is a special type of kitchen tool you can use to cut pizzas into slices. It has a circular blade attached to a handle, with a swivel action that allows the blade to rotate and cut the pizza into equal slices. The blade comprises stainless steel, and the handle can either be of wood, plastic, or metal. However, the blade is sharp enough to slice through the pizza dough, but not so sharp that it risks cutting the user’s fingers. It is a great tool for cutting pizzas into even slices quickly and easily.

Is pizza cutter dishwasher friendly?

The answer is yes! Most pizza cutters are made of stainless steel or plastic, both of which are safe to wash in a dishwasher. It is important to check the manufacturer’s instructions, however, as some pizza cutters may need to be hand washed instead.

You might also face issues while reheating leftover pizza slices. Our blog on how to reheat pizza in an air fryer can help you learn the trick easily.

Conclusion

The right pizza cutter can be an invaluable tool in creating a delicious pizza. Finding the perfect pizza cutter requires careful consideration, but with a few tips and tricks, it’s easy to find the ideal cutter for your needs. No matter what type of pizza cutter you choose, it is important to make sure it is made from a high-quality material that won’t rust or corrode over time and that it is easy to clean and maintain.

You can get the best reviews and ratings on the products you’re interested in. BestViewsReviews will help you make the right purchasing decision. Whether you’re looking for the top-selling convection ovens or the best pizza cutters, we’ve got you covered.

Best Dutch Ovens: A Must-Have Cookware

Dutch Ovens

The way of making a wide variety of delicious dishes gets easier when you have an incredibly versatile piece of cookware in your kitchen space. From classic stews to succulent roasts and even hearty casseroles, the Dutch oven is a must-have kitchen tool for those who love to cook.

With so many different models on the market, however, it can be difficult to choose the best one for your specific needs. Read below to know about the various types of Dutch ovens available and get helpful advice on selecting the model that is right for you.

Tramontina dutch oven is known for offering high-quality and advanced features. Go through our blog on Tramontina dutch oven to know more about it.

How do I choose a Dutch oven?

When selecting a Dutch oven, consider factors such as size, material, and accessories. Firstly, it is important to decide how much space is available for the oven, and what size would best suit your needs. The factors that you mainly need to consider are as follows:

Material

The main options in the material are ceramic, enameled cast iron, cast iron, and stainless steel. Ceramic Dutch ovens are great for baking and are lightweight, which makes them easy to handle. You can go with enameled cast iron Dutch ovens because of their ability to use on a variety of cooking surfaces, including induction and stovetop.

Cast iron Dutch ovens are great for slow cooking, as they retain and distribute heat evenly. Stainless steel Dutch ovens are ideal for searing, as they are non-reactive and easy to clean. Go for a model like Tramontina 80131/648DS that is durable and long-lasting.

Size

When deciding on a size for a Dutch oven, the number of servings is an important factor. For a family of 4 or more, the 6QT- 10QT size would be best. This size is great for making up to 10 lbs of whole goose for large groups and can accommodate up to 14 servings.

If you’re looking for something to serve a smaller group of 3-5 people, the 0.5QT-2QT size would be a good choice. It is perfect for preparing meals for a small family and will easily fit on most stovetops. For an in-between size, the 4QT-5QT size would be ideal.

Interior Design

You can choose between light Vs dark interiors of dutch ovens. Dark interiors are likely to hide scuffs and scratches but lighter interiors are better in making it easier for you to check the contents of the pot without removing the lid.

Dark interiors can better withstand higher heat and are less likely to experience crazing, which is a series of lines or cracks caused by extreme temperatures.

What is the best way to use a Dutch oven?

The Dutch oven is one of the most versatile and valuable pieces of cookware to have in the kitchen. With a Dutch oven like Amazon Basics covered dutch oven, you can make a wide variety of delicious meals, from soups and stews to roasts and bread. To get the most out of your Dutch oven, it’s important to understand the proper techniques for using it.

How much should I spend on a Dutch oven?

When it comes to purchasing a Dutch oven, one of the main factors to consider is your budget. Dutch ovens can range in price from relatively affordable to quite pricey, depending on the size, material, and brand. If you are looking for an entry-level Dutch oven, you can expect to spend anywhere between $50-100.

Mid-range Dutch ovens made from enameled cast iron usually cost between $100-200. For high-end Dutch ovens, you can expect to spend upwards of $200 or more. Keep in mind that a larger Dutch oven will cost more than a smaller one and that certain brands may also be more expensive than others.

How do you maintain a Dutch oven?

Maintaining a Dutch oven can be a simple process that will ensure it provides years of reliable use. It is important to clean the oven regularly and to season it every few months or after it has been exposed to moisture or has been used to cook acidic foods.

Cleaning a Dutch oven is as simple as wiping it down with a damp cloth and then drying it thoroughly. To season the oven, rub the inside and outside with cooking oil, then place the oven in an oven and bake at 350-400° F for 1-2 hours.

After the oven has cooled, rub the interior with a paper towel to remove any excess oil. You might also get confused between the french oven and a dutch oven while making your choice. Go through our blog on a french oven vs dutch oven to know more.

What material should a Dutch oven be?

When selecting a Dutch oven, it’s important to consider the material it is made from. The most commonly used materials for Dutch ovens are cast iron, enameled cast iron, and clay. Cast iron is the traditional material for Dutch ovens, and it provides excellent heat retention and durability.

Enameled cast-iron Dutch ovens like Le Creuset have the same heat retention properties as regular cast iron, but they are coated with a protective enamel layer to make them easier to clean and maintain. Clay Dutch ovens are a great choice for slow-cooking stews and other dishes that require a moist cooking environment.

The customer reviews of Crock-Pot dutch oven claim that it is made of heavy-duty cast iron material that retains and distributes heat evenly.

What is the most useful size of a Dutch oven?

When choosing the most useful size of a Dutch oven, it is important to consider the size of the meals you plan to cook. Smaller Dutch ovens, such as those with a capacity of four to six quarts, are perfect for individual meals or side dishes. These are also great for smaller households, as they are more compact and take up less space. Medium-sized Dutch ovens, with a capacity of seven to nine quarts, are ideal for larger meals like family-style dishes or roasts. These are ideal for larger households, as they can hold more food and feed more people.

Models like Amazon Basics dutch oven feature a 4.3 quartz capacity that allows preparing food for up to 3-4 people.

What are Dutch ovens used for?

Dutch ovens like Caraway Dutch Oven are incredibly versatile cookware pieces, ideal for both indoor and outdoor cooking. Many chefs consider them a kitchen essential due to their ability to cook a variety of dishes, from soups and stews to casseroles and desserts. Here are four delicious recipes to put your dutch oven to good use:

  • Dutch Oven Chicken Pot Pie: This classic comfort food is sure to be a hit with family and friends. Start with your favorite pre-made pie crust, then add cubed chicken, mixed vegetables, butter, and a creamy sauce. Top it off with the remaining crust and bake until golden brown.
  • Dutch Oven Pizza: This classic recipe is surprisingly easy to make. Preheat your Dutch oven and prepare your favorite pizza dough. Add a layer of olive oil, then spread the dough into the bottom of the Dutch oven. Top with your favorite pizza sauce and toppings. Place the lid on the Dutch oven and bake for 20-30 minutes, or until the crust is golden brown.
  • Dutch Oven Beef and Potato Stew: brown beef cubes and onions in your Dutch oven, then add potatoes, carrots, and celery. Once everything is nicely browned, add beef broth, Worcestershire sauce, and seasonings. Bring it to a boil, then reduce it to a simmer and let it cook until the vegetables are tender. Finish it off with a sprinkle of fresh parsley and serve.
  • Dutch Oven Lasagna: This easy lasagna recipe features layers of tender lasagna noodles, flavorful Italian sausage, and a rich cheese sauce made with cream and mozzarella. Assemble the lasagna in the Dutch oven and bake until the cheese is melted and bubbly.

Dutch ovens are also great for cooking desserts. Go through our blog on easy and delicious dutch oven desserts to know more.

Conclusion

A Dutch oven is perfect for braising, slow cooking, searing, and roasting. These ovens are made of durable materials and come in a variety of sizes and styles to suit your needs. They are also easy to clean, making them a great addition to any home kitchen. With all these great features, a Dutch oven is sure to be a great addition to your kitchen.

Get the best reviews and ratings on the products you’re interested in. BestViewsReviews helps you make the right purchasing decision. Whether you’re looking for the top-rated toaster ovens or the best dutch ovens, we’ve got you covered.

Small Air Fryer Tips: How To Cook With One

small air fryer

Cooking with a small air fryer is a great way to make tasty and healthy meals without making a huge mess in the kitchen. Air fryers are becoming increasingly popular due to their quick and easy cooking methods. Unlike traditional deep-frying, air fryers use little to no oil, making them a much healthier option for cooking. Air fryers use hot air to cook food, which results in crunchy, delicious meals. Not only are air fryers healthier, but they are also much easier to clean up. Air fryers take up little counter space and are energy efficient.

Air fryers with rotisserie are modern kitchen equipment that allows you to cook meals without using any oil. You can also read our guide on air fryers with rotisserie to know more.

How to Cook Multiple Items in a Small Air Fryer?

Cooking multiple items in a small air frying device can be a challenge, but with the right techniques, it is possible. Here are some tips for cooking multiple items in small air fryers:

  • Stacking Racks: Invest in a set of stacking racks to maximize the space in your air fryer and double the amount of food you can cook. Stacking racks are designed to fit into your air fryer and allow you to cook two items at once.
  • Cooking in Batches: If you don’t have stacking racks, try cooking in batches. This means only cooking a few items at a time, allowing the air fryer to cool down in between batches.
  • Adjust the Timer: When cooking multiple items in a small air fryer, it is important to adjust the timer accordingly. Depending on the type and size of food you are cooking, you may need to adjust the timer to ensure that each item is cooked to perfection.
  • Use the Basket: To maximize the capacity of the air fryer, use the entire basket. Place items that require a longer cooking time on the bottom and items that require a shorter cooking time on top. This will help ensure that all items are cooked evenly.

Tips for ensuring even cooking when using these techniques

  • Preheat your air fryer: Preheating helps ensure that ingredients cook more evenly, so make sure you preheat your air fryer for at least a few minutes before adding your ingredients.
  • Cut food into equal-sized pieces: This will help ensure that all of your ingredients cook evenly and at the same rate.
  • Place food in a single layer: Air fryers work best when food is spread out in a single layer. If you put too much food into the basket, the ingredients may not cook evenly or thoroughly.
  • Arrange food in the air fryer with space between pieces: This will help your air fryer circulate hot air and promote even cooking.

What size is a small air fryer?

Small air fryers typically have a capacity of 2-4 quarts. This is enough to make a single serving for one person or a few servings for 2-4 people. The size of the fryer is also determined by the wattage of the unit. Small air fryers typically have a wattage of between 800-1400 watts.

Best Small Air fryer for 2

Elite Gourmet EAF1121BG

You can enjoy up to 85 percent less oil for fat-free delicious meals with the Elite Gourmet EAF1121BG fryer. It holds 1.1 Qt or up to 0.75-lb of food. The adjustable dials of this air fryer give you the ultimate cooking control and versatility allowing you to fry, bake, grill, and roast all in one. It also includes a full-color booklet featuring 26 delicious and healthy recipes to get you started.

Chefman TurboFry 2-Quart Air Fryer

Chefman TurboFry 2-Quart Fryer’s reviews claim that it comes in a sleek and space-saving design that makes it an elegant addition to any countertop. This model also features a cool-touch rubber handle that helps safely glide the fry basket in and out of position. Its dishwasher-safe cooking tray and basket make it easy to clean and maintain.

Power Air Fryer XL 3.4 QT Deluxe

Power Fryer XL 3.4 QT Deluxe features a 7 presets menu that helps to cook your favorite dishes easily. Its rapid fan speed delivers faster cooking and crisping quickly and easily. The automatic shut-off feature of this model prevents overcooking and overheating of food. It is versatile and can roast, air fry, bake, steam, sauté, and grill.

How to Adapt Recipes for a Small Air Fryer

When adapting recipes for small air fryers, it is important to take into consideration the size of the air fryer, the type of food being cooked, and the cooking time needed. The general rule of thumb is to reduce the recipe size by half if using a small fryer. This means that if a recipe calls for 4 servings, you should use only 2 servings when cooking in a small air fryer.

When reducing the recipe size, it is important to assess the type of food being cooked. For example, when cooking vegetables, it may be necessary to reduce the number of vegetables used. This will help ensure that the vegetables cook evenly and do not overcrowd the air fryer. Similarly, when cooking proteins such as fish or chicken, it may be necessary to reduce the portion size or cook smaller pieces of meat.

There are a variety of meals and snacks that are well-suited for cooking in small air fryers. Vegetable dishes such as roasted Brussels sprouts, sweet potato fries, and roasted cauliflower are excellent options. Smaller portions of proteins such as fish, chicken, or shrimp can be cooked in the air fryer and served with a side of vegetables. Other snacks such as falafel, french fries, and hash browns are also great options.

Overall, adapting recipes for small air fryers is relatively simple. By reducing the recipe size and adjusting the cooking time accordingly, it is possible to create delicious meals and snacks that are well-suited for cooking in small air fryers.

Cleaning and Maintenance for a Small Air Fryer

Cleaning and maintaining small air fryers is vital for food safety and efficiency. Proper cleaning and maintenance will help keep your fryer running smoothly and ensure that you get the most out of your appliance. Here are some tips for keeping your air fryers clean:

  • Use a soft brush to clean hard-to-reach spaces and crevices.
  • Wipe away food splatter and grease with a damp cloth and mild detergent.
  • After each use, empty the drip tray and wipe it down with a damp cloth.
  • Periodically remove the filter and wash it with warm, soapy water.
  • Clean the interior of the air fryer with a damp cloth and mild detergent.

Recommendations for Maintaining Small Air Fryers

  • Empty the drip tray after each use.
  • Clean the interior of the air fryer with a damp cloth and mild detergent.
  • Clean the filter regularly to remove built-up grease and food particles.
  • Replace the filter every three to six months, depending on usage.
  • Inspect the heating element for any signs of wear and tear.
  • Check the power cord for any damage or fraying.
  • Follow the manufacturer’s instructions for cleaning and maintenance.

Frequently Asked Questions

Can I cook frozen food in a small air fryer?

Yes, you can cook frozen food in a small air fryer. Air fryers use hot air circulated by a fan to cook the food quickly and evenly, so they are a significant choice for frozen food. To cook frozen food in a small air fryer, you should adjust the temperature to the maximum setting and preheat the air fryer for a few minutes. Then, place the frozen food in the fryer basket and cook for the recommended time, flipping the food halfway through. The time and temperature will depend on the type of food being cooked, but most frozen foods need to be cooked for 8-10 minutes at 350-400°F. Once cooked, it is important to let the food cool down before serving.

Cuisinart air fryer toaster oven are also a great way to make delicious, healthy meals with minimal effort and time. Read our blog on why should you get Cuisinart air fryer toaster oven.

Can I use aluminum foil in a small air fryer?

Yes, you can use aluminum foil in small air fryers. However, it is important to make sure that the aluminum foil is not too thick or too close to the heating elements. Aluminum foil can act as a barrier to the hot air circulating in the air fryers and prevent food from cooking evenly. It is also important to make sure that the aluminum foil is not touching any of the heating elements in the air fryers. If the aluminum foil does come into contact with the heating elements, it may cause a fire or damage to the air fryers.

Can you make popcorn in an air fryer?

Yes, it is possible to make popcorn in air fryers. The process is relatively simple and can be done in a few easy steps. First, preheat the air fryer to 350°F. Then, add a few tablespoons of popcorn kernels to the air fryer basket and close the lid. Make sure the kernels are spread evenly across the bottom of the basket. Next, set the timer for 3-5 minutes, depending on how much popcorn you are making, and let the popcorn cook. When the timer is up, check the popcorn for doneness. If it is not done yet, set the timer for another minute or two and check again. Once the popcorn is finished, remove it from the air fryer and season it according to your preference. Enjoy!

Air fryers would be a welcome addition to the kitchen of bachelors, who rely heavily on eating out. Go through our blog on easy mini air fryer recipes for bachelors to know more.

Conclusion

Cooking with mini air fryers can be an easy and efficient way to make delicious, healthier dishes. The right tips and tricks can help you make the most of your air fryer and create amazing dishes that are sure to impress. Remember to preheat your fryer, adjust the temperature and time as necessary, and always keep a close eye on your food to ensure it is cooked thoroughly and evenly.

Get the best reviews and ratings on the products you’re interested in. BestViewsReviews helps you make the right purchasing decision. Whether you’re looking for the top-rated air fryers or the best toaster ovens, we’ve got you covered.

Ninja Air Fryer Max Xl: An Honest Review

ninja air fryer max xl

Everyone wants to relish their favorite indulgence food yet stay healthy and fit. Being able to cook delicious meals with minimal oil is a fantastic way to enjoy your favorite dishes without having to feel guilty. No matter whether you want fried foods such as meat, or fresh foods like chicken, steak, and pork chops, an air fryer is the best addition to your kitchen space. But, before choosing the right air fryer model for your kitchen, it is important to evaluate the best brands and models in the market. Some most popular models are the Ninja air fryer max xl, Instant Vortex, and Pro Air Fryer Oven Combo from Cosori.

The Ninja air fryer max xl is the model that has been rated as the best overall air fryer in one of the Forbes Vetted articles. Ninja has also produced other top models like Ninja Foodi Dual Zone AF300UK which often raises confusion about what to buy between Ninj air fryer Max Xl Vs Ninja Foodi Dual Zone AF300UK. However, choosing the Max XL air fryer is a great idea because of its higher maximum cooking temperature of 232°C. Moreover, the Max XL offers 7 cooking functions, and Ninja Foodi Dual Zone AF300UK offers only 6 cooking functions.

The other popular comparison of Ninja air fryer Max XL is with Instant Vortex Plus. Both are among the top-rated models, but the Max XL air fryer from Ninja outweighs the Instant Vortex Plus because of its lightweight design of around 12 pounds compared to 17 pounds of weight of Instant Vortex Plus.

You must browse through our detailed review of Ninja air fryer Max XL to understand if it is the right model that you should be bringing home.

Ninja air fryer Max XL: Benefits

Capacity

The Ninja Max XL is an exceptional kitchen appliance, offering users a 5.5-quart capacity that is perfect for larger households. This capacity will allow you to make up to 3 pounds of french fries or chicken wings. The Max XL air fryer measures 11″D x 14″ W x 14.75″H. The height of this top-quality air fryer is larger than other models. Thus, you will need to ensure that you have enough space in your kitchen cabinet.

Hotter Temperatures

Ninja air fryer Max XL offers a revolutionary new cooking experience. This is because of its higher maximum cooking temperature of 449.6 degrees Fahrenheit. The higher temperature allows for foods to be cooked faster and more evenly, resulting in a crispier texture. With 450 degrees of superheated air, you can cook food up to 30% faster when compared to Ninja AF100. The sweet potato fries air fryer recipes will help you stay party ready any time.

Easy To Use with 7 Cooking Programs

The Max XL features seven cooking programs, making it simple to create delicious meals quickly and effortlessly. With the press of a button, you can cook wings, french fries, steak, pork, fish, and more. The air fryer also features a digital touchscreen with adjustable time and temperature settings. It gives you complete control over the cooking process. The seven cooking programs that it offers are:

  1. Max Crisp
  2. Air Fry
  3. Air Roast
  4. Air Broil
  5. Bake
  6. Reheat
  7. Dehydrate

FAQs

Which Model of Ninja is Best?

Ninja has a series of many top-quality air fryers for every usage. The Ninja Foodi AF400UK can be considered the best large air fryer with a capacity of 9.5L.

If you are buying for use in your dorm or for cooking smaller batches of food, the best model of Ninja air fryer for you would be Ninja AF101. It has a 3.8L basket that can fit around 900g of french fries.

The Ninja air fryer MAX AF161UK is the best overall air fryer from Ninja. It offers up to 75% less fat than traditional frying methods. It can also cook your meals up to 30% faster.

What is the largest size Ninja air fryer?

The Ninja air fryer Max XL is one of the large-size Ninja air fryers that is an easy-to-use kitchen appliance. It offers a large cooking capacity of 5.5 quarts. This means you can make 3 pounds of chicken wings in a single batch. The air fryer’s rapid air technology ensures even cooking and helps to lock in the flavor and moisture of each meal. You can also consider another large model which is Ninja Foodi MAX Dual Zon air fryer DZ401 with around 10 quarts of capacity.

What can you not cook in a Ninja air fryer?

The Ninja air fryer is designed to support almost all your regular kitchen recipes, but still, there are some foods that you should avoid. The list of such foods is as follows:

  1. Battered Foods
  2. Fresh Greens like spinach
  3. Whole roasts

One of the great things you can make with your air fryer is pizza rolls. Not only these pizza rolls are a healthier and more convenient option, but they are also incredibly delicious. Read on to know how to cook pizza rolls in air fryer.

Conclusion

The Ninja air fryer Max XL is a terrific purchase if you’re looking for a healthier way to fry your food. It has several benefits, including the ability to cook food quickly with minimal oil, as well as the convenience of having a larger cooking basket for larger servings.

Another benefit of having this appliance is its easy cleaning. It has a ceramic basket that is both nonstick & dishwasher safe. However, there are also some cons of this model, like the air fryer Max XL may not be suitable for cooking a whole chicken.

The combo appliance, microwave ovens with an air fry feature is also easily available in the market now. To learn more about these combo appliances you can read our other blog about the best microwave ovens with air fryers.

BestViewsReviews helps you find the best air fryers and toaster ovens on the market by rating and reviewing them on the basis of quality, convenience, and durability. Get unbiased, honest reviews of products before you buy.

Why Should You Get A Cuisinart Air Fryer Toaster Oven: 4 Best Options

cuisinart air fryer toaster oven

Cuisinart air fryer toaster ovens are a great way to make delicious, healthy meals with minimal effort and time. They offer the convenience of a traditional toaster oven, with the added benefit of air frying capability. Air frying is a healthier alternative to deep frying that uses only a fraction of the oil, resulting in crispier, tastier snacks and meals. With the Cuisinart air fryer toaster oven, you can cook your favorite foods quickly and easily without sacrificing flavor or texture.

Notable features of Cuisinart Oven

Serial no.Notable features of Cuisinart Air Fryer Toaster
Air FryerThis air fryer toaster oven uses hot air to cook food, instead of oil, for a healthier and more flavorful way to enjoy fried foods.
Adjustable Temperature ControlThe adjustable temperature control allows you to set the temperature to precisely the desired level.
Convection Bake and BroilThis toaster oven is equipped with convection bake and broil settings, which use a fan to circulate hot air for faster, more even cooking.
Nonstick InteriorThe nonstick interior of the toaster oven ensures that your food won’t stick to the walls of the oven and makes cleanup a breeze.

How do you use a Cuisinart AirFryer toaster oven?

Using a Cuisinart AirFryer toaster oven is simple and convenient.

  • Preheat the oven to the desired temperature by pressing the “Power” button.
  • Place the food in the oven. The Cuisinart AirFryer toaster oven comes with a wire rack and baking pan. Place the food on the wire rack or baking pan, depending on the type of food you are cooking.
  • Select the desired mode and temperature. The Cuisinart AirFryer toaster oven has several cooking modes, such as Bake, Broil, Toast, and AirFry. Select the desired cooking mode and adjust the temperature as desired.
  • Press the “Start” button and the oven will begin to cook the food.
  • Monitor the food and adjust the cooking time as needed. The Cuisinart AirFryer toaster oven has an adjustable timer that allows you to adjust the cooking time for precise results.
  • Once the food is cooked, press the “Stop” button and the oven will shut off.
  • Enjoy your delicious food!

Sweet potato fries are a great snack to make in an air fryer. Read our blog on how to make sweet potato fries in air fryer to know more.

Popular Cuisinart air fryer toaster ovens

TOA-60NV Convection Toaster Oven Air Fryer

Cuisinart TOA-60NV Convection Toaster Oven Air Fryer comes with 7 functions air fry, convection bake, convection broil, bake, broil, warm, and toast. This model is easy to use and clean as well. It comes in a stainless steel material that makes it durable ane long-lasting. This model is also available at a discount of up to $20 during the sale.

Cuisinart TOA-60 Toaster Oven

Cuisinart TOA-60 Air Fryer Toaster Oven’s reviews claim that it can cook large 4-pound chicken and requires only about a teaspoon of oil to fry in this air fryer. It is a healthier way to prepare delicious fried favorites, from wings to fritters to fries to shrimp. It also offers a 6 cubic foot interior with a light 4 lb. air-fry capacity.

Cuisinart TOA-60BKS Toaster Oven

Cuisinart TOA-60BKS Air Fryer Toaster Oven is versatile and can bake, broil, convection bake and broil, toast and air fry modes. Its 0.6 cubic ft. interior fits 12″ pizza pie, up to 6 slices of bread or 4lb chicken. This model uses powerful ultra-hot air for healthier fried version of your favorites. It also offers features like adjustable thermostat, auto shut off and quiet operation.

Cuisinart Air Fryer + Convection Oven

Cuisinart Air Fryer + Convection Toaster Oven comes with a toast shade selector that ensures the meals are cooked to the preferred perfection. It features an extra large window that allows checking the cooking status of the food easily. This model is also equipped with an adjustable temperature dial that can be set according to the cooking needs.

We also have a detailed blog on the best microwave ovens with air fryers that will be a great addition to your kitchen.

FAQs

Can I use aluminum foil in my Cuisinart air fryer toaster oven?

Yes, you can use aluminum foil in your Cuisinart air fryer toaster oven. The foil can be used to cover food, as a liner on the bottom of the air fryer basket, or on the air fryer trays. It is important to note that aluminum foil should not be used to completely cover food in the air fryer, as this can inhibit air circulation and prevent food from cooking properly. It is also not recommended to use aluminum foil to line the inside of the air fryer itself. This can cause damage to the appliance and can be a fire hazard.

You can also use your air fryer to make tasty snacks like pizza rolls. Go through our blog on how to cook pizza rolls in air fryer to know more.

What is the best countertop air fryer toaster oven?

The best countertop air fryer toaster oven would depend on the user’s needs and budget. There are a wide variety of units available and many features to consider.

The Cuisinart TOA-60 Air Fryer Toaster Oven is a popular choice for many users. It has a variety of cooking functions, including air frying, baking, broiling, toasting, and more. It also comes with an adjustable temperature of up to 450°F and a digital timer to help you keep track of your cooking. This unit also has a spacious interior, which can accommodate up to 6 slices of toast or a 12-inch pizza.

Are toaster oven air fryer combos worth it?

Toaster oven air fryer combos combine two useful kitchen appliances into one, but they also take up more counter space than either appliance alone. The advantages of a combo toaster oven and air fryer are that you can cook a variety of foods with one appliance, such as toast, bake, roast, and fry. If you’re short on counter space and don’t have room for two separate appliances, a toaster oven air fryer combo can be a great option.

Conclusion

A Cuisinart air fryer toaster oven is an ideal kitchen gadget for anyone who wants a more efficient and healthier way to cook their meals. This appliance offers a healthier alternative to traditional deep-fat frying and can quickly and easily cook a variety of dishes, including pizzas, casseroles, and more. It’s easy to use and clean, and it can help you save time and energy in the kitchen.

Get the best reviews and ratings on the products you’re interested in. BestViewsReviews helps you make the right purchasing decision. Whether you’re looking for the top-rated air fryers or the best toaster ovens, we’ve got you covered.

How To Cook Pork Chops In Air Fryer

Pork chops in air fryer

Cooking pork chops in an air fryer is a terrific way to enjoy a delicious and flavorful meal without the hassle of deep-frying. Pork chops are a delicious and hearty meal that can be prepared in a variety of ways. One of the quickest and healthiest methods to prepare them is in an air fryer. Air fryers use hot air to cook food and require little to no oil, resulting in a delicious and lower-fat meal.

You can also use Air fryers to make amazing recipes like pizza rolls. If you want to try cooking them on your own, go through our blog on how to cook pizza rolls in air fryer.

Pork chops in an air fryer: The step by step Recipe

  • Preheat the air fryer to 350°F.
  • Place pork chops in a shallow dish and season with olive oil, garlic powder, onion powder, salt, and pepper.
  • Place pork chops in the air fryer.
  • Cook for 8 minutes.
  • Flip pork chops over and cook for an additional 5 minutes.
  • Check to make sure pork chops have reached an internal temperature of 145°F.
  • Serve pork chops immediately.

For perfectly cooked pork chops, you will need the right air fryer model that has got good customer reviews. Well, you can opt for the Ninja foodi 9-in-1 air fryer which has got positive reviews for its 9-in-1 versatility. This model offers pressure cooking, slow cook, steaming, and more.

What ingredients do you need?

The ingredients you need to make pork chops are as follows:

  • 4 boneless pork chops
  • 1 tablespoon olive oil
  • 1 teaspoon garlic powder
  • Salt and pepper, to taste
  • 1 teaspoon onion powder

Air fryer sweet potatoes are also a great snack to try. Not just pork chops, you can also use your air fryers to cook sweet potatoes. Make sure you know how to make air fryer sweet potato fries so that you end up making a delicious meal.

FAQs

How long do you cook pork chops in the air fryer?

Cooking time for pork chops in an air fryer like COSORI Air Fryer will vary depending on the thickness of the chops, the temperature of the air fryer, and any additional ingredients or seasonings. Generally, for boneless pork chops that are 1 inch thick and cooked in a 350°F air fryer, cook for 8-10 minutes, flipping halfway through. For bone-in pork chops that are 1 inch thick, cook for 10-12 minutes, flipping halfway through. For thicker chops, add an additional 2-4 minutes to the cooking time.

At what temperature should you cook pork in an air fryer?

The ideal temperature is 350°F when cooking pork in an air fryer like Gourmia 7-quart digital air fryer. This temperature will ensure that the pork is cooked through while still retaining its juicy texture and flavor. It is important to note that the cooking time will depend on the size and thickness of the pork. For example, a thick pork chop may take up to 12 minutes to cook, while a thin pork chop may only take 8 minutes. If you are unsure of the exact cooking time, use a thermometer to determine the internal temperature of the pork. The pork is safe to eat when it reaches an internal temperature of 145°F.

The Ninja max xl air fryer can be a great buying option. With 450 degrees of superheated air, it cooks foods up to 30% faster, leaving them hotter, crispier, and fat-free.

What is the best method to cook pork chops?

The best method to cook pork chops is to pan-fry them. Pan frying is a quick and easy way to cook pork chops that will give you great results.

  • The first step is to season the pork chops with salt and pepper. You can also add other spices and herbs like garlic powder, paprika, and thyme for extra flavor.
  • Next, heat a large skillet over medium-high heat and add a tablespoon of oil. Once the oil is hot, add the pork chops and cook for 3-4 minutes per side, or until they are golden brown and cooked through.
  • Finally, reduce the heat to low and continue to cook the pork chops for another 5-7 minutes, or until they reach an internal temperature of 145°F.
  • Once the pork chops are cooked, transfer them to a plate and let them rest for a few minutes before serving. This will help the pork chops retain their juices and stay tender and juicy.

Choosing between an air fryer and a grill can be a confusing decision. Both these kitchen appliances have their own pros and cons. Read our blog on air fryers vs grills to know which is better for your kitchen.

Conclusion

Preparing pork chops in an air fryer is a fantastic way to get a delicious and healthy meal that is ready in no time. It is simple to do, requiring only a few ingredients and minimal preparation. To cook pork chops in an air fryer, season the pork chops with your favorite spices, place them in the air fryer basket, and set the temperature and timer according to the recipe instructions. Air fryers cook pork chops quickly and evenly, ensuring juicy and tender results every time. With a little bit of preparation, you can enjoy delicious pork chops in no time!

Get the best reviews and ratings on the products you’re interested in. BestViewsReviews helps you make the right purchasing decision. Whether you’re looking for the top-rated toaster ovens or the best air fryers, we’ve got you covered.

The Best Budget Canister Vacuum Cleaners

Canister Vacuum Cleaners

Canister vacuum cleaners are one of the most popular and effective methods of keeping your home clean. They offer powerful suction, great maneuverability, and a wide range of attachments to help you reach difficult-to-access areas. Canister vacuum cleaners are lightweight and easy to move around, making them ideal for cleaning stairs, furniture, and other surfaces. These vacuums also come with a variety of attachments, such as brushes and crevice tools, to help you clean more efficiently.

Robot vacuum cleaners can also make home cleaning a quick job. Go through our blog to know about the pros and cons of robot vacuum cleaners.

What should I keep in mind when buying a vacuum cleaner?

When buying a vacuum cleaner, there are a few key things to keep in mind. First, consider the size and weight of the vacuum. You can choose from a variety of sizes vacuums come in depending on how much space you have and how often you plan to use them. You may want to opt for a smaller, more lightweight model if you want to move it around with ease in the house.

Second, think about the type of flooring you have. Different vacuums are designed for different surfaces, so it’s important to choose one that will work well on your floors.

Third, consider the attachments that come with the vacuum. Some models come with a wide range of accessories, from upholstery tools to crevice nozzles, so you can make sure you’re getting the most out of your vacuum.

Finally, it’s important to figure out what your budget is and what features are most important to you.

The most important feature of a vacuum cleaner is its suction power. This is what determines how well the vacuum can pick up dirt and debris, so it’s important to make sure you’re getting a model with enough suction to get the job done. Other important features to consider are the noise level, the filtration system, and the battery life (if you’re buying a cordless model).

How many times a week should you vacuum your house?

A lot of factors come into play when determining how often you should vacuum your house. It is usually recommended to vacuum your house at least once a week. Depending on the number of people living in the house and the amount of foot traffic, you may need to vacuum more often. If you have pets and they shed, you may need to vacuum even more frequently. Carpets should also be vacuumed more frequently than hardwood or tile floors.

The customer reviews of Bissell Zing Canister 2156A Vacuum claim that it features cyclonic action and powerful suction that provides thorough cleaning.

What is the proper care and maintenance of a vacuum cleaner?

Proper care and maintenance of a vacuum cleaner are important for keeping it in good working order and ensuring that it is able to effectively clean your home. Here are some tips for keeping your vacuum cleaner in top shape:

  • Empty the dust cup or bag regularly. Depending on the model, this should be done after each use or when it becomes full.
  • Clean the filter regularly. Most vacuum cleaners have a filter to help trap dust and dirt. Replace the filter as recommended in the owner’s manual.
  • Clean the brush roll. Hair and other debris can get twirled around the brush roll, reducing the suction power of the vacuum cleaner. Check the brush roll for debris and clean it as needed.
  • Clean or replace the belt. The belt is important for the vacuum’s suction power. Check it periodically for signs of wear or damage and replace it as needed.
  • Check the hoses and attachments. Vacuum hoses and attachments should be checked regularly for blockages or signs of wear. If necessary, clean or replace them as recommended.
  • Inspect the cord and plug. Check the cord and plug for any signs of wear or damage. If necessary, have them replaced.
  • Store the vacuum properly. When the vacuum is not in use, make sure to store it in a cool, dry place. Do not store it near heat sources or in direct sunlight.

Handheld vacuum cleaners are also convenient devices to clean your home. Read our blog on handheld vacuum cleaners to know more about them.

How do I know when my canister filter needs cleaning?

The frequency of cleaning your canister vacuum cleaner filter depends on how often you use your vacuum cleaner and the type of filter your vacuum cleaner has. Generally, you should clean your filter every 3-4 months or after every 10 hours of use.

How often should a vacuum be serviced?

It is recommended that a vacuum should be serviced at least once a year, or after every three to four uses. Servicing your vacuum regularly helps to ensure that it runs properly and optimally, and prevents major problems from arising. It is also important to check for any damaged or worn parts that may need to be replaced.

During servicing, the vacuum filters should be replaced, the roller brush should be cleaned or replaced, and the belts should be checked for wear. Finally, the bag or dust cup should be emptied and the vacuum should be thoroughly cleaned.

Miele Compact cleaner is also a great option available at a discount of up to $130 during the sale.

How do you clean a bagless canister vacuum?

  • Begin by emptying the dust canister of the bagless canister vacuum. To do this, open the dust canister and remove the lid. Set the lid aside and tip the canister over a trash can. Shake the canister to remove all the dirt and dust particles. Once the canister has been emptied, set it aside.
  • Use a vacuum cleaner attachment to remove any remaining dust and debris from the canister. Start at the top and work your way down to the bottom. Make sure to reach into all the nooks and crannies.
  • Clean the filter. This step is important because the filter will trap dust and dirt particles. Most bagless canister vacuums have a removable filter that can be washed in warm, soapy water.
  • Wipe down the outside of the canister with a damp cloth. This will remove any dust that may have accumulated on the outside.
  • Reassemble the canister vacuum. Replace the lid on the canister and place the filter back in its proper place. Your vacuum should now be clean and ready to use.

How can I make my vacuum cleaner more powerful?

  • Clean the filter and hose regularly: Vacuum cleaners tend to lose power over time due to dust and debris buildup. To keep your vacuum cleaner as powerful as possible, clean the filter and hose regularly. This will help to ensure that the suction power isn’t being reduced by a clogged filter or hose.
  • Change the vacuum bag: Vacuum bags can become clogged with dirt and dust over time, reducing the suction power of your vacuum cleaner. To keep your vacuum cleaner powerful, change the vacuum bag regularly to ensure that the suction power is not being reduced.

Can I use a canister vacuum on the carpet?

Yes, you can use a canister vacuum like Miele Grey Classic on the carpet, but it may not be the best option for deep cleaning. Canister vacuums are often used for cleaning hardwood floors, but they can be used on carpets as well. Canister vacuums are light and easy to maneuver, so they are great for quick clean-ups on carpets. They, however, don’t have the same suction power as an upright vacuum, so they are not ideal for deep cleaning carpets. Upright vacuums are designed for cleaning carpets, so they are better for deep cleaning.

We also have a detailed blog on the best handheld vacuum cleaner for carpet cleaning to make deep cleaning easier.

What is better a canister vacuum or an upright?

A canister vacuum like Kenmore 81214 200 is great for cleaning hard-to-reach places like stairs and corners, as it comes with a flexible hose and wand. Upright vacuums, on the other hand, are good for cleaning large areas quickly, such as carpets and bare floors, as they have a wider cleaning path.

Canister vacuum cleaners are often more lightweight and easier to maneuver around furniture and other obstacles. They also tend to have better suction power than upright vacuums. This makes them great for deep cleaning carpets and rugs.

Upright vacuums like Shark NV501 are great if you want to get the job done quickly. They have larger dust bins and offer more suction power than canister vacuums. These vacuums are also great for tackling pet hair, as many models that come with extra attachments are specifically designed for this purpose.

Conclusion

Canister vacuum cleaners are a great tool to help keep your home clean and tidy. They offer powerful suction and a variety of attachments to make cleaning easier and more efficient. The canister vacuum cleaners are also lightweight and maneuverable, making them easy to use and store.

Get the best reviews and ratings on a wide range of products. BestViewsReviews helps you make the right purchasing decision. Whether you’re looking for the top-rated bathroom canisters or the best canister vacuum cleaners, we’ve got you covered.

Smoke Cocktail Kits For a Unique, Smoky Twist

Smoke Cocktail Kits

Are you looking to add a hint of smokey deliciousness to any cocktail in minutes? The smoke cocktail kits are the perfect way to take your entertaining to the next level as these kits allow you to create your own signature drinks.

Smoke cocktail kits are specialized tools that use smoke to enhance a cocktail’s flavor and presentation. They include a vessel, such as a glass dome or carafe, that allows you to capture and infuse smoke into a spirit or beverage.

The smoke adds dimension and depth to the cocktail’s flavor and can also be used to create a dramatic presentation. Smoke cocktail kits are becoming increasingly popular amongst mixologists, with many restaurants and bars offering customized smoke infusions that reflect the flavors of their menus.

With the rise of craft cocktails, these kits provide a unique way to create an unforgettable drink. However, it is important to know about the smoking equipment you need to smoke your cocktails.

Smoke Cocktail Kits: Smoking Equipment For Your Cocktails

Smoked Cocktail Boards

Smoked Cocktail Boards are a revolutionary and innovative way of smoking cocktails. These boards are designed to provide a unique flavor to any cocktail, as well as an aesthetically pleasing presentation. The boards are made of high-quality, food-safe material, and come in a variety of shapes and sizes.

Wood shavings are placed on the board and then heated using the torch. This provides a unique experience for any cocktail, adding a depth of flavor and complexity that cannot be achieved with traditional methods. The Helius Originals Luxury Smoke Wood Boards are also great for entertaining, as they add a visual element that can be used to impress guests.

Rocks Glasses

Rocks glasses, also known as old-fashioned glasses, are essentially short tumblers that are used to serve cocktails and other beverages on the rocks. Their wide mouth allows for the addition of ice, making them an essential part of any barware collection. Thanks to their shape and design, they are ideal for serving drinks with a smoky finish, such as a classic old-fashioned or a whiskey sour.

The wide mouth also allows for more air contact with the smoke, intensifying the flavor and aroma of the cocktail. The low height of the top-quality glass also makes it easier to combine and stir the ingredients, creating a more balanced and enjoyable smoked cocktail.

Wood Shavings

Wood shavings are a type of wood chip that is most commonly used to smoke cocktails. In order to enjoy a smoked cocktail, one must first prepare the wood shavings. The wood shavings are placed in a metal container or wood board that is heated to create smoke. The container is filled with either hardwood chips or sawdust and then heated over an open flame.

Once the Helius Originals Luxury Smoker Wood Shavings are producing smoke, they can be used to flavor and infuse the drink. Wood shavings can come in various flavors like black walnut, cherry, sugar maple, and white oak. With the right blend of wood shavings, one can create a unique and flavorful drink.

Torch in Smoke Cocktail Kits

A torch is a tool that is equipped with a blowtorch and a smoke wand. The blowtorch is used to heat up the smoke wand, which is then inserted into the glass of the cocktail. Once the wand is in the glass, the smoke is released, giving the cocktail a unique smoky flavor. A torch is also used to ignite wood shavings placed in a cocktail chimney or cocktail boards.

Cocktail Chimney

Cocktail chimneys are an essential tool for enjoying smoked cocktails. They are specialized glass or wood containers that allow for the smoke from flavored wood chips to flavor drinks. A base spirit is poured into the chimney and then a lid is placed over the top.

Charcoal and flavored wood chips are placed in a separate chamber at the bottom of the chimney. The smoke from the flavored chips is then released from the top of the chimney and diffuses the flavor into the spirit. The combination of smoke and spirit creates a unique and delicious cocktail.

How to Smoke Cocktails?

Using Smoke Topper and Cocktail Chimney

To smoke a cocktail using a smoke topper and a cocktail chimney, follow these steps:

1. Start by preparing the drink in the rock glass as usual.

2. Take the smoke topper, place it securely over the top of the glass, and fill it with your choice of smoking material.

3. Check the tightness of the seal, and ensure the glass opening is completely covered.

4. Light the smoking material with a torch, match, lighter, or other appropriate flame sources.

5. Allow the smoke to fill the cocktail

Using Smoked Cocktail Boards

Smoking cocktails with a smoked cocktail board can be a great way to add an extra layer of flavor and aroma to your favorite drinks. Here are some simple steps to get you started:

1. Start by gathering the necessary supplies, including a smoked cocktail board, a few pieces of wood chips, matches, a lighter, as well as your favorite cocktail ingredients.

2. Place a few pieces of wood chips onto the smoked cocktail board.

3. Light the chips to create the smoke.

4. Make sure to keep the flame away from the board to avoid melting it.

5. Place the glass over the top of the board and let the smoke permeate for about 15-20 seconds.

6. Take the glass off and prepare your drink

Types of Woods Available and Their Impacts on the Cocktail Flavor 

White American Oak

White American Oak is a type of oak wood used for aging and flavoring spirits as well as other beverages. Its impact on cocktail flavor can range from subtle vanilla and coconut notes to more intense spice and smoky flavors. White American Oak can also impart a touch of sweetness and a roundness of flavor.

Sessile European Oak

The Sessile European Oak is a type of oak tree found in Europe, noted for its strong and flavorful wood. The wood is often used in the making of barrels for aging and storing spirits, giving a unique and intense flavor to the cocktail. The oak imparts a sweet and spicy flavor, with notes of vanilla, caramel, and honey, along with a subtle smokiness.

Penduncate European Oak

The Pendunculate European Oak is a species of an oak tree that produces a distinctive woody flavor that is said to be mellower and less tannic than other oaks. Its unique flavor profile has been used to great effect in cocktails, adding a smooth, woody, and slightly smoky flavor to drinks. Pedunculate European Oak compliments earthy flavors like whisky and rum, as well as citrus-based drinks like martinis and margaritas.

Japanese Miunara Oak

Miunara Oak is an oak wood species native to Japan that has seen an increase in popularity for use in the creation of cocktails. The wood adds an earthy, smoky flavor when used to age spirits and makes for an excellent aging vessel. Furthermore, the wood is known to impart a unique umami-like flavor to spirits. Its influence on the flavor profile of a finished cocktail is hard to ignore, as the unique characteristics of this type of oak can bring out flavors that would otherwise be undetectable.

Garry American Oak

Garry American oak imparts a spicy, bold flavor to the cocktails, combined with a hint of sweetness, smokiness, and notes of coffee and clove. The flavor is enhanced by the oak’s tight grain pattern, which helps to mellow the tannins of the wood and create a smooth, complex flavor. Garry American oak has become a popular choice for craft cocktail makers, due to its unique flavor profile and ability to infuse unique nuances of flavor into drinks.

Conclusion

Incorporating a smoke cocktail kit into your home bar can be a great way to create unique and delightful drinks. Not only will this provide you with a great way to entertain guests, but it can also help you to create truly unique flavors. With the use of smoke, you can give traditional cocktails a completely different and unique taste. Make sure you get the right tools, so, you can make your home bar the ultimate place for friends and family to gather.

BestViewsReviews is your one-stop shop for all the information you need to make an informed decision. Get the best reviews and ratings on the best outdoor smokers and cocktail shakers you’re interested in before you buy!

Food Saver Vacuum Sealer: Benefit Your Kitchen in 4 Ways

Food Saver Vacuum Sealer

Whether you are an experienced home chef or just starting out in the kitchen, the food saver vacuum sealer will help you to preserve and store your food easily and conveniently. Its powerful suction and airtight seal will keep your food fresh for a long time so you can enjoy it at its best.

The vacuum sealer comes with a powerful motor that removes air from the bag and creates an airtight seal. It also includes a built-in cutter that allows you to customize the size of the bag to fit your specific food item. Some sealers have a built-in marinate mode for quick marination. The device also has an accessory port for sealing canisters and containers. It is lightweight and portable which makes it great for small kitchens.

How does a vacuum sealer work?

A vacuum sealer works by using a vacuum to seal a bag or container. Then it creates a hermetic seal, which prevents air and moisture from entering the container. The top vacuum sealer uses a pump to create a vacuum inside the bag and then seals it with a heat sealer.

Ways a Food Saver Vacuum Sealer Can Benefit Your Kitchen

Saves Time

A vacuum sealer can save you time in the kitchen by quickly and efficiently sealing food items for storage. Vacuum sealing keeps food fresh for longer which allows you to buy in bulk. With a vacuum sealer, you can store individual meals for later use. Vacuum sealing also eliminates the need for additional storage containers, as the sealed plastic bag can be used for both storing and reheating food.

Preserve Food

A vacuum sealer preserves food by removing air from a sealed container. This prevents oxygen and other bacteria from spoiling the food, thus extending its shelf life. Vacuum sealing also prevents freezer burn and maintains the flavor, texture, and nutritional value of the food.

Saves Money

You can also save money in multiple ways with vacuum sealers. This kitchen appliance reduces food waste by preserving food for a longer period of time. Vacuum-sealed food will last up to five times longer than food stored in traditional containers which means you have to spend less money on groceries due to spoilage.

Extends Shelf Life

A vacuum sealer creates an airtight barrier that prevents oxidation and bacterial growth. It creates an airtight seal that extends the shelf life of the food. Vacuum sealing retains the flavor and texture of the food, as well as maintains its nutritional value.

How to use a food saver vacuum sealer?

  1. Place the bag you want to vacuum seal in the vacuum sealer.
  2. Close the lid of the vacuum sealer and press down to lock it.
  3. Press the vacuum seal button to start the vacuum sealing process.
  4. Once the sealer has finished, it will beep to indicate that the bag is sealed.
  5. Open the lid and remove the bag.
  6. Enjoy your sealed food!

Other essentials with food saver vacuum sealer

Vacuum sealer canisters

Vacuum sealer canisters are airtight containers that you can use for storing food for the long term. It removes the oxygen from the container, creating an airtight seal that preserves the food from spoilage and freezer burn.

Food vacuum sealer machine

A food vacuum sealer machine removes air from a sealed container, usually a plastic bag. It seals the container to prevent air from entering and spoiling the food inside. The vacuum sealer machine extends the shelf life of food.

Vacuum sealer jar attachment

A vacuum sealer jar attachment removes air from jars and creates a tight seal. It works by attaching to the lid of a mason jar and then using a vacuum pump to draw out the air. Vacuum sealer jar attachments are ideal for preserving food and keeping liquids and spices fresh.

Which vacuum sealer has the best suction?

The suction in a vacuum sealer is essential for creating an airtight seal on food storage bags. The suction removes the air from the bag which creates a vacuum that prevents the bag from expanding or bursting when food is stored inside. Below we have listed some of the best suction power vacuum sealers for you.

  1. NutriChef Vacuum Sealer
  2. Vacuum Sealer Machine by Entrige
  3. Avid Armor Chamber Vacuum Sealer

Conclusion

The top-quality food saver vacuum sealer is an incredibly useful kitchen tool that preserves food for much longer periods of time. This removes oxygen and moisture from the bag and creates an airtight environment. It prevents bacteria from growing and food from spoiling. This means that food can be stored for weeks or even months and still remain safe to eat.

BestViewsReviews helps you find the best vacuum sealer bags and top food container sets on the market by rating and reviewing them on the basis of quality, convenience, and durability. Get unbiased, honest reviews of products before you buy.

Best Flame Humidifier For Your Home

Flame Humidifier

The best flame humidifier helps you maintain healthy humidity levels in your home. The humidifier gives you the pleasure of enjoying the natural beauty of a burning flame while providing a comfortable and healthy environment for your home. The flame humidifier increases the humidity level in a room and makes the air more pleasant to breathe. It uses fuel sources, such as propane, gas, or kerosene, and releases moisture into the air.

This type of humidifier is ideal for large spaces such as homes and offices, as it can provide a steady stream of humidity. Flame humidifiers are easy to use and maintain, and they are also known for their energy efficiency. Some features of a flame humidifier include adjustable humidity settings, various fan speeds, and a built-in safety shut-off. They are also highly portable and can be easily moved around wherever you need them.

What does a flame humidifier do?

A flame humidifier is used to reduce the dryness of the air. It produces combustion and releases water vapor into the air. This water vapor increases the humidity level in the room and keeps the air moist. The benefits of using a flame humidifier include improved air quality, decreased static electricity, and reduced dust levels. Flame humidifiers are an excellent way to reduce the risk of respiratory problems.

Is the flame humidifier good?

The flame humidifier is safe to use, as it does not produce any smoke or odors. It adds humidity to a room without creating too much heat which makes it suitable for any environment.

Best Flame Humidifier

Onlyliua Flame Humidifier

The Onlyliua Flame Humidifier has a capacity of 360 ml and can be used continuously for 8-10 hours. It has a timing function, which automatically shuts down after reaching the set time. This model also works as an essential oil diffuser with flames. You can add 2-3 drops of essential oil to the water to make the aroma. It has three different modes such as two spray modes, volcano mode, and flame mode which provide you convenience.

Chunyouhai Humidifier

You can opt for a model like the Chunyouhai Flame Humidifier which has seven different flame-light colors. This humidifier creates a warm flame atmosphere like a fireplace. It comes with a capacity of 180ml. The aroma diffuser will run for about 7 hours at 25dB ultra-low volume which provides you ultra-quiet operation. This model also has a sleeping mode which offers you a great good night’s sleep.

Fossduck Flame Humidifier

Fossduck Flame Humidifier comes with 3 in 1 air diffuser that is used as an aromatherapy diffuser, mist humidifier, and night light. The model comes with a 200ml water tank that allows you to humidify continuously for up to 15 hours. It has whisper-quite operations that improve your sleep quality and soothes your mood. The humidifier automatically stops working when there is a lack of water which makes it safe and reliable.

Tiandirenhe Humidifiers with Flame

The Tiandirenhe Humidifier with Flame is an excellent addition to any home. It has a 180ml cool mist that helps to keep the air in your home clean and healthy. It also has an automatic shutdown protection feature, so it will shut off when it runs out of water. The flame effect gives it an extra touch that makes it an attractive addition to any room. This humidifier is also easy to use and maintain.

Is Sleeping in your room with a humidifier healthy?

Sleeping with a humidifier can be beneficial for your health. A humidifier reduces symptoms of dryness, such as dry skin, nose, and throat. It reduces static electricity in the air, which can be beneficial for people with asthma.

With proper maintenance and use, a top humidifier can be a great addition to your bedroom and can help to create a healthier sleeping environment.

Do humidifiers help your lungs?

Humidifiers reduce the dryness and irritation that occur from dry air. The extra moisture in the air reduces inflammation and makes it easier to breathe. It also reduces the symptoms of some respiratory conditions like asthma and allergies. The best humidifiers decrease the risk of infection by inhibiting the growth of bacteria, viruses, and fungi in the air.

Conclusion

Flame humidifiers are an effective way to add moisture to the air. They also provide you many health benefits. They are easy to use, require little maintenance, and are relatively inexpensive. Flame humidifiers are also safer than some other types of humidifiers, as they do not use electricity and emit no harmful gases.

BestViewsReviews helps you find the top-rated humidifiers on the market by rating and reviewing them on the basis of quality, convenience, and durability. Get unbiased, honest reviews of products before you buy.