Best Shredders for Home and Office: A Complete Buying Guide

Best Shredders for Home and Office

Best shredders are essential for safeguarding your personal and business information in today’s digital world. As identity theft rates soar, securely disposing of sensitive documents has never been more important. A paper shredder provides an effective way to protect your data from falling into the wrong hands.

However, with countless options on the market, choosing the right shredder can feel overwhelming. Whether you need a compact model for occasional home use or a heavy-duty machine for a high-volume office environment, this guide will walk you through the key features to consider, ensuring you make an informed decision tailored to your needs.

Types of Shredders

  • Strip-Cut Shredders: This is the most basic and budget-friendly shredder type. It cuts paper into long, narrow strips. While this method is fast, it provides only basic security. This type is suitable for everyday, non-sensitive documents.
  • Cross-Cut Shredders: These shredders cut paper into small squares or diamonds. They offer better security than strip-cut shredders because the paper is cut into smaller pieces, making it harder to piece the documents back together. Cross-cut shredders are ideal for those who need a moderate level of security.
  • Micro-Cut Shredders: They take security to the next level by cutting paper into tiny pieces that are almost impossible to reconstruct. These are ideal for high-security environments, including home offices where sensitive information needs to be protected. They tend to be slower than other types but provide peace of mind with their superior level of destruction.
  • High-Security Shredders: For those handling highly sensitive documents, high-security shredders comply with strict government standards, such as DIN 66399 P-7. They produce ultra-fine particles, ensuring that even the smallest shred of paper is nearly unreadable. These are commonly used in professional environments where security is of the utmost importance.
  • Heavy-Duty Shredders: These shredders are designed for continuous use in large offices or commercial settings. They can handle large volumes of paper and come with stronger motors to manage bigger workloads. These machines often have a higher capacity for shredding and are ideal for large companies or businesses that need to shred lots of documents daily.

Key Features to Look for When Choosing the Best Shredders

Shred Size

The smaller the shred size, the more secure the shredder. If security is a top concern, consider a cross-cut or micro-cut shredder. Larger strip-cut shreds are easier to reconstruct, making them less safe.

Sheet Capacity

A shredder’s sheet capacity determines how many sheets of paper it can shred at once. If you only shred a few pages at a time, a machine with a lower sheet capacity will suffice. However, if you have large volumes of paper, opt for a shredder like BONSEN with a higher sheet capacity to save time.

Motor Power

Shredders come with different motor strengths. Higher-power motors can handle more sheets at once and operate for longer periods without overheating. This is especially important if you’re going to use the shredder frequently.

Bin Size

A larger bin means fewer stops to empty it, so consider a shredder like Fellowes 62MC 10 with a larger size if you plan to shred frequently. Some shredders have bins that can hold up to 20 gallons, while others may only hold a few gallons.

Noise Level

Shredders can be loud, especially if they have a high sheet capacity or heavy-duty motors. If you’re using the shredder in an office setting or at home where noise is a concern, look for models like Aurora AU1630MA designed to operate more quietly.

Safety Features

Shredders like VidaTeco often have safety features such as automatic shut-off when the bin is full, overload protection, and anti-jam technology. These features ensure that the shredder is safe to use and won’t be damaged by misuse.

What is the Difference Between a Home and a Commercial-Grade Shredder?

Home shredders are generally designed for personal or light office use. These machines have smaller capacities, less robust motors, and more straightforward features. They’re perfect for individuals or small families who only need to shred a few papers.

In contrast, commercial-grade shredders are built for larger workloads and continuous use. These shredders can handle larger volumes of paper, have more powerful motors, and offer higher security. They’re ideal for businesses and offices that need to shred large quantities of documents daily.

While commercial shredders often come with a higher price tag, they are more durable and long-lasting. They are designed to withstand the strain of frequent use and provide superior performance and security.

How Long Do Shredders Typically Last?

The lifespan of a shredder depends on the quality of the machine, its usage frequency, and the type of materials being shredded. On average, a good-quality shredder can last anywhere between 3 to 10 years.

To maximize the lifespan of your shredder, be sure to maintain it properly. Regular oiling, clearing out jams, and ensuring don’t overload the machine can all help extend its life. Higher-end, commercial-grade models tend to last longer due to their more durable construction and design.

Tips for Maintaining Your Shredders

  • Oil the Blades Regularly: Shredders often come with oil sheets or can be oiled manually. This helps keep the blades running smoothly, preventing jams and ensuring longevity. Check your shredder’s manual for specific instructions on how to oil the blades.
  • Avoid Overloading: Always adhere to the shredder’s sheet capacity. Overloading the machine can cause jams and damage the motor. If your shredder jams, turn it off immediately and clear the paper before attempting to use it again.
  • Empty the Bin Frequently: Don’t let the bin become overfilled, as this can prevent the shredder from functioning properly. Empty it regularly to ensure smooth operation.
  • Clean the Shredder: Dust and paper particles can accumulate in the machine, so periodically clean the inside of your shredder. Use compressed air or a vacuum to remove dust and debris that could cause blockages or overheating.

Frequently Asked Questions

1. What is the best type of shredder for high-security documents?

The best shredder for high-security documents is a micro-cut shredder, which slices paper into tiny, confetti-like pieces that are virtually impossible to reassemble. This makes it the top choice for environments that handle highly sensitive information, such as legal firms, government offices, or businesses.

Micro-cut shredders provide superior security by ensuring the complete destruction of documents. Some models can cut paper into pieces as small as 1/32″ x 1/2″. For the highest level of protection, look for a shredder that meets the DIN 66399 P-7 standard, which guarantees top-tier security.

2. Are there some shredders that can shred paper, CDs, and credit cards?

There are some shredders designed to handle not just paper, but also CDs, DVDs, and credit cards. These versatile shredders typically feature separate slots or specially designed blades for each type of material, ensuring they are shredded efficiently without damaging the machine.

Equipped with stronger motors and reinforced cutting mechanisms, they can easily break down tougher materials like the hard plastic of credit cards and the discs of CDs, which could otherwise ruin a standard paper shredder. This makes them ideal for homes or offices that securely destroy various sensitive information, offering convenience and security in one machine.

3. What size shredder is ideal for a small office?

A cross-cut shredder with a sheet capacity of 10-15 sheets is an excellent choice. This type of shredder offers a strong balance between security and efficiency, as it cuts paper into smaller, more intricate pieces, making it much harder to reconstruct. A bin capacity of 5-7 gallons is typically sufficient for a small office, allowing you to shred a moderate amount of paper without needing to empty the bin too often.

Additionally, selecting a shredder with a moderate duty cycle will ensure it can handle continuous use for a few hours, without risking overheating, making it a reliable option for the consistent demands of a small, yet busy office environment.

Conclusion

Choosing the right shredder for your home or office depends on security needs, usage frequency, and capacity. Whether you need a basic strip-cut shredder for personal use or a high-security micro-cut model for sensitive business documents, there’s a shredder that fits your needs. Consider the type, features, and maintenance requirements before making a decision, as this will help protect your sensitive documents and extend the lifespan of your shredder. Happy shredding!

Kids’ Electronics 101: The Ultimate Buying Guide

Kids Electronics

In today’s digital age, kids’ electronics have become more than just toys—they’re powerful tools for learning, creativity, and fun. From interactive tablets to kid-friendly smartwatches and educational robots, the right gadgets can spark curiosity, develop problem-solving skills, and even encourage physical activity.

Whether you’re shopping for a birthday gift, upgrading your child’s learning tools, or simply curious about the latest tech trends, you’ll find everything you need to know about buying safe, age-appropriate, and fun electronics for kids right here.

Why Kids’ Electronics Are More Than Just Toys?

Gone are the days when electronics were only for grown-ups. Now, even toddlers can interact with age-appropriate devices that encourage learning in a fun and engaging way. From early learning tablets and reading pens to coding robots and musical toys, kids’ electronics help build essential skills like logic, communication, and creativity.

For example, educational tablets help children improve their reading, writing, and math skills while playing interactive games. Likewise, electronic building kits teach kids how to think critically, follow instructions, and even experiment with basic coding—all while having a great time.

Choosing the Right Kids’ Electronics for Your Child’s Age

Every age group has different needs when it comes to electronics. Toddlers might enjoy simple tablets with large icons and educational games, while older kids might look for more advanced features like better graphics and the ability to create content.

Ease of Use

No matter how flashy a gadget is, if your child can’t figure out how to use it, they’ll lose interest fast. Touchscreen devices with large icons and simple interfaces are key. Luoba Kids Smart Phone for Girls offers a kid-friendly interface that’s easy to navigate, especially for younger users who are just getting familiar with tech.

Parental Controls

Safety comes first. Parental controls help you filter content, set time limits, and monitor what your child is accessing. Apple iPad (with Apple Family Sharing) lets you monitor screen time, approve downloads, and set age-appropriate limits with ease, making it a solid pick for tech-savvy families.

Durability

Let’s face it — kids drop things. A good kid’s electronic device should be built to survive tumbles and spills. VTech KidiZoom Smartwatch DX3 is designed with rugged plastic and can handle the bumps and scrapes of daily kid life. Plus, it’s splash-proof!

Portability

Whether you’re traveling or just heading to the park, portable electronics are a must. Lightweight design and built-in handles help, but battery life is key too. Toniebox Audio Player Starter Set is a screen-free, portable storytelling device that’s easy to carry and perfect for travel or quiet time.

Educational Value

The best kids’ electronics double as learning tools. From phonics to STEM subjects, a good device keeps learning fun and engaging. Osmo Genius Starter Kit for iPad turns screen time into interactive learning with hands-on games that teach math, spelling, and problem-solving skills.

Battery Life

Kids aren’t always patient, especially when the battery dies mid-play. A long-lasting battery can save everyone a headache. Nintendo Switch Lite offers up to 7 hours of battery life and is perfect for both learning games and fun, age-appropriate entertainment.

Graphics and Display

Clear visuals and vibrant displays are important, especially for drawing, reading, or watching educational videos. Samsung Galaxy Tab A Kids Edition features a bright 8-inch screen with crisp resolution, ideal for reading digital books and enjoying visual learning apps.

Top 5 Recommendations of Kids’ Electronics

1. VTech Sing It Out Karaoke Microphone – White

Get ready for mini concerts at home! The VTech Sing It Out Karaoke Microphone is perfect for kids who love to perform. With fun voice effects, built-in songs, and the ability to record and play back their singing, this mic keeps the fun going. It’s a great way to build confidence while having a blast. A perfect pick for any little music lover—and a great addition to their growing collection of kids’ electronics.

2. Kids’ Smart Phone for Girls – Purple

Looking for a fun and age-appropriate phone for your little one? This kid’s smartphone for Girls checks all the boxes. It has a kid-friendly 2.8” touchscreen, dual cameras for selfies, educational games, music playback, and even comes with an 8GB memory card. It’s the perfect mix of learning and play—ideal for girls ages 3 to 10. When it comes to kids’ electronics, this one’s a win for both kids and parents.

3. Mini Karaoke Machine for Kids & Adults – Perfect for Ages 4–12

Turn any day into a dance party with this Mini Karaoke Machine made for both kids and adults! It’s fun, easy to use, and delivers great sound in a small package. Whether it’s a birthday party or just a rainy afternoon, kids ages 4–12 will love belting out their favorite tunes. This one’s a total hit for families looking to add more fun to their kids’ electronics collection.

4. Kids Camera for Girls – Pink, Fun Selfie Camera for Ages 3–12

Let your little photographer capture the world from her point of view! This adorable Kids Camera for Girls is super easy to use and perfect for snapping selfies, pets, or fun family moments. It comes with cute filters and frames too! Designed for ages 3 to 12, it’s a creative and screen-free way to explore the world of kids’ electronics—without the distractions of grown-up devices.

5. Unicorn Dance Mat – LED Lights, Music, and 5 Fun Game Modes

Who says screen-free play can’t be exciting? This Unicorn Dance Mat brings music, movement, and magic together for endless fun. With colorful lights, built-in songs, adjustable volume, and five game modes, it’s perfect for solo play or dancing with friends. Great for ages 3–12, this is one of those kids’ electronics that gets them up and moving—and keeps them smiling the whole time.

How to Teach Kids Electronics? (Parent & Teacher Guide)

  • Start with Hands-On, Age-Appropriate Projects: The best way to learn electronics is by doing. For young children (ages 4-6), begin with simple snap-together circuit kits that light up or make sounds – the instant feedback keeps them engaged while teaching basic concepts. Elementary-aged kids (7-10) can progress to beginner-friendly robotics kits or simple programming projects that offer visible results from their efforts.
  • Make Learning Fun Through Gamification: Electronics education works best when it feels like play rather than work. Turn circuit-building into challenges (“Who can make the loudest buzzer?”) or scavenger hunts for components. Use story-based learning where children “rescue” a robot by completing electronic tasks.
  • Prioritize Safety Through Practical Lessons: Before touching any components, children need to understand basic electronics safety. Teach them to always work on dry surfaces, never handle exposed wires when circuits are powered, and properly dispose of batteries. 
  • Encourage Problem-Solving Over Perfection: When a project doesn’t work, resist the urge to immediately fix it for the child. Instead, guide them through troubleshooting questions: “Which connection might be loose?” “What happens if we test this component separately?” Keep a “debugging journal” where they document problems and solutions. Celebrate creative mistakes – some of the best learning comes when a circuit does something unexpected.
  • Connect Concepts to Real-world Applications: Help children understand how their projects relate to everyday technology. When they build a simple alarm circuit, show how similar principles work in home security systems. Take apart old appliances (safely) to identify components they’ve learned about. Visit local maker spaces or science museums to see electronics in professional contexts.
  • Balance Screen Time with Physical Activity: While coding apps and simulators have value, they shouldn’t replace hands-on experience. Establish a healthy mix where digital tools complement physical projects. For example, children might design a circuit in a simulator first, and then build it with real components.

Safety Tips for Kids’ Electronics

  • Choosing Age-Appropriate Devices: Selecting electronics that match a child’s developmental stage is crucial for both safety and engagement. The American Academy of Pediatrics recommends avoiding digital media for children under 18-24 months (except video chatting), with limited, high-quality programming for preschoolers.
  • Implementing Robust Parental Controls: Modern kids’ electronics offer increasingly sophisticated parental control options that go far beyond simple time limits. When evaluating a device’s parental control features, look for the ability to create customized user profiles that restrict specific apps or functions based on the time of day or learning objectives.
  • Evaluating Physical Safety and Durability: The physical construction of kids’ electronics deserves careful examination, as children naturally handle devices more roughly than adults. High-quality products designed specifically for young users incorporate rubberized edges and corners to absorb impacts from inevitable drops.
  • Establishing Safe Charging Practices: Proper charging habits represent one of the most overlooked aspects of kids’ electronics safety. Lithium-ion batteries power most modern devices and require specific handling to prevent overheating or other hazards. Designate a safe charging station in your home – ideally, a hard, non-flammable surface away from beds, curtains, or other flammable materials.
  • Protecting Privacy and Personal Data: Children’s electronics increasingly collect sensitive data, including location history, voice recordings, and usage patterns, making privacy protection essential. Before purchasing any connected device, research the manufacturer’s data collection policies and security measures.

Commonly asked questions

1. What age is appropriate to start learning electronics?

Most kids can begin exploring basic electronics as early as 3 years old, with age-appropriate toys that involve light, sound, and touch. Around 6 to 8 years old, children can start understanding simple circuits and concepts like cause and effect. By 10 years and up, many kids are ready for more advanced kits involving coding, robotics, or even beginner soldering.

2. Are electronics kits safe for kids?

Yes, most electronic kits designed specifically for children are completely safe when used as intended. Reputable brands ensure their kids’ electronics products are built with safety features like insulated wires, battery-powered components, and snap-together parts that don’t require soldering. Many kits are labeled with age recommendations to help you choose the right level of complexity.

3. How can I make electronics fun for my child?

Making electronics fun is all about turning learning into play. Start by choosing projects that align with your child’s interests—like building a mini music player, creating a moving robot, or coding a simple game. Give them small, achievable challenges that spark their curiosity, such as “Can you make this light blink faster?” or “What happens if we change this wire?” Let them decorate or customize their projects to feel a sense of ownership

4. What are the best free resources for learning electronics?

There are many free resources available online that make learning about kids’ electronics accessible and fun. Platforms like Tinkercad Circuits allow kids to experiment with virtual circuits in a safe, interactive environment. Websites like the Adafruit Learning System offer simple, step-by-step guides for beginner projects. Code.org is a fantastic place to introduce kids to logic and programming skills in a playful way.

Home Audio Subwoofers: Your Guide For Better Sound

Home Audio Subwoofers

Home audio subwoofers are essential for achieving superior sound quality in your home audio system. While main speakers handle mid and high-range frequencies, subwoofers focus on the low-end bass, adding depth and richness to your listening experience.

Whether watching movies, listening to music, or gaming, a subwoofer significantly enhances sound dynamics, something standard speakers can’t achieve. This comprehensive guide will explore everything you need to know about home audio subwoofers, including the different types, key considerations, benefits, and common mistakes to avoid.

Types of Subwoofers

  • Powered Subwoofers: They are the most popular choice for home audio systems. These subwoofers have a built-in amplifier, meaning you don’t need to invest in a separate amp. Powered subwoofers are easy to set up and provide a lot of power, making them ideal for most home entertainment setups. They’re perfect for people who want a simple, plug-and-play solution without extra components.
  • Passive Subwoofers: Unlike powered subwoofers, passive subwoofers do not have a built-in amplifier. Instead, they rely on an external amplifier or receiver to power them. Passive subwoofers are more affordable and are a good choice if you already have a high-quality amplifier in your audio system. However, they require a more complex setup and tuning to get the most out of them.
  • Front-Firing Subwoofers: Front-firing subwoofers direct sound waves forward, making them popular for home theaters and living rooms. This type of subwoofer typically produces a more direct and accurate bass response, ensuring that the deep bass fills the room effectively. The front-facing design also tends to work well in spaces with limited room for placement, as the sound can travel directly toward the listening area.
  • Down-Firing Subwoofers: These subwoofers send sound waves downward toward the floor. This design is perfect for people who want to avoid visible subwoofers or prefer a more discreet option. Down-firing subwoofers can also help reduce vibrations that might disturb neighbors or others in the house. They provide smooth, even bass, especially when placed in a corner or against a wall.
  • Wireless Subwoofers: They are a newer innovation that eliminates the need for physical wiring between the subwoofer and the rest of your audio system. They use Bluetooth or Wi-Fi to connect with your receiver or audio equipment, making them an excellent option for reducing cable clutter. Wireless subwoofers are often paired with powered subwoofers, providing flexibility and ease of installation.

Key Considerations When Buying a Subwoofer

Room Size

The size of the room in which the subwoofer will be placed is crucial. A large room may require a more powerful subwoofer to produce deep, resonant bass, while a smaller room might only need a more compact model. Consider the cubic feet of your space to determine how much bass you’ll need to fill the room effectively.

Power Output

Subwoofers like Sony SA-SW3, come in different power ratings, measured in watts. A higher power rating means the subwoofer can produce more bass output and fill a larger room. However, a higher power output is not always necessary, especially in smaller rooms or for people who prefer less intense bass. A good rule of thumb is to match the power output with the size of the room.

Frequency Response

Frequency response like Yamaha Audio, is the range of bass frequencies the subwoofer can reproduce. Most subwoofers can produce bass in the range of 20 Hz to 200 Hz, but some higher-end models can go as low as 10 Hz. If you’re looking for deep, rumbling bass, opt for a subwoofer with a lower frequency response range.

Placement Flexibility

Subwoofers can be large, and their placement in the room can significantly impact sound quality. Consider where you plan to place the subwoofer and ensure it has the flexibility to be positioned optimally in your room. Front-firing subwoofers require more space in front of them, while down-firing subwoofers can be placed closer to walls or corners.

Connectivity

Subwoofers Rockville Rock Shaker typically connect to your audio system via RCA, speaker wire, or wireless connections. Consider how your audio equipment is set up and whether you need a wired or wireless connection for your subwoofer. Ensure compatibility with your receiver or amplifier before purchasing.

Benefits of Adding a Subwoofer to Your Home Audio System

Enhanced Sound Quality

Subwoofers are designed to handle low-frequency sound, which creates a more dynamic and rich listening experience. With a subwoofer SoundPath, you’ll experience deeper bass, fuller sound, and improved clarity, especially when watching action movies or listening to music with heavy bass.

Improved Movie and Gaming Experience

A subwoofer NZXT Relay brings movies and games to life by adding powerful, immersive low-end sound. Whether it’s the deep rumble of an explosion in a film or the thundering bass in a video game, a subwoofer makes everything more realistic and engaging.

Better Music Listening

Many genres of music, especially electronic, hip-hop, and rock, have bass-heavy elements that a regular speaker may not fully capture. A subwoofer ensures that these low frequencies are rendered accurately, allowing you to hear every note, beat, and bassline.

Less Distortion

By offloading bass frequencies to the subwoofer, your main speakers can focus on mid- and high-frequency sounds. This produces clearer sound with less distortion at higher volumes, as the subwoofer handles the heavy lifting for low-end sounds.

Common Mistakes to Avoid While Using Home Audio Subwoofers

  • Poor Placement: Placement plays a critical role in subwoofer performance. Placing the subwoofer in a corner can result in “boomy” or overly loud bass, while placing it too far from the listening area can make the bass sound weak. Experiment with different locations and consider using a subwoofer positioning tool to find the optimal spot in the room.
  • Ignoring Room Acoustics: Your room’s acoustics can affect how the bass sounds. Hard surfaces, like walls and floors, reflect sound waves, while soft surfaces, like carpets and curtains, absorb them. Consider your room’s layout and acoustics when placing your subwoofer. Room treatments like bass traps and acoustic panels can also help enhance bass performance.
  • Setting Subwoofer Volume Too High: Turning the subwoofer volume too high can lead to distorted bass or an overpowering sound. It’s essential to balance the subwoofer with your main speakers, adjusting the volume until the bass is full but not overwhelming.
  • Not Calibrating the Subwoofer Properly: Many subwoofers come with calibration tools that help you fine-tune the settings for your room and listening preferences. Skipping the calibration step can result in suboptimal performance. Take the time to properly calibrate the subwoofer to ensure accurate, balanced sound.

Commonly Asked Questions

1. Can I Adjust the Bass Without Affecting the Rest of My System?

You can adjust the bass without affecting the rest of your system. Many home audio systems and subwoofers offer dedicated bass controls or adjustable crossover settings, allowing you to fine-tune the bass output independently. These adjustments let you boost the low-end frequencies without altering the midrange or high frequencies produced by your main speakers.

Additionally, most subwoofers have a volume control, giving you direct control over bass levels. By carefully experimenting with these settings, you can achieve a well-balanced sound that enhances your listening experience while maintaining clarity in the rest of your audio system.

2. Can I Use a Subwoofer with My Soundbar?

You can easily add a subwoofer to your soundbar. Many modern soundbars are designed to be compatible with external subwoofers, either through a wired connection or via Bluetooth. Adding a subwoofer enhances the low-end bass, offering a deeper, more immersive sound experience, particularly for movies, music, and gaming.

Even if your soundbar doesn’t have a built-in subwoofer or a dedicated subwoofer output, you can still connect a separate subwoofer using an adapter or a wireless connection, depending on the model. Just check the specifications of both your soundbar and subwoofer for compatibility.

3. What Should I Do if My Subwoofer is Rattling or Making Noise?

If your subwoofer is rattling or making noise, check its placement. Ensure it’s on a stable, solid surface, as vibrations can cause rattling. You can also use isolation pads to minimize vibrations. Next, inspect the wiring to ensure secure, intact connections, as loose cables can lead to distortion. Check the subwoofer cone for damage, such as tears or misalignment, which may require repair or replacement.

Adjusting the volume or crossover settings may help reduce distortion caused by excessive bass. Additionally, ensure the subwoofer’s power cable is not near other electronic devices that could cause interference. Finally, test with different audio content and volumes to identify if the rattling is specific to certain sounds. If the issue persists, it may be time to seek professional help or consider replacing the subwoofer.

Conclusion

A home audio subwoofer is a powerful tool for enhancing your listening experience. Whether upgrading an existing system or building a new one, a subwoofer can bring your audio to life. With a clear understanding of the types of subwoofers available, key considerations when purchasing, and common mistakes to avoid, you’ll be well-equipped to choose the right subwoofer for your needs. Take the time to explore your options, and soon, you’ll be enjoying rich, dynamic sound in every room of your home.

Kid’s Bike 101: How to Pick the Right One for Your Child

Kid’s Bike

Choosing the right kid’s bike can feel overwhelming. With so many styles, sizes, and features available, it’s easy to get confused. But don’t worry we’re here to simplify it for you. Whether your child is learning to ride or ready for more adventure, the perfect bike is out there. In this guide, we’ll walk you through everything you need to know about a kid’s bike and make the best choice for your little rider.

Why Kid’s Bikes Matter: Benefits of Cycling for Children

Riding a bike is much more than just child’s play, it’s a fundamental childhood experience that fosters physical health, mental development, and lifelong skills. The simple act of pedaling a child’s bike delivers benefits that extend far beyond the driveway or playground.

Promotes Physical Fitness and Develops Motor Skills :

In today’s digital age where screens dominate leisure time, kid’s bike serve as an essential tool to get children moving and active. Regular cycling strengthens leg muscles, improves cardiovascular health, and enhances overall endurance. The physical coordination required to balance, pedal, and steer a kid’s dirt bike or standard bicycle helps develop crucial gross motor skills that form the foundation for other sports and physical activities.

Builds Confidence and Fosters Independence :

There’s a transformative moment in every child’s life when they ride without training wheels for the first time—that triumphant grin says it all. Kid’s bikes provide tangible milestones that boost self-esteem, teaching young riders how to overcome challenges through persistence.

Encourages Outdoor Exploration and Creative Play :

A bike serves as a passport to adventure, transporting children beyond the confines of their backyard or local playground. Unlike passive entertainment, bikes for kids stimulate the imagination as young riders create games, pretend to be racers or explorers, and discover new corners of their world.

Strengthens Social Connections and Family Bonds :

Cycling is rarely a solitary activity it creates natural opportunities for social interaction and quality family time. Bikes for kids become vehicles for friendship as children ride together to school, race around the park, or join community cycling events. Family bike rides, where parents use adult bikes while children ride their own (or younger siblings enjoy a bike trailer for kids), create lasting memories and traditions.

Teaches Responsibility and Safety Awareness :

Owning a kids’ bike comes with valuable life lessons about maintenance and safety. Children learn to perform basic checks ensuring tires are properly inflated, testing brakes, and storing their bikes correctly. Riding also introduces important safety concepts like wearing helmets, understanding traffic rules (for older children), and being aware of surroundings.

Provides Eco-Friendly and Cost-Effective Transportation :

In an era of environmental consciousness, the best kids’ bikes offer sustainable transportation options that reduce carbon footprints from an early age. Unlike many modern toys that require constant battery replacement or charging, traditional pedal bikes provide endless entertainment without environmental impact.

How to Choose the Right Kids’ Bike: A Parent’s Checklist

Prioritize Adjustability for Growing Riders :

Children grow remarkably fast, often outgrowing their bikes within a single season. That’s why adjustable features make such a crucial difference in kids’ bikes. Look for models with seat posts that offer at least 4 inches of vertical adjustment, allowing your child to maintain proper leg extension as they grow taller.

JOYSTAR Kids Cruiser Bike with Training Wheels – The JOYSTAR Kids Cruiser Bike features a simple, elegant design with a lightweight steel frame, making it easy and fun for kids to ride. Inspired by beach cruiser bikes, it includes a sturdy frame, front/rear fenders, and adjustable components for comfort. Safety is a priority with coaster brakes, an enclosed chain guard, and removable training wheels. It’s designed for easy learning with a single-speed drivetrain and custom DIY decal stickers. Available in multiple sizes for ages 2–7, it comes partially assembled with a limited lifetime warranty. 

Understand Braking Systems for Safe Stopping :

When evaluating bikes for kids, the braking system deserves special attention as children develop coordination at different rates. Younger riders typically benefit most from simple coaster brakes (pedal-back brakes), which are intuitive to use and require minimal hand strength. As children grow older and graduate to larger bikes, hand brakes become essential – but look for models with short-reach levers designed for small hands.

Baby Joy 14 16 18 Inch Children Bikes for Boys Girls – This 14-inch kids bike is designed to grow with your child, featuring adjustable handlebars (26”–28.5”) and saddle height (20”–24”), plus a comfy seat and handy basket. It includes both a hand brake and a coaster brake for added safety, along with an enclosed chain guard. The sturdy carbon steel frame, anti-slip tires, and detachable training wheels support beginner riders. With 95% pre-assembly and included instructions, setup is easy. Front and rear fenders and pedal reflectors make it ideal for outdoor use, even in low light.

Focus on Comfort Features for Happy Riding :

A comfortable bike means more riding time and fewer complaints. Key comfort elements in best kids’ bikes include padded seats with a slight upward curve at the back to prevent sliding, plus sufficient width to distribute weight comfortably. Handlebar grips should be ergonomically shaped with soft, non-slip materials to prevent hand fatigue.

RoyalBaby EZ Kids Innovation 2-in-1 Balance & Pedal – The RoyalBaby EZ bike offers a smarter way for beginners to learn cycling by starting as a balanced bike and smoothly transitioning into a pedal bike. It’s 20% lighter than average, with a child-friendly design that eliminates the need for training wheels. The metallic paint, sporty colors, and unique “jet engine” water bottle add extra fun. With 98% pre-assembly and quick-release parts, setup takes just 15 minutes. Trusted worldwide, the EZ bike meets top safety standards and comes with responsive customer support.

Evaluate Durability for Long-Term Value :

Durability separates quality kids’ bikes from disposable ones. Look for frames constructed from reinforced steel or lightweight aluminum alloys that resist bending and corrosion. Check that all welded joints are smooth and consistent, with no visible gaps or rough edges. Components like pedals, cranks, and chain guards should be made of durable plastics or metals rather than flimsy materials.

RoyalBaby Kids Bike Boys Girls Freestyle Bicycle – The RoyalBaby Freestyle kids bike blends a sporty BMX-inspired design with kid-friendly features for a fun and safe riding experience. It includes sealed bearings for smooth pedaling, training wheels for beginners (on 12–16” models), and a BPA-free water bottle for added excitement. The adjustable seat and handlebars grow with your child, while wide tires and a sturdy steel frame ensure safety. With 95% pre-assembly and quick setup, it’s ready to ride in 15 minutes. Trusted worldwide, it meets CPSC standards and offers reliable customer support.

Consider Easy Assembly for Stress-Free Setup :

Nothing dampens the excitement of a new bike like hours of frustrating assembly. When selecting bikes for kids, look for models that arrive at least 85% pre-assembled, with clear instructions and all necessary tools included. Key things to check: Are the wheels already installed? Is the drivetrain pre-assembled? Are handlebars and seat posts easy to adjust without special tools? Some retailers offer professional assembly services for a small fee, often worth it for complex setups like bike trailers for kids or electric bikes for kids.

Jetson Light Rider Kids Light-up Unisex Bike – This light-up kids’ bike makes learning to ride fun and exciting with colorful training wheels that light up in three modes and seven vibrant colors. It features a height-adjustable handlebar and seat, allowing the bike to grow with your child for longer use. The comfortable seat ensures smooth rides, while the lightweight alloy steel frame keeps the bike sturdy yet easy to handle at just 22 lbs, lighter than many similar models.

Don’t Compromise on Safety Features :

Safety should be the top priority for any kid’s bike. Essential features include reflectors on the front, rear, and wheels for visibility, along with optional light mounts for evening rides. Chain guards should completely enclose the chain to prevent clothing snags or finger injuries. Handlebar ends need protective caps to prevent injury in falls.

JOYSTAR Starlet 12-Inch Kids Bike with Training Wheels – The JOYSTAR 12-inch kids bike is a perfect gift for 2–4-year-olds (33–41 inches tall), ideal for park and neighborhood rides. Built with a sturdy Hi-Ten steel frame and lightweight EVA foam tires, it’s easy for toddlers to handle. Safety features include a fully enclosed chain guard and removable training wheels. With a single-speed drivetrain, soft grips, a front basket, and fun DIY stickers, it’s designed for both comfort and enjoyment. The bike comes 85% pre-assembled with a lifetime warranty and responsive customer service.

Balance Weight and Stability Appropriately :

The ideal kid’s bike finds the perfect balance between being light enough for a child to handle yet stable enough for confident riding. As a general rule, the bike should weigh no more than 40% of the rider’s body weight, so a 50-pound child needs a bike under 20 pounds. Lightweight aluminum frames work well for most riders, while heavier steel frames may suit kids’ dirt bikes needing extra durability.

Royalbaby Stargirl Kids Bike Girls 12 14 16 18 20 Inch – The Stargirl 18-inch purple bike features a stylish design with twinkling star decals, helping kids aged 5 to 9 (45–53 inches tall) build independence and coordination. Its extra-wide tires and strong alloy steel frame ensure safety and stability, even for beginners. The low step-through frame and adjustable seat and stem make it easy to ride and grow with your child. Dual brake levers with soft grips, fun streamers, and a handy front basket add both function and flair to every ride.

Safety First: Essential Kids’ Bikes Accessory

Helmets: The Most Critical Safety Gear :

No piece of safety equipment matters more than a properly fitted helmet when it comes to kids’ bikes. A quality helmet does more than just sit on your child’s head – it’s their first line of defense against serious head injuries. Look for helmets that meet certified safety standards like CPSC or ASTM, which means they’ve passed rigorous impact tests.

Knee and Elbow Pads: Essential Impact Protection :

Every parent knows that falls come with the territory when kids are learning to ride. That’s where high-quality knee and elbow pads become invaluable, especially for adventurous riders on kids’ dirt bikes or rough terrain.

Bike Gloves: Protection Meets Performance :

Often overlooked but incredibly important, bike gloves serve multiple safety functions for children riding bikes for kids. They protect delicate palms during falls, prevent painful blisters from handlebar friction, and improve grip in all weather conditions.

Lights and Reflectors: Visibility for Safe Riding :

As any parent knows, kids don’t always stick to daylight hours for their bike adventures. Proper lighting transforms the best kids’ bikes into visible beacons after dark. A bright white front light and red rear light (preferably rechargeable LED models) help drivers spot your child from hundreds of feet away. Adding reflective wheel strips, pedal reflectors, and even reflective clothing creates 360-degree visibility.

Maintenance Tips: Keeping Kids’ Bikes in Top Shape

A well-maintained kid’s bike ensures safety, extends its lifespan, and keeps your child riding smoothly. Whether it’s a rugged kids’ dirt bike, a zippy electric bike for kids, or a classic pedal bike, regular care prevents breakdowns and costly repairs. Here’s how to keep bikes for kids running like new:

Regular Cleaning: The Foundation of Bike Maintenance :

Keeping your kid’s bike clean isn’t just about appearances – it’s essential for preventing premature wear and tear. Whether it’s a sturdy kids’ dirt bike that sees muddy trails or a sleek electric bike for kids used for neighborhood cruising, dirt, and grime can work their way into critical components.

Tire Maintenance: Ensuring Safe and Smooth Rides :

Proper tire care is one of the most impactful yet often overlooked aspects of kids’ bike maintenance. Underinflated tires make pedaling harder and increase puncture risks, while overinflated tires reduce traction and comfort.

Brake System Checks: Your Child’s Primary Safety Feature :

A bike’s braking system deserves special attention as it directly impacts your child’s safety. For traditional rim brakes found on most bikes for kids, monthly inspections should include checking pad wear (replace when grooves disappear), proper cable tension, and alignment. Disc brakes, common on higher-end kids’ dirt bikes and electric bikes for kids, require checking rotor straightness and pad thickness.

Chain and Drivetrain Care: The Power Behind Every Pedal :

The chain and drivetrain form the mechanical heart of any kid’s bike, transferring your child’s pedaling power to the wheels. A well-maintained chain should appear slightly shiny with no visible rust or stiff links. 

Bolt and Bearing Checks: Preventing Loose Parts and Wear :

Vibrations from riding can gradually loosen bolts throughout a bike’s frame and components. Monthly, go over all visible bolts on your child’s bike with the appropriate wrench, paying special attention to handlebars, stem, seat post, and wheels. Spin the wheels to check for bearing smoothness – they should rotate freely without grinding or wobbling.

Frequently Asked Questions

1. What age should a child start riding a bike?

Most children are ready for their first kids’ bike between the ages of 2 and 4, starting with a balanced bike to develop coordination before transitioning to pedals. By age 5-6, many kids graduate to traditional pedal bikes (often with training wheels initially). For electric bikes for kids, wait until at least age 8-10 when children have better control and judgment.

2. When Should You Consider Upgrading Your Child’s Bike?

Children’s growth spurts and developing skills mean most will need a new bike every 2-3 years. The most telling signs it’s time to upgrade include physical indicators like knees bumping against the handlebars when pedaling or difficulty mounting/dismounting comfortably. For electric bikes for kids, pay special attention to weight limits as your child grows.

3. Is Buying Used Kids’ Bikes a Smart Choice?

Second-hand bikes for kids can offer excellent value if selected carefully, especially since children often outgrow bikes before wearing them out. When considering a used bike, thoroughly inspect the frame for cracks, dents, or significant rust, and check that all components function properly – test brakes, gears (if present), and wheel bearings. Be particularly cautious with used electric bikes for kids, as battery life and motor condition are hard to assess, and replacement parts can be costly.

Conclusion

Choosing the right kid’s bike and maintaining it properly creates endless opportunities for adventure, exercise, and family fun. Whether your child is starting with their first balance bike, upgrading to a kids’ dirt bike for off-road excitement, or cruising the neighborhood on an electric bike for kids, prioritizing safety, proper fit, and regular maintenance ensures years of enjoyable riding.

Remember that cycling isn’t just about transportation—it’s about building confidence, independence, and lifelong healthy habits. By investing in quality bikes for kids, teaching essential safety practices, and keeping up with maintenance, you’re giving your child the gift of freedom on two wheels.

Fitness Trampolines: A Fun and Effective Way to Stay Fit

Fitness Trampolines

Fitness trampolines are compact, easy to store, and can be used indoors or outdoors. The best part is that they offer a full-body workout that strengthens muscles, improves cardiovascular health, and helps with weight loss. Whether you’re a beginner or an experienced fitness enthusiast, a fitness trampoline is suitable for all levels.

This blog will explore the different types of fitness trampolines, their benefits, and how to care for them. We’ll also cover some common mistakes to avoid when using these trampolines and answer some questions to help you make the most of your trampoline workouts.

Types of Fitness Trampolines

Mini Trampolines (Rebounders)

Mini trampolines are popular for their compact size, portability, and suitability for home use. With a diameter of 36 to 48 inches, they offer a low-impact workout and are perfect for beginners or anyone seeking a space-saving exercise solution. Many models also include adjustable handles, providing added stability and balance, making workouts safer and more effective.

Rectangular Trampolines

These larger trampolines offer a traditional trampoline experience with a rectangular shape, providing a spacious workout area. Ideal for advanced fitness enthusiasts or those with more space, they are commonly found in gyms. Their bigger surface allows for more dynamic exercises, making them perfect for individuals looking for an enhanced workout.

Foldable Trampolines

These trampolines, as the name implies, can be folded into a compact form, making them easy to store and transport. Perfect for individuals with limited space or those who need a trampoline that can be taken on the go, they offer great portability. Additionally, many models come with a safety handle for added support during exercises, combining convenience with functionality.

Springless Trampolines

These trampolines use flexible bands instead of traditional springs, providing a quieter and smoother bounce. They are ideal for individuals sensitive to noise or those who prefer a softer, more comfortable bounce. Additionally, using bands results in lower impact and quieter operation, while enhancing the trampoline’s durability for long-lasting performance.

Trampolines with Safety Enclosures

These trampolines come equipped with a safety net around the perimeter, providing protection against accidents and falls during workouts. They are perfect for families with kids or individuals new to trampoline fitness, offering added security and peace of mind. This feature ensures a safer workout environment, allowing users to focus on their exercise with confidence.

Top Benefits of Using Fitness Trampolines

Cardiovascular Health

Jumping on a trampoline provides an excellent cardiovascular workout, helping to increase your heart rate and improve circulation. This leads to better heart health and can even help reduce the risk of heart disease.

Low-Impact Exercise

One of the biggest advantages of using a fitness trampoline is that it’s a low-impact exercise. The trampoline’s bounce absorbs a lot of the shock that would normally be placed on your joints, making it an ideal choice for those with joint issues or those recovering from injuries.

Full-Body Workout

Trampoline workouts engage various muscle groups, including the legs, core, and upper body. As you bounce, your muscles are constantly working to maintain balance, which strengthens and tones your body over time.

Improved Balance and Coordination

Regularly using a trampoline can help improve your balance and coordination. The instability of the surface forces your body to engage in stabilizing muscles, which enhances overall balance.

Weight Loss and Fat Burning

Trampoline exercises are an effective way to burn calories and lose weight. Studies suggest that trampoline workouts can burn up to 200-300 calories in just 30 minutes, depending on the intensity. This makes trampolines an excellent addition to any weight loss routine.

Mental Health Benefits

Just like any other form of physical exercise, bouncing on a trampoline releases endorphins — the body’s natural mood boosters. Regular trampoline workouts can help alleviate stress, reduce anxiety, and even combat symptoms of depression.

Boosts the Lymphatic System

Trampoline exercise stimulates the lymphatic system, which is responsible for detoxifying the body. The up-and-down motion of bouncing helps move lymph fluid, aiding in the removal of toxins and improving overall immunity.

Key Features to Consider While Buying Fitness Trampolines

Size and Shape

They typically range from 36 to 48 inches in diameter, are compact, and ideal for home use or smaller spaces. If you have more space available, a full-sized trampoline, such as a rectangular model, provides a larger jumping area for greater freedom of movement. Be sure to consider the room you have, ensuring enough space for the trampoline and safe movement during your workouts. You can check this product Skywalker, on bestviewsreviews.

Portability

If you plan to move your trampoline frequently, choose one lightweight and easy to transport. Many mini trampolines are designed with portability in mind, making them easy to fold and store.

Noise Level

Some trampolines can be noisy due to the springs. If noise is a concern, look for models like JumpSport that use bungee cords, which are quieter than metal springs.

Bounce Quality

The quality of the bounce is essential for a more effective workout. Trampolines with more springs or thicker bungee cords, like Darchen offer better bounce and provide a more stable workout.

Weight Capacity

Every trampoline has a specified weight limit, usually between 200 to 300 pounds. It’s essential to choose one that can safely support your weight to ensure safety and prevent damage to the trampoline.

Safety Features

Fitness trampolines like ONETWOFIT often come with adjustable handlebars, providing extra stability, especially for beginners or those with mobility issues. Additionally, trampolines with safety pads around the edges help prevent injury if you accidentally step off the mat. Larger models may also include an enclosure net, offering further security by preventing falls and ensuring a safer workout experience.

Maintenance and Care Tips for Fitness Trampolines

Inspect Regularly

Check the trampoline’s surface and frame for any signs of wear and tear. Look out for loose springs, broken bands, or any rips in the mat. Repair or replace damaged parts immediately to prevent accidents.

Clean the Mat

Keep the trampoline mat clean by wiping it down with a damp cloth. For deeper cleaning, use mild soap and water, but avoid using harsh chemicals that could damage the surface.

Store Properly

If you’re not using your trampoline for a while, store it in a dry, cool place to prevent rust and damage. For foldable models, ensure that they are properly folded and stored away.

Check the Springs/Bands

Springs and bands are critical components of the trampoline. Check for any wear or loose connections and tighten or replace them if necessary. Springless trampolines may need less frequent maintenance, but checking the bands for damage is still important.

Ensure Proper Placement

Place your trampoline on a flat, stable surface to avoid wobbling during workouts. Avoid placing it on rough or uneven terrain, as this can damage both the trampoline and its users.

Common Mistakes to Avoid While Using Fitness Trampolines

Not Using a Safety Handle

While fitness trampolines are low-impact, they still require balance and coordination. Not using a safety handle can increase the risk of falling, especially for beginners.

Incorrect Posture

When jumping on a trampoline, maintain a straight posture. Bending too much at the waist or leaning forward can cause back strain and decrease the effectiveness of the workout.

Overworking Your Joints

Even though trampolines are low-impact, overuse can still lead to joint strain, especially if you’re doing high-intensity workouts for extended periods. Always listen to your body and take breaks when needed.

Skipping Warm-Ups

Like any exercise, warming up before using a trampoline is crucial to prevent injury. Take a few minutes to stretch and get your muscles ready before you start bouncing.

Not Following the Weight Limits

Each trampoline has a specific weight limit. Exceeding this limit can cause damage to the trampoline and increase the risk of accidents. Always check the manufacturer’s guidelines and make sure you’re within the recommended weight range.

Commonly Asked Questions

1. Can trampoline workouts improve balance and coordination?

Fitness Trampoline workouts can actively improve balance and coordination. As you bounce on the trampoline, the unstable surface forces your body to engage and strengthen stabilizing muscles, which directly enhances your balance.

Moreover, the dynamic movements in trampoline exercises challenge your coordination, requiring you to adjust and control your body in real-time. Over time, this consistent practice boosts your balance and improves your overall body awareness. Additionally, by strengthening the core and lower body, trampoline workouts provide long-term benefits for both coordination and stability.

2. What kind of exercises can I do on a fitness trampoline?

Fitness trampolines offer a variety of exercises that can enhance cardiovascular health, balance, coordination, and strength. You can do basic exercises like jumping jacks and the basic bounce, which warm up the body and engage multiple muscle groups. As you progress, high knees and running in place will help improve your cardiovascular fitness while strengthening your legs and core.

For a more intense workout, squat and tuck jumps target the lower body and core, increasing strength and agility. Additionally, lunges work the thighs and glutes, while plank variations strengthen the core. Side-to-side jumps improve coordination, and leg lifts focus on the lower abs and hip flexors. These exercises, when combined, provide a fun and effective way to build strength and boost overall fitness.

3. How much space do I need for a fitness trampoline?

The space required for a fitness trampoline depends on its size and the area needed for movement. For mini or rebounder trampolines, which are compact, you’ll need at least 6 to 8 feet of clear space around them. This ensures you can perform exercises safely and comfortably while having room to move freely.

On the other hand, larger, full-sized fitness trampolines require more space. Ideally, you should have a clear area of 10 to 12 feet in length and 8 to 10 feet in width. This provides ample room for bouncing, stretching, and unrestricted movement. Additionally, the surface is flat and stable, preferably on a non-slip mat or carpet, to prevent slipping and protect the floor. If using the trampoline indoors, account for the ceiling height to ensure enough clearance for jumping.

Conclusion

Fitness trampolines are a fun and highly effective way to stay fit while engaging in a full-body workout. Whether you’re looking to improve your cardiovascular health, burn calories, or simply have a good time while working out, trampolines offer a great alternative to traditional exercise routines. By choosing the right type of trampoline, following maintenance tips, and avoiding common mistakes, you can enjoy all the benefits of trampoline workouts safely and effectively. So, grab your fitness trampoline today and start bouncing your way to better health!

Home Theater Systems – Transform Your Living Room Into Threater

Home Theater Systems

Imagine stepping into your living room and feeling like you’re inside a movie theater. The lights dim, the sound surrounds you, and every detail on the screen comes to life. With the right home theater systems, you can create a cinematic experience without leaving your house, with amazing sound. Whether you’re a movie buff, a music lover, or a gaming enthusiast, investing in the best home theater system can elevate your entertainment game.

Why Invest in Home Theater Systems?

Imagine feeling every explosion, hearing every whisper, and getting fully immersed in your favorite movies, all from the comfort of your couch. A home theater system turns your living room into a cinematic escape. They deliver theater-quality sound and visuals without the hassle of crowded cinemas.

Whether you’re a movie buff, a gaming enthusiast, or just love hosting movie nights, a complete home theater system elevates your entertainment experience. From wireless home theater systems for sleek setups to powerful home theater surround sound systems, there’s a perfect fit for every home.

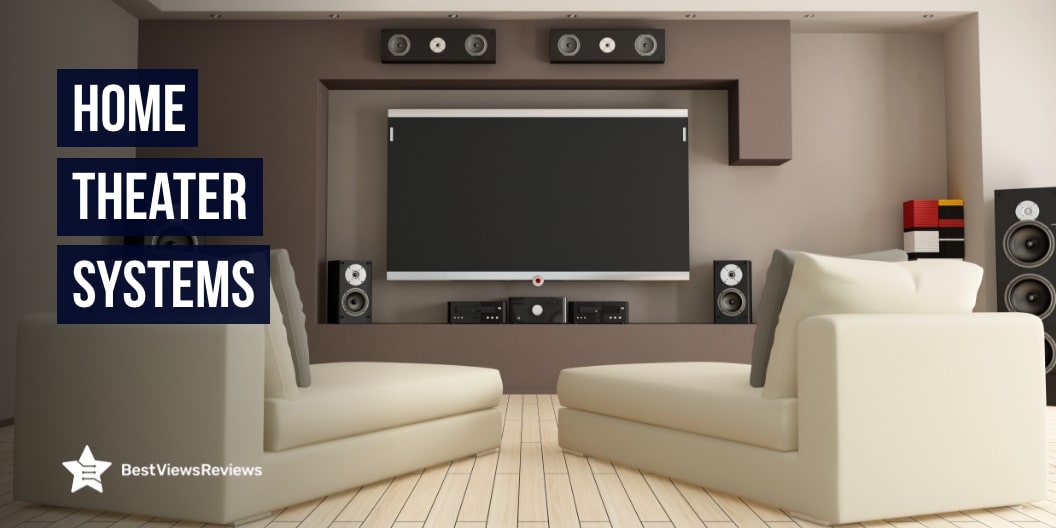
Home Theater Essentials: What You Need for the Best Experience

Creating the perfect home theater system requires more than just a big screen and a few speakers. To fully enjoy movies, music, and gaming, you need a combination of high-quality visuals, immersive sound, and the right setup. Below are the essential components of a complete home theater system.

1. High-Quality Display: The Heart of Your Home Theater

The display is the most crucial part of any home theater system. A high-resolution TV or projector ensures sharp visuals and vibrant colors. A 4K Ultra HD TV is the standard choice for most home setups, while 8K TVs offer future-proofing with even higher resolution. OLED and QLED TVs enhance picture quality by providing deep blacks, high contrast, and rich colors.

2. Surround Sound System: Immersive Audio for Maximum Impact

A home theater surround sound system is essential for creating a realistic and engaging sound experience. Unlike basic TV speakers, surround sound systems use multiple speakers to distribute audio throughout the room, making you feel like you’re part of the action. A 5.1-channel system includes five speakers and a subwoofer, while a 7.1-channel system adds two extra speakers for richer sound.

3. AV Receiver: The Brain of Your Home Theater System

The AV receiver is the control center of your home theater audio system, managing audio and video signals from various sources and distributing them to your TV and speakers. A good receiver supports at least 5.1 or 7.1 channels, ensuring compatibility with home theater surround sound systems.

4. Streaming Devices & Media Players: Access Unlimited Entertainment

A home theater system is incomplete without a reliable content source. Smart TVs come with built-in streaming apps like Netflix, Disney+, and Amazon Prime Video, but if your TV lacks these features, devices like Roku, Apple TV, and Fire TV Stick can provide access to your favorite streaming services. A 4K UHD Blu-ray player ensures the highest-quality video and audio playback for those who prefer physical media.

5. Subwoofers: Adding Depth to Your Audio Experience

A powerful subwoofer is essential for producing deep, rich bass that enhances action scenes, music, and overall sound quality. Unlike standard speakers, which focus on mid- and high-frequency sounds, subwoofers handle low-frequency sounds, adding depth to explosions, drum beats, and dialogue. A well-placed subwoofer—typically near a wall or in a corner—can create a fuller, more immersive sound.

How to Choose a Perfect Home Theater System

A great home theater system can turn your ordinary living room into an immersive cinematic experience. Whether you’re a movie buff, a music lover, or a gaming enthusiast, choosing the right system can make all the difference. Let’s break down the key factors you need to consider to get the best home theater system for your space.

Sound Quality

Sound quality is the defining factor of any complete home theater system. Rich bass, crisp highs, and balanced mids create an immersive experience. When choosing a home theater surround sound system, look for speakers that offer deep, distortion-free sound. Wireless home theater systems are also a great option for those who want high-quality audio without the clutter of cables.

Polk Audio 5.1 Channel Home Theater System – Experience massive sound with 15 high-performance speakers, including a powered 10” subwoofer for deep bass. Polk’s Dynamic Balance Technology ensures clear, room-filling audio with minimal distortion. Compatible with most AV receivers, this 5.1 system can be upgraded to 7.1 or 9.1 for an immersive setup. Enjoy premium home theater sound at an affordable price with easy setup and high-quality construction.

Ease of Installation

Nobody wants to spend hours figuring out how to install their home theater audio system. Many modern systems come with plug-and-play features, making setup a breeze. Opt for wireless home theater systems if you prefer a hassle-free installation process.

Enclave Audio 2016 CineHome HD 5.1 Wireless – Get a Wi-Fi-enabled home theater system with a MusicCast AV receiver, 5 wired speakers, a subwoofer, and speaker wire—all in one package. Enjoy clear 5.1-channel surround sound with 4K Ultra HD HDMI, HDR10, and Dolby Vision support. Easy setup with Yamaha YPAO room optimization and flexible speaker placement. Connect via Wi-Fi, Bluetooth, AirPlay 2, and Spotify Connect, or expand to wireless 5.1 surround with MusicCast 20 speakers (sold separately). Stream from Spotify, Pandora, TIDAL, and more for an immersive audio experience.

Noise Reduction

Unwanted background noise can ruin the immersive feel of your home theater system. Advanced noise reduction technologies help eliminate distortions, allowing you to enjoy clear and focused sound, whether you’re watching a blockbuster or listening to music.

Bose 3.1 Home Theater System, Black – The Bose Smart Ultra Dolby Atmos Soundbar Bundle delivers an immersive sound experience with Dolby Atmos support for rich, room-filling audio. It includes a remote control, ADAPTiQ headset, optical & HDMI cables, power cord, and a 1-year Bose warranty. The bundle also features the Bass Module 700 and two Surround Speakers 700 for deep bass and true surround sound. With built-in Alexa and Google Assistant, plus Voice4Video technology, you get hands-free control and seamless voice commands for an effortless home theater experience.

Build Quality

Durability is essential when selecting the best home theater system. High-quality materials ensure better sound reproduction and longevity. Check for sturdy construction, heat-resistant components, and reliable speaker enclosures to get the most out of your system.

Klipsch Reference R-625FA 5.1 Home Theater Pack – The Klipsch R-625FA Home Theater System brings cinematic Dolby Atmos surround sound with two R-625FA floorstanding speakers, two R-41M bookshelf speakers, an R-52C center speaker, and a powerful R-12SW 12” subwoofer. The built-in elevation channel on the R-625FA enhances height effects, immersing you in movies and games. Experience crystal-clear highs from 1” aluminum compression tweeters and deep, distortion-free bass from 6.5” copper-spun IMG woofers. With 90×90 Tractrix horn technology, enjoy wide, room-filling sound from any position. Backed by a 5-year Klipsch warranty, this system is built for premium home audio.

Wireless Connectivity

A wireless home theater system eliminates the mess of cables while offering seamless connectivity. Many top-rated home theater audio systems now come with Bluetooth or Wi-Fi options, making it easy to stream music, connect to smart TVs, or integrate with voice assistants.

iLive 5.1 Home Theater System with Bluetooth – This wired 5.1-channel surround sound system includes six speakers: a subwoofer, front left & right, surround left & right, and a 32” soundbar for an immersive audio experience. Bluetooth technology allows easy pairing with compatible devices, while voice prompts simplify setup. Features include LED indicators, master volume control, and a cloth speaker grill. The wall-mountable soundbar and satellite speakers come with all the necessary hardware. The package includes a remote, AC/DC adapter, mounting hardware, optical audio cable, 3.5mm to RCA cable, and 3 RCA stereo cables for a complete setup.

Compatibility

Your home theater system should work flawlessly with your existing devices. Whether you’re using a smart TV, gaming console, or streaming device, check for HDMI, optical, and Bluetooth compatibility. The best home theater systems support multiple connections, allowing for a flexible and versatile setup.

VIZIO 46-Inch 5.1.4 Premium Home Theater Sound System – Experience premium home theater sound with Dolby Atmos, bringing you inside the action with immersive cinematic surround sound. Featuring four up-firing speakers and rear surround speakers, it creates a truly 3D audio experience. The wireless subwoofer with a 10” driver delivers deep, room-shaking bass, while the five-channel soundbar with a dedicated center channel ensures crystal-clear dialogue. Enjoy seamless streaming via Chromecast, Bluetooth, and Wi-Fi. With premium audio cables included, setup is quick and easy for a next-level home theater experience.

Setting Up Your Home Theater: Step-by-Step Guide

Creating the perfect home theater surround sound system isn’t just about plugging in speakers and a screen; it’s about optimizing every element for the best experience.

Choose the Right Home Theater System :

Before you begin, decide on the type of home theater system that fits your space and budget. A wireless home theater system keeps things clean and clutter-free, while wired setups deliver consistent, high-quality sound. If you prefer a hassle-free setup, the best home theater system that comes as a complete package is a great option.

Select the Ideal Location :

The placement of your home theater systems plays a crucial role in the sound distribution and viewing experience. Choose a spacious room with minimal sound interference and consider wall-mounting options for speakers to save space. Ensure the seating arrangement provides an optimal distance from the screen and audio system to create a truly cinematic feel.

Optimize Your Sound for a Surround Experience :

A home theater surround sound system is all about immersing yourself in rich, multidimensional audio. Position the front speakers at ear level to ensure clear dialogues, while placing rear speakers slightly behind or to the side of your seating enhances surround effects. Adding a subwoofer amplifies deep bass, creating a more realistic and powerful sound experience.

Connect and Calibrate Your System :

Once your home theater audio system is set up, fine-tune it to ensure the best performance. Adjust speaker levels to balance the sound output and use built-in receiver settings or a calibration tool to optimize the audio. Experiment with different sound modes based on your content—movies, music, or gaming—to get the most out of your system.

Common Home Theater Systems Mistakes to Avoid

Many homeowners make common mistakes that prevent them from getting the best out of their home theater surround sound system. Let’s look at these pitfalls and how to avoid them.

Placing Speakers Incorrectly :

Your home theater system is only as good as its sound setup. Many people place speakers too close together or push them against walls, which disrupts the surround sound experience. To get the most out of your home theater audio system, position front speakers at ear level for clear dialogues and effects, space surround speakers evenly to create immersive sound, and keep subwoofers away from corners to prevent overpowering bass.

Ignoring Room Acoustics :

A home theater surround sound system needs the right environment to shine. Hard surfaces like tile or glass can cause sound reflections, making audio harsh or echoey. Fix this by adding carpets, curtains, or acoustic panels to absorb excess sound, avoiding large empty spaces that cause sound distortion, and placing furniture strategically to enhance sound absorption.

Choosing the Wrong Size TV or Screen :

A massive screen in a small room or a tiny TV in a large space can ruin the viewing experience. When setting up your home theater system, follow general guidelines for viewing distance. For a 55-inch screen, sit about 7–9 feet away; for a 65-inch screen, sit around 8–10 feet away; and for a projector setup, ensure the screen matches your room dimensions for the best visual experience.

Not Investing in a Complete Home Theater System :

A complete home theater system includes a high-quality audio setup, a large screen or projector, and comfortable seating. Many people focus solely on the TV and overlook the importance of sound. If you want the best home theater system, consider a receiver that supports high-resolution audio, a wireless home theater system for a clean, clutter-free setup, and a high-quality soundbar or surround sound speakers for immersive audio.

Using Cheap or Incorrect Cables :

Good cables ensure that your home theater audio system performs at its best. Many people buy low-quality HDMI or speaker cables, leading to poor audio and video quality. When setting up your home theater system, opt for high-speed HDMI cables for 4K and HDR content, shielded speaker wires to minimize interference, and optical or coaxial cables for better digital sound transmission.

Ignoring Smart Features and Connectivity :

Modern home theater systems come with smart features like voice control, Bluetooth, and Wi-Fi streaming. If you’re investing in the best home theater system, make sure it supports wireless connectivity for easy streaming, compatibility with Alexa, Google Assistant, or Apple HomeKit, and multi-room audio options for an enhanced experience.

Maintenance & Upgrade Tips for Home Theater Systems

Longevity

A home theater system is more than just a collection of speakers and a screen—it’s an experience that brings movies, music, and gaming to life. To keep your system performing at its best, regular maintenance and timely upgrades are essential. In this guide, we’ll walk you through simple yet effective ways to extend the life of your home theater audio systems and ensure you continue to enjoy cinematic experiences right in your living room.

Regular Cleaning for Optimal Performance

Dust and dirt can accumulate on your home theater surround sound system, affecting both audio and visual quality. To maintain optimal performance, wipe down your speakers and receivers with a soft microfiber cloth to prevent dust buildup. Use a screen-safe cleaner to keep your TV or projector screen smudge-free and avoid glare. Regularly check and clean your cables and ports to prevent loose or dusty connections that might interfere with sound and picture quality.

Check & Upgrade Your Cables

Old or damaged cables can degrade audio and video quality. Upgrading to high-speed HDMI and optical audio cables ensures better transmission and reliability. If you want a cleaner and more efficient setup, consider investing in wireless home theater systems that eliminate cable clutter while maintaining high-quality performance.

Optimize Speaker Placement

Properly positioning your home theater audio systems enhances sound quality and immersion. Place front speakers at ear level for clear dialogue and main audio effects. Position subwoofers near walls to maximize deep bass impact, and angle surround speakers slightly towards the seating area for a truly immersive surround sound experience.

Keep Your System Updated

Many best home theater systems come with firmware updates that enhance performance and introduce new features. To ensure your system remains up to date, regularly check the manufacturer’s website for updates or enable automatic updates on your device. This simple step can improve functionality and prolong the lifespan of your equipment.

Invest in a Power Surge Protector

Your complete home theater system is a significant investment, and power surges can cause serious damage. Using a high-quality surge protector shields your system from unexpected electrical spikes, helping to extend the life of your audio and visual components.

Invest in a Power Surge Protector

Your complete home theater system is a significant investment, and power surges can cause serious damage. Using a high-quality surge protector shields your system from unexpected electrical spikes, helping to extend the life of your audio and visual components.

Upgrade Components for a Better Experience

Rather than replacing your entire setup, upgrading specific components can breathe new life into your system. Upgrading to the best home theater system speakers enhances sound quality, while investing in a more powerful receiver improves audio processing. Adding a newer streaming device ensures better resolution, faster performance, and a smoother viewing experience.

Calibrate Your Audio & Video Settings

Many users overlook the importance of calibration, yet it plays a key role in maximizing your home theater surround sound system performance. Adjust your system’s audio and video settings manually or use built-in calibration tools to fine-tune sound levels and picture quality for the most immersive experience possible.

Create the Perfect Viewing Environment

Your room’s acoustics and lighting significantly affect your home theater system experience. Use curtains or acoustic panels to reduce echo and improve sound clarity. Install dimmable lights or smart lighting for a true theater-like ambiance. Adjusting room lighting can also minimize screen glare, providing a clearer and more immersive viewing experience.

Frequently Asked Questions

1. Is a soundbar enough for a home theater experience?

A soundbar enhances TV audio but doesn’t match the depth and richness of a home theater system. If you want immersive sound, a home theater surround sound system with multiple speakers is a better choice.

2. Do I need a 4K projector, or is a 4K TV better?

It depends on your preference and space. A 4K projector is great for larger screens and a cinematic feel, while a 4K TV provides better brightness and clarity for everyday use.

3. What’s the difference between Dolby Atmos and regular surround sound?

Dolby Atmos adds height channels to traditional surround sound, creating a 3D audio experience. Standard home theater audio systems offer directional sound, but Atmos makes it feel like sound is coming from all around, including above.

Conclusion

A home theater system is more than just an upgrade; it’s a gateway to a richer, more immersive entertainment experience. Whether you prefer a home theater surround sound system for movies or a wireless home theater system for convenience, making the right choice can transform how you enjoy audio and visuals at home. Take the time to explore your options, invest in quality components, and create a cinematic oasis right in your living room!


Women’s Flip Flops: The Ultimate Guide

Women’s Flip Flops

Women’s flip-flops have become a staple in casual footwear, offering the perfect blend of comfort and style. Lightweight, easy to wear, and versatile, they are ideal for everything from a quick grocery run to a relaxing day at the beach. With so many options available, flip-flops have evolved far beyond their simple design, catering to different tastes and needs. In this blog, we’ll dive into why women’s flip-flops are a must-have for your wardrobe and how they keep you stepping in comfort.

Types of Women’s Flip-Flops

  • Casual Flip-Flops: Informal palms provide ordinary ease and straightforwardness. Manufacturers create them with lightweight materials and thin soles for use on the occasional run to the stores, for house use, or for a walk in the park.
  • Beach Flip-Flops: Beach or rubber sandals, generally made of rubber or EVA foam-type materials, ensure your feet don’t get wet. The non-slip soles give you a proper grip to allow easy strolling even on sandy beaches or wet floors.
  • Orthopedic Flip-Flops: Specialized types of flip-flops are created to meet the needs of a person without disadvantaging the looks. These have features such as proper arch support, the footbeds being soft, and ergonomic designs that will not stress your feet, hence perfect for long use.
  • Fashion Flip-Flops: Fashion flip-flops manage clothing for the feet that is fashionable and beautiful, yet very functional. Whether with intricate applications or bold patterns, metallic or intense colors, they help enhance your style for celebrations, brunches, or sundowns.
  • Sports Flip-Flops: Sporting flip-flops are fully designed to be used as performance shoes. They feature cushioned straps, and the soles come with the same material; these features make them appropriate for slacking after a workout session or strolling.
  • Platform Flip-Flops: Among shoes that give people height, flip-flop platforms are famous for their fashion and comfort. The raised heels make them stylish and perfect for the night and can be worn with a dress, skirt, or jeans.
  • Eco-Friendly Flip-Flops: For the environmentally conscious consumer, there is flippable footwear made of recycled rubber, cork, or biodegradable products. These support environmental conservation without including an element of comfort or design.

Benefits of Flip-Flops

1. Provide Unmatched Comfort

Flip-flops are designed to maximize comfort, especially in warm climates. Their open-toe structure allows air to circulate freely, preventing sweat buildup and keeping your feet cool. Unlike enclosed shoes that can feel tight or restrictive, flip-flops let your feet breathe, reducing the chances of blisters and irritation. Their lightweight nature makes them ideal for casual wear, whether you’re relaxing at home, strolling along the beach, or running a quick errand.

2. Offer Easy Accessibility

One of the greatest advantages of flip-flops is their slip-on design. You don’t have to worry about tying laces or fastening buckles—just slide your feet in and go. This convenience makes them an excellent choice for situations where you need to take off or put on shoes quickly, such as at the pool, gym, or when stepping outside for a brief moment. Their hassle-free wearability is especially useful for kids, seniors, or anyone who prefers simple footwear.

3. Promote Foot Freedom

Unlike closed-toe shoes, which can feel constrictive, flip-flops allow your feet to move naturally. This flexibility encourages foot muscle engagement, which may contribute to strengthening the arch and improving overall foot health. Walking barefoot or in minimal footwear, such as flip-flops, can also enhance balance and posture by allowing your feet to function more naturally. However, it’s important to choose flip-flops with proper arch support for long-term use to avoid strain.

4. Stay Budget-Friendly

Compared to other types of footwear, flip-flops are generally inexpensive. Whether you need a basic pair for home use or a stylish one for casual outings, there are affordable options available in a variety of materials and designs. Even high-quality flip-flops with enhanced comfort features (such as cushioned soles or ergonomic straps) are often more budget-friendly than other types of footwear, making them accessible to all.

5. Support Versatile Styles

Flip-flops come in an array of designs, colors, and patterns, making them a versatile addition to any wardrobe. Whether you prefer a simple, classic look or a trendy, embellished design, you can find flip-flops that match your personal style. They pair effortlessly with casual summer outfits like shorts, sundresses, and swimwear, making them a go-to choice for warm-weather fashion.

6. Make Cleaning Hassle-Free

Another major perk of flip-flops is their ease of maintenance. Most are made from materials like rubber, foam, or synthetic blends, which resist dirt and water. Unlike sneakers or leather shoes that require extensive care, flip-flops can be easily cleaned with a quick rinse under running water or a simple wipe-down with a damp cloth. This makes them perfect for outdoor adventures, beach days, and other activities where your feet might get wet or dirty.

How to Choose the Right Women’s Flip-Flops

By focusing on comfort, style, and durability, you can easily select footwear that complements your lifestyle. Here’s how you can make the right choice:

  • Prioritize Comfort: The first check that a buyer should make is to look at the outer layer and inner layer of the flip-flops. Ensure you get shoes with a soft interior that cushions your feet and sides to protect your arches when walking long distances, and check the straps to avoid any chances of rubbing your skin and causing swelling and itching.
  • Assess the Fit: When selecting flip-flops, it is preferable to fit your shoes without causing any pressure on your feet. You should also ensure they do not stretch right to the edges of your toes or the heel rest, respectively. Wearing the right size will help eliminate the chances of getting blisters, besides they have enhanced stability.
  • Consider the Material: Choosing the finest substance concerns the following elements: leather, rubber, or foam. Leather comes in handy when wearing shoes, while rubber pairs are perfect for the beach, or any other occasion that involves water. Many types of foam serve well for products made for light comfort.
  • Check the Sole’s Durability: The sole should also be checked for grip and durability. Thick soles, such as those with slip-resistant capability, allow for different terrains appropriate for longer shoe durability. Do not go for the ultra-slim soles as they are not durable products.
  • Match with Your Style: Choose something that will match the rest of your outfits. Neutral colors are useful for modifying tone, but for entertaining and creativity, bright, bold, and graphic prints are wonderful for summer ensembles.

Top Women’s Flip Flops Recommendations

Highly Recommended

Reef Women’s Cushion Spring Joy Sandals

Step into comfort and style with the Reef Women’s Cushion Spring Joy Sandals. Designed for all-day wear, these flip-flops feature soft, supportive footbeds that cradle your feet with every step. The lightweight design and durable rubber soles ensure a secure grip, whether strolling on the beach or running errands in the city.

Crocs Women’s Capri V Glitter Flip Flop

Shine with every step in the Crocs Women’s Capri V Glitter Flip Flop. These glamorous flip-flops feature glittery straps that add a sparkle to your casual look. Designed with dual Crocs Comfort™, the plush foam footbed and lightweight sole ensure exceptional cushioning and support for all-day wear.

Top Picks For Slip Resistance

Shower Shoez Women’s Non-Slip Pool Dorm Water Sandals

Step into comfort and safety with the Shower Shoez Women’s Non-Slip Pool Dorm Water Sandals Flip Flops. Designed for durability and practicality, these flip-flops feature a non-slip sole that provides excellent traction on wet surfaces, making them perfect for pools, showers, and dorm rooms. The water-resistant upper and cushioned footbed offer all-day comfort, while the lightweight construction ensures easy wear. Whether lounging by the pool or walking across a wet floor, these sandals provide reliable support and a secure fit.

Ampeo Women’s Arch Support Flip Flops Comfortable Casual Summer Beach Thong Sandals

Experience ultimate comfort and support with the Ampeo Women’s Arch Support Flip Flops. Designed with a contoured footbed and built-in arch support, these sandals provide all-day cushioning and stability. The soft, durable straps ensure a secure fit, making them perfect for casual outings, beach days, or relaxed summer walks.

Top Picks For Material Quality

Crocs Women’s Kadee Ii Graphic Flip Flops Sandals

The flexible upper and contoured footbed provide a secure fit, while the durable outsole ensures reliable traction on various surfaces. Whether relaxing by the pool, running errands, or enjoying a casual day out, these flip-flops combine fashion with comfort effortlessly.

Flojos Women’s Fiesta flip Flop

Embrace comfort and style with the Flojos Women’s Fiesta Flip Flop. These casual sandals are designed with a soft, cushioned footbed that provides support for all-day wear. The flexible straps ensure a comfortable fit, while the durable outsole offers reliable traction on various surfaces.

Top Picos For Arch Support

Crocs Unisex-Adult Mellow Flip Flops, Recovery Flip Flop Slides

Experience ultimate comfort and relaxation with the Crocs Unisex-Adult Mellow Flip Flops. Designed for both men and women, these recovery slides provide a cushioned, ergonomic fit for after-sport recovery or casual wear. The Croslite™ foam footbed offers soft support, while the durable outsole ensures stability and traction on various surfaces.

Teva Women’s Mush II Flip-Flop

Step into comfort and style with the Teva Women’s Mush II Flip-Flop. These lightweight sandals feature a cushioned Mush® topsole for all-day support and comfort. The soft webbing straps provide a secure fit, while the durable outsole offers excellent traction on various surfaces. Perfect for casual wear, beach outings, or relaxed adventures, these flip-flops combine functionality with a sleek design. Whether strolling by the water or running errands, the Teva Mush II Flip-Flop ensures you stay comfortable and stylish.

Top Picks For Strap Design

Reef Women’s Slap 3 Sandal

Unleash effortless style and comfort with the Reef Women’s Girls Slap 3 Flip-Flop. Designed for casual wear, these flip-flops feature a soft, molded footbed that provides cushioning and support with every step. The durable rubber outsole ensures a reliable grip, making them perfect for beach outings, poolside relaxation, or everyday wear.

Women’s Cushion Court Flip-Flop

Designed for all-day wear, these flip-flops feature a soft, cushioned footbed that provides responsive support with each step. The durable rubber outsole offers excellent traction, making them ideal for casual strolls and outdoor adventures. The sleek, minimalist design is versatile and pairs effortlessly with any summer outfit. Whether at the beach, running errands, or relaxing by the pool, the Reef Cushion Court Flipflop keeps you comfortable and stylish.

Commonly asked questions

1. Can flip-flops be worn for long walks?

Yes, you can wear flip-flops for long walks, but it depends on the type and design that the flip-flop comes with. Embedded soles and straps surrounding the foot area also provide more comfort and lessen the possibility of foot soreness. Nonetheless, wearing flip-flops for a long time is sometimes associated with discomfort for many individuals.

2. Are flip-flops suitable for people with flat feet?

This is particularly true because flip-flops have little support for the middle of the sole, and people with flat feet should avoid using them. Abnormality of the foot, such as flat feet requires shoes that will provide a correct footbed support and shoe structures that support proper alignment and reduce foot stress.

3. What materials are best for waterproof flip-flops?

Waterproof flip-flops are typically made from EVA foam, rubber, or synthetic materials. These materials are lightweight, durable, and quick-drying, making them ideal for water-resistant footwear.

4. Can flip-flops cause blisters?

Well, flip-flops can result in blisters because, for instance, if the straps are too tight or the shoe abrasive the skin. SOME TIPS TO AVOID Blisters: Avoid cloth shoes with new seams, loose shoes that do not quite fit, go to the next size up, and choose flip-flops with padded straps or cushioned soles.

Conclusion

Flip-flops are a versatile and comfortable choice for casual wear, but they may not be the best option for every situation. While convenient for short and casual outings, long walks or activities requiring support can strain your feet. People with flat feet should avoid regular flip-flops due to the lack of proper arch support. Waterproof flip-flops from durable materials like EVA foam, rubber, or synthetic materials provide convenience and quick-drying features for water-related activities.

Best Vacuum Sealers: An Easy Solution for Waste-Free Meal Prep

Best Vacuum Sealers

Best Vacuum Sealers are becoming an essential kitchen tool for anyone who loves cooking, meal prepping, or preserving food. As meal prep continues to grow in popularity, finding efficient ways to keep food fresh longer and reduce waste is more important than ever. One of the most effective solutions is using a vacuum sealer.

Whether freezing meals, storing bulk items, or organizing your kitchen, a vacuum sealer helps preserve food, save time, and reduce waste. In this blog, we will explore what a vacuum sealer is, the benefits it offers, key features to consider when buying one, and some helpful tips to maximize its use.

What is a Vacuum Sealer?

A vacuum sealer is a kitchen appliance that removes air from specially designed bags or containers and seals them shut, keeping food fresh for longer. It uses heat and suction to eliminate air, preventing the growth of bacteria, mold, and yeast, which thrive in oxygen. Sealing food in an airtight bag helps preserve flavor, texture, and nutritional value. Many vacuum sealers offer various settings, allowing you to seal everything from dry foods to delicate items like fruits and vegetables.

There are two main types of vacuum sealers: external and chamber. External vacuum sealers remove air from bags and seal the food, while chamber vacuum sealers eliminate air from the entire chamber, creating a tighter seal. While both types have advantages, external sealers are typically more affordable and user-friendly for home cooks.

Benefits of Using Vacuum Sealers for Meal Prep

Longer Food Shelf Life

A key advantage of using a vacuum sealer is the extended shelf life it offers. By sealing food in an airtight bag, you protect it from air, moisture, and bacteria, significantly reducing spoilage. Vacuum-sealed food can be stored in the fridge, freezer, or pantry longer than traditional methods. Raw meat or fish that typically lasts a few days in the fridge can remain fresh for weeks when vacuum-sealed. It also prevents freezer burn, preserving texture and flavor. Vacuum-sealed foods can last 3–5 times longer than those stored in standard containers.

Food Preservation Without Chemicals

Vacuum sealing helps preserve food naturally without the need for preservatives or chemicals. This means you can keep your food fresh and nutritious without worrying about added artificial substances. Vacuum-sealed fruits and vegetables, for example, retain their nutrients and flavor for much longer than their non-sealed counterparts.

Cost-Effective

By preserving your food effectively, vacuum sealers can save you money. You can buy in bulk, vacuum seal individual portions, and store them for future use. This eliminates food waste from spoilage and prevents you from needing to buy new ingredients as often. Additionally, buying bulk items like meat, cheese, or grains and sealing them properly can lead to significant savings in the long run.

Organized Meal Prep

For those who follow a meal prep routine, vacuum sealers provide an excellent solution for keeping pre-made meals fresh. After cooking in large batches, simply vacuum seal individual portions and store them in the fridge or freezer. This will ensure your meals stay fresh, and you can easily grab and reheat your pre-prepared meals throughout the week.

Time-Saving

Vacuum sealers allow you to store food more efficiently, which translates to less time spent on meal prep and grocery shopping. If you’re someone who likes to prepare meals in advance, having a vacuum sealer can streamline your workflow, so you can cook in batches, store food safely, and always have a variety of meals ready to go.

Top Recommendations

NESCO VS-12 Deluxe Vacuum Sealer

Upgrade your food preservation game with the NESCO VS-12 Deluxe Vacuum Sealer—a powerful 130-watt machine with a double vacuum pump for maximum air extraction. With three sealing settings (dry, moist, and double), plus adjustable vacuum pressure, it ensures perfect results for every type of food, from delicate pastries to juicy steaks. The easy-lock handle allows for smooth, one-handed operation, while the double heat seal provides extra security for sealing moist foods. Featuring built-in storage for vacuum sealer bags and a bag cutter to customize sizes, this sealer is designed for convenience, efficiency, and long-lasting freshness.

GERYON Vacuum Sealer Machine

Keep your food fresher for longer with the GERYON Vacuum Sealer Machine, designed to prevent freezer burn and reduce food waste with its airtight heat sealing technology. This compact and lightweight vacuum sealer offers two sealing modes—perfect for dry or moist foods—allowing you to customize the preservation process. The detachable upper lid makes cleaning easy, while the soft-touch digital buttons and LED indicator lights ensure a user-friendly experience. With a fully automatic vacuum sealing operation, this machine simplifies meal prep, helping you save time, money, and effort in the kitchen.

NutriChef Food Vacuum Sealer Machine

The NutriChef Food Vacuum Sealer is your go-to solution for extending food shelf life and preventing waste. With automatic air sealing, it efficiently preserves both dry and moist foods, making it ideal for meal prep and bulk storage. Equipped with versatile sealing modes and an air suction hose, it ensures airtight results for all your food storage needs. Its compact yet powerful design features a 110-watt suction element, soft-touch LED controls, and stain-resistant housing for easy maintenance. Plus, it comes with vacuum bags, an extra-long roll, and a wine stopper, making it a complete solution for any modern kitchen.

FoodSaver® 4800 Series 2-in-1 Automatic Vacuum Sealing System

Keep your food fresh up to 5x longer in the freezer and 2x longer in the fridge or pantry with the FoodSaver 4800 Series 2-in-1 Vacuum Sealer. Designed for ultimate convenience, it features automatic bag detection and sealing, allowing for quick and effortless food preservation. The built-in handheld sealer extends its functionality to zipper bags, canisters, and containers, while also offering a fast marinating mode. The pull-out drip tray drawer with a dishwasher-safe tray keeps your counters mess-free, making it a hassle-free solution for sealing everything from meats to leftovers.

Anova Culinary Precision Vacuum Sealer Pro

Designed for serious food enthusiasts, the Anova Culinary Precision Vacuum Sealer Pro offers high-powered suction, a double heat sealer, and built-in storage for seamless meal prep and long-term food preservation. It’s one-handed operation makes sealing quick and effortless, while the wet-function mode ensures even the juiciest foods are securely sealed without mess. The integrated bag cutter and hidden cord storage add to its sleek, user-friendly design. Plus, the accessory port and hose allow for sealing jars, wine bottles, and vacuum-ready containers, making it a versatile tool for home chefs and sous vide enthusiasts alike.

Key Features to Look for in a Vacuum Sealer

Sealing Strength

Look for a vacuum sealer with adjustable sealing strength like Anova. The stronger the seal, the more airtight it will be, which is essential for long-term food storage. A powerful vacuum motor is crucial for removing air completely from the bags, keeping the contents fresh and free of contaminants.

Multiple Settings

Some foods are more delicate than others, and you don’t want to crush or damage items like bread or soft fruits. Therefore, look for a vacuum sealer that offers multiple settings, including options for sealing moist foods, delicate items, and dry foods. This will give you the flexibility to preserve a wide variety of foods properly.

Ease of Use

The best vacuum sealers are simple to operate. Look for a model like GERYON that has user-friendly controls, clear instructions, and intuitive buttons or touchscreen functionality. A machine has automatic sealing features and easy-to-replace bags will make meal prep a breeze.

Vacuum Bag Compatibility

Ensure the vacuum sealer, like Mesliese is compatible with various vacuum bags or rolls. Some models only work with specific brands or types of bags, limiting your options. Many sealers work with standard vacuum bags, while others might come with proprietary bag options. Flexibility in this area is a plus.

Size and Storage Capacity

The size of the vacuum sealer matters, especially if you have a small kitchen or need to store larger quantities of food. Compact, portable models are great for smaller kitchens, while larger models provide more functionality if you need to seal large portions or multiple items at once.

Seal Quality

Look for a vacuum sealer like Vsdk Vacuum Sealer Machine that guarantees a reliable, high-quality seal. Weak or inconsistent seals will lead to air entering the bags, which can result in spoiled food. A good vacuum sealer should create a tight, lasting seal every time.

Tips for Maximizing Your Vacuum Sealer’s Effectiveness

  • Pre-Freeze Wet Items: If you’re sealing wet or juicy items (like raw meat or fish), freeze them for a few hours before vacuum sealing. This prevents liquids from being sucked into the vacuum machine, ensuring a cleaner and more efficient process.
  • Use the Right Bags: Invest in high-quality vacuum bags to ensure a strong seal. Look for bags that are BPA-free and made of thick, durable material to prevent tears or punctures.
  • Don’t Overfill Bags: When sealing food, avoid overfilling the bags. Leave enough space around the edges to ensure a tight seal.
  • Store Properly: After sealing your food, make sure to store it correctly. Vacuum-sealed food stored in the fridge or freezer will last longer if kept at a consistent temperature.
  • Seal in Portions: For meal prepping, it’s best to vacuum seal food in portion sizes that make sense for your family or meal plan. This makes it easier to grab exactly what you need without having to unseal large amounts.

Commonly Asked Questions

1. What types of foods can I vacuum seal?

You can vacuum seal a wide range of foods, dry and moist. Raw or cooked meats, poultry, and fish benefit from vacuum sealing, extending their fridge or freezer shelf life. Many fruits and vegetables can also be vacuum sealed, though some may require blanching before storage in the freezer.

Dry foods like nuts, seeds, grains, and pasta stay fresh longer when sealed, as do cheese and dairy products, which retain their flavor and prevent drying. Snacks such as chips and crackers remain crisp and fresh, while leftovers and prepared meals can be preserved for future use. Additionally, bread and baked goods stay fresh longer and are protected from freezer burn.

2. How long can food stay fresh when vacuum-sealed?

Vacuum sealing extends the freshness of food far beyond traditional storage methods. Depending on the type of food and how it’s stored, the shelf life can vary. For instance, raw meats stay fresh for 1-3 weeks in the fridge and up to 3-5 years in the freezer. Similarly, fresh fish lasts 1-2 weeks in the fridge and up to 1-2 years when frozen. Fruits and vegetables also benefit from remaining fresh for 1-2 weeks in the fridge and up to 1-3 years in the freezer.

Dry goods like nuts, grains, and pasta last 6-12 months in the pantry, while leftovers and prepared meals stay good for 1-2 weeks in the fridge or 3-5 months in the freezer. By removing air and preventing the growth of bacteria and mold, vacuum sealing preserves the food’s flavor, texture, and nutritional value.

3. What’s the difference between a manual and automatic vacuum sealer?

The primary difference between manual and automatic vacuum sealers lies in how they operate. With a manual vacuum sealer, the user must initiate and control each step of the process. This means manually activating the vacuum function, waiting for the air to be removed, and pressing the sealing button.

While this method offers more control, it requires more time and effort. On the other hand, an automatic vacuum sealer takes care of everything for you. Once you place the bag in the machine, it automatically starts the vacuum and sealing process, offering a more convenient and faster solution. While manual sealers are typically more affordable, automatic ones provide greater ease of use and efficiency, making them ideal for those who want a hassle-free experience.

Conclusion

Vacuum sealers offer a simple and effective way to keep food fresh for longer, reducing waste, saving money, and making meal prep much easier. Whether you’re trying to preserve bulk items, organize your kitchen, or prep meals in advance, investing in a good vacuum sealer can make a difference. Keep in mind the key features, such as sealing strength, ease of use, and bag compatibility, to choose the best vacuum sealer for your needs.

Best Desk Chairs for Home Office: The Ultimate Buying Guide

Best Desk Chairs

Working from home has become the new normal, and the best desk chairs for the home office can make all the difference. A well-designed chair enhances comfort, improves posture, and boosts productivity. Sitting for long hours in an uncomfortable chair leads to back pain, fatigue, and reduced efficiency. Investing in the best desk chair for your home office ensures you stay focused, comfortable, and pain-free throughout the day.

Discover the best desk chairs for home office, blending ergonomics, style & durability. This guide compares top picks for comfort & support. Whether you need lumbar support, adjustable armrests, or a sleek design that complements your workspace, we’ve got you covered. Let’s dive into the key features to look for and the best options available!

The Anatomy of the Best Desk Chairs For Home Office: Must-Have Features

When selecting the best desk chairs for your home office, it’s essential to consider several key features that enhance comfort, productivity, and overall well-being. Here are the must-have features that you should prioritize in your search for the perfect chair:

Breathability for All-Day Comfort :

One of the most important factors in choosing a home office chair is its breathability. Sitting for extended hours can lead to discomfort and heat buildup, especially if your chair is made of non-ventilated materials. Look for chairs with breathable mesh backs or seat cushions that allow airflow, keeping you cool and comfortable throughout the day.

Gabrylly Ergonomic Mesh Office Chair – This ergonomic office chair offers full-body support with adjustable lumbar, headrest, and armrests, making it perfect for long hours of sitting. Its breathable mesh seat ensures comfort, while the flip-up armrests save space when not in use. The recline function (90-120°) lets you switch between focus and relaxation effortlessly. Built to last with a sturdy frame and smooth-rolling wheels, it supports up to 400 lbs. Plus, with a 5-year warranty and easy assembly, you can count on durability and hassle-free setup.

Armrest Adjustability for Better Posture :

The ability to adjust the armrests is crucial for maintaining a natural arm position while typing or using a mouse. Adjustable armrests allow you to customize the height and width to fit your body, reducing strain on your shoulders, neck, and wrists. This feature is especially beneficial for people who spend long hours working at their desks.

Mimoglad Office Chair, Ergonomic Desk Chair – This ergonomic office chair supports your spine with an adjustable lumbar feature and a thick, cushioned seat for ultimate comfort. It offers a 4-inch height adjustment and a 90-135° reclining function, letting you find the perfect sitting position. The breathable mesh fabric keeps you cool, while the heavy-duty base and smooth-rolling casters ensure stability and mobility.

Recline Functionality for Relaxation :

A recline function is another essential feature in the best desk chairs for home offices. Having the option to recline slightly helps relieve pressure on your spine and promotes better posture. Look for chairs that offer adjustable recline settings, allowing you to lean back and relax when needed without compromising support.

Hbada Modern Desk Comfort Swivel Home Office Task – The Hbada J1 Office Chair is a trusted choice worldwide, used by over 3 million households. Its W-shaped memory foam cushion (12.5 cm thick) contours to your body, reducing pressure from long sitting hours. With a sleek penguin-inspired design, it fits seamlessly into offices, homes, gaming setups, and meeting rooms. Flip-up armrests save space, while the 105° rocking function provides quick relaxation. Backed by a 3-year warranty, 30-day free return, and price match guarantee, it ensures a risk-free and comfortable seating experience.

Ergonomic Design for Maximum Support :

Ergonomics is the foundation of a comfortable office chair. The best desk chairs for home office use are designed to support your body’s natural posture and movement. Look for features like lumbar support, contoured backrests, and adjustable seat height to keep your spine aligned and reduce the risk of back pain. Proper ergonomic design is crucial for long-term comfort and health.

Office Mid Back Swivel Lumbar Support Desk – This ergonomic office chair features dual lumbar support, mimicking the feel of hands supporting your waist for enhanced comfort. Its high-density elastic sponge cushion, layered with breathable mesh and solid wood, ensures durability and double the comfort. Built with high-quality materials, including an SGS-certified gas lift and a BIMIFA-tested five-star base, it supports up to 240 lbs with stability.

Easy Assembly and Maintenance :

When purchasing a desk chair for your home office, consider how easy it is to assemble and maintain. Many high-quality chairs come with simple assembly instructions, and some even offer a tool-free setup. Additionally, look for chairs with removable and washable cushions or covers, making it easy to keep your chair clean and fresh.

FelixKing Executive Rolling Swivel Comfy Task – The FelixKing ergonomic office chair offers 5-point support (head, shoulders, back, hips, and hands) with proper lumbar support to maintain a healthy posture and relieve neck and shoulder strain. Its adjustable height and tilt adapt to different body shapes, ensuring personalized comfort. The breathable mesh fabric keeps you cool, while the high-density foam cushion provides lasting support. Built for durability, it features silent PU casters, a sturdy air rod, and a reinforced base, holding up to 300 lbs. Easy to assemble in 15 minutes, it comes with a 1-year warranty for a worry-free experience.

How to Test the Best Desk Chairs for Home Office Before Buying (Try Before You Commit)

Finding the best desk chair for your home office isn’t just about looks—it’s about comfort, support, and long-term usability. Testing a chair before buying ensures that it meets your needs and prevents discomfort or back pain in the future. Here’s how to evaluate a desk chair before making a commitment.

Check the Seat Comfort and Cushioning :

Sit in the chair for at least 10–15 minutes. A high-quality chair should have a firm, comfortable cushion that supports your weight without sinking too much. Memory foam or high-density padding works best for prolonged sitting.

Test the Lumbar Support :

Good lumbar support keeps your spine aligned and prevents lower back strain. When sitting, check if the chair supports the natural curve of your lower back. Adjustable lumbar support is a plus, allowing you to customize the fit.

Adjust the Height and Armrests :

A chair’s height should allow your feet to rest flat on the floor while keeping your knees at a 90-degree angle. Armrests should support your elbows without lifting your shoulders. Adjustable armrests offer more flexibility and prevent wrist strain.

Evaluate the Recline and Tilt Mechanism :

A good home office chair should offer a reclining feature and tilt tension control. Lean back slightly, does the chair support you without feeling too stiff or too loose? The ability to adjust recline angles can improve posture and comfort during long work hours.

Move Around and Test the Swivel :

A chair with smooth swiveling and rolling capabilities makes it easier to move around your workspace. Test the wheels on different surfaces, like hardwood and carpet, to ensure they glide smoothly.

Check the Material and Breathability :

Leather, mesh, and fabric each offer different benefits. Mesh chairs provide breathability, leather offers a premium feel, and fabric combines comfort with durability. Choose a material that matches your comfort preferences and home office environment.

Ensure Durability and Weight Capacity :

Look at the chair’s weight capacity and build quality. A solid metal or reinforced plastic frame ensures durability. Also, check user reviews and manufacturer warranties for insight into the chair’s longevity.

How to Maintain Your Best Desk Chairs for Home Office for Longevity

Investing in the best desk chairs for the home office ensures comfort and productivity, but proper maintenance is essential to keep them in top shape. Regular care not only extends their lifespan but also prevents issues like squeaky wheels, worn-out cushions, and unstable frames. Follow these maintenance tips to keep your chair looking and feeling new for years.

Clean Your Chair Regularly :

Dust, dirt, and spills can accumulate over time, affecting both the appearance and functionality of your chair. Fabric chairs should be vacuumed weekly to remove dust and debris, while mild detergent can help with stains. Leather chairs require a wipe-down with a damp cloth and occasional conditioning with a leather protector to prevent cracking. Mesh chairs, which often trap dust, should be cleaned with a damp cloth or a small brush to maintain breathability.

Check and Tighten Screws & Bolts :

Over time, screws and bolts may loosen due to regular use, causing instability and unnecessary squeaks. Inspect all joints, especially around the base and armrests, every few months and tighten any loose screws. If your chair wobbles or makes noise, checking and securing its components can help restore stability and extend its lifespan.

Lubricate Moving Parts :

If your chair has wheels, a swivel mechanism, or an adjustable height feature, keeping these parts well-lubricated prevents stiffness and friction. A silicone-based lubricant is ideal for ensuring smooth movement, especially on wheels and levers. Avoid oil-based products as they can attract dust and dirt, which may clog the mechanisms over time.

Protect the Wheels and Base :

Wheels tend to collect dust, hair, and debris, which can hinder movement and cause uneven rolling. Cleaning the casters once a month with a damp cloth and removing trapped debris with tweezers helps maintain their efficiency. Using a chair mat under your desk chair can also protect both the wheels and the flooring, reducing wear and tear while allowing smoother movement.

Maintain Proper Usage :

Using your chair correctly prevents unnecessary stress on its structure. Avoid excessive leaning, as putting too much weight on the armrests or reclining too far can weaken the frame over time. Adjusting the height and lumbar support to fit your posture not only enhances comfort but also reduces strain on the chair’s components. Additionally, always check the chair’s weight limit to prevent damage to the base and wheels.

Store Properly When Not in Use :

If you need to store your chair for an extended period, proper storage can prevent damage. Covering it with a protective sheet helps keep dust away while storing it in a dry area prevents mold and rust formation on metal parts. Keeping the chair in an upright position also ensures that no pressure is placed on the cushions, maintaining their shape and durability.

Common Mistakes to Avoid When Buying a Home Office Chair

Choosing the best desk chair for a home office can significantly impact your comfort, productivity, and overall health. However, many buyers make common mistakes that lead to discomfort and regret. Here are the top mistakes to avoid when shopping for a home office chair.

Ignoring Ergonomics :

Many people prioritize style over ergonomics, leading to back pain and poor posture. Always choose a chair with lumbar support, adjustable armrests, and seat height to maintain a natural sitting position.

Choosing the Wrong Seat Cushion :

A chair with a hard or overly soft cushion can cause discomfort during long hours of work. Look for a balance memory foam or breathable mesh cushions provide both comfort and support.

Overlooking Adjustable Features :

A fixed-height chair might seem fine initially, but it won’t accommodate different desk setups or body types. Opt for a chair with height, tilt, and armrest adjustments for a personalized fit.

Not Considering the Material :

Leather chairs may look elegant, but they can trap heat, making them uncomfortable for long work hours. Mesh chairs provide better airflow, preventing sweat buildup, especially in warmer climates.

Buying Without Testing or Researching Reviews :

Many buyers order chairs online without checking reviews or testing them in-store. Always read customer feedback to understand durability, comfort, and quality before making a purchase.

Ignoring Weight Capacity and Size :

A chair that’s too small or unable to support your weight can break down quickly. Always check the weight capacity and seat dimensions to ensure a proper fit.

Sacrificing Quality for Price :

Budget-friendly chairs might save money upfront, but poor-quality materials can wear out quickly. Investing in a durable, well-built chair will provide better long-term value and comfort.

Commonly Asked Questions

1. How much should I spend on a good office chair?

A high-quality home office chair can cost anywhere from $100 to $600. Mid-range chairs ($200-$400) often provide the best balance of comfort, durability, and adjustability.

2. How often should I replace my office chair?

Most office chairs last 5 to 10 years, depending on build quality and usage. If your chair is causing discomfort, showing wear and tear, or losing support, it’s time for a replacement.

3. How do I know which chair is best for long hours?

Look for an ergonomic design with lumbar support, adjustable armrests, and a breathable seat cushion. A chair designed for 8+ hours of daily use will provide the best long-term comfort.

4. Can a good chair prevent back pain?

Yes! A well-designed ergonomic chair supports your spine, reducing strain on your lower back and preventing posture-related pain. Pair it with good sitting habits and regular breaks for optimal results.

Hand Grip Strengthener: Boost Your Grip Power Like a Pro!

Hand Grip Strengthener

Do you struggle with weak grip strength? Many people overlook the importance of a strong grip, but it plays a crucial role in daily activities and athletic performance. Whether you’re lifting weights, playing sports, or simply opening a stubborn jar, a powerful grip makes life easier. A hand grip strengthener is a simple yet highly effective tool that builds hand, wrist, and forearm strength. Athletes, musicians, and even office workers use grip trainers to enhance endurance and prevent injuries.

In this blog, we’ll explore how a hand grip strengthener can transform your strength training routine & the best ones. You’ll discover its benefits, the best exercises, and how to choose the right one for your needs. Let’s dive in and unlock the power of a stronger grip!

Beyond the Gym: Surprising Benefits of Using a Hand Grip Strengthener

Whether you’re an office worker, a musician, or simply looking to improve daily function, a hand grip strengthener can enhance your life in unexpected ways.

Improves Everyday Functional Strength :

A strong grip makes daily tasks easier opening jars, carrying groceries, or even turning a stubborn doorknob becomes effortless. Regular use of a hand grip strengthener builds endurance in your fingers, hands, and forearms, boosting overall functional strength.

Reduces Risk of Injury :

Weak grip strength often leads to strain in the wrists and forearms. By strengthening these muscles, you lower the risk of repetitive stress injuries, especially if you type, play an instrument, or perform manual labor.

Enhances Athletic Performance :

A powerful grip benefits athletes in sports like rock climbing, tennis, golf, and martial arts. A hand grip strengthener improves control, stability, and endurance, giving you a competitive edge.

Supports Rehabilitation :

Physical therapists frequently recommend grip strengtheners for recovery after hand or wrist injuries. They help restore mobility, rebuild strength, and prevent muscle atrophy.

Boosts Mental Focus & Stress Relief :

Squeezing a hand grip strengthener can serve as a form of active meditation, reducing stress and improving concentration. The rhythmic motion helps channel nervous energy productively.

Promotes Better Blood Circulation :

Regular use stimulates blood flow to the hands and fingers, which can alleviate stiffness and reduce the risk of conditions like arthritis

How to Choose the Right Hand Grip Strengthener

A hand grip strengthener is a compact yet highly effective tool that helps build hand, wrist, and forearm muscles. But with so many options on the market, selecting the right one can be tricky. Here’s what you should consider before making your choice.

Adjustability :

A hand grip strengthener is a compact yet highly effective tool that helps build hand, wrist, and forearm muscles. But with so many options on the market, selecting the right one can be tricky. Here’s what you should consider before making your choice.

Grip Strength Trainer, 6 Pack Grip Strength Trainer Set – The Hozzen 6-Pack Grip Strength Trainer offers six resistance levels (50-200 lbs), catering to beginners and advanced users alike. Its ergonomic, ambidextrous design targets fingers, hands, wrists, and forearms for enhanced grip strength. The double non-slip grip with engraved patterns and grip tape ensures comfort and control. Made with high-tensile alloy steel springs and aluminum handles, it’s built for durability.

Ergonomic design :

An ergonomic design with contoured or padded handles enhances comfort and reduces strain during prolonged use. If you want a versatile workout, opt for a strengthener that offers a variety of exercises, such as pinch grips, crush grips, or support holds, to target different hand and forearm muscles. Portability is a big plus—compact and lightweight strengtheners let you train anytime, anywhere.

FLYFE Grip Strength Trainer Kit (5 Pack) – This 5-in-1 Grip Strengthener Trainer Kit includes an adjustable hand gripper (11-132 lbs), finger exerciser, grip ring, stress relief ball, and finger stretchers—perfect for a variety of hand and forearm workouts. The smart counting grip automatically tracks reps without a battery, helping you monitor progress. Made from high-quality, durable materials, it ensures longevity and a comfortable grip. Ideal for athletes, musicians, and those recovering from injuries, it helps with stress relief, rehabilitation, and strength building. Suitable for all ages, from teens to seniors, looking to improve grip strength.

Grip strength range :

Make sure the grip strength range matches your fitness level, whether you’re a beginner or an advanced user. If you plan to use it in shared spaces, consider the noise level—some models operate quietly, making them ideal for office or travel use. Finally, cleaning and maintenance should be hassle-free, especially if you use the strengthener frequently.

Logest Metal Hand Grip Set 100LB-350LB 6 Pack No Slip – Built with durable alloy steel, this grip strength trainer set is designed for long-lasting use. Each grip features raised-texture silicone covers for a firm, non-slip hold, and enhanced comfort. Compact and portable, you can train anywhere—at home, at work, or while traveling. These hand grips target forearms, wrists, and fingers, helping you build strength and lift heavier weights. Available in three sets (100-200 lbs, 250-350 lbs, or a full 6-pack), they cater to different training levels.

Durability :

Choose a strengthener made from high-quality materials like steel springs and reinforced plastic. A durable design ensures long-term use without breaking or wearing out quickly.

FlintRehab Twist Hand Exerciser Flexible Bars  – This set of three premium flex bars is made from high-grade, odorless silicone for durability and long-term use. The non-slip ridged design ensures a secure grip, even during intense twisting and bending exercises. Designed for physical therapy and strength training, these bars target hands, wrists, forearms, and elbows, helping to improve grip strength, flexibility, and mobility. They provide joint pain relief, making them perfect for those recovering from tennis elbow, golfer’s elbow, or tendonitis.

Variety of Exercises :

Some grip strengtheners allow you to train different muscle groups in your hand, fingers, and forearm. Consider a model that supports multiple exercises for a well-rounded grip workout.

IMENSEAS Hand Grip Strengthener 7 Pack – This 7-pack Grip Strengthener Trainer Kit includes an adjustable hand gripper (22-88 lbs), finger stretchers, a finger exerciser, a grip ring, and a stress relief ball, offering a full range of hand and forearm workouts. With various resistance levels, it’s perfect for athletes, musicians, and anyone looking to build grip strength. Ideal for rehabilitation and stress relief, it helps reduce joint pain and stiffness and aids recovery from conditions like arthritis and carpal tunnel. Made from high-quality, flexible silicone, this set ensures durability and comfort.

Portability :

A compact and lightweight design lets you take your hand grip strength anywhere. Whether at home, in the office, or traveling, portability ensures you never miss a training session.

ZEAGUS Grip Strength Trainer 4 Pack– This Hand squeeze grip Strengthener is perfect for building forearm, wrist, finger, and hand strength while aiding rehabilitation from arthritis, tendonitis, carpal tunnel, and injuries. Made with knurled aluminum handles and high-quality springs, it ensures a durable and comfortable grip for long-term use. Its portable design fits all hand sizes, making it ideal for workouts at home, in the office, or while traveling. Whether you’re a beginner or an experienced athlete, this tool helps improve grip strength anywhere. Premium customer service guarantees support within 24 hours.

Noise Level :

If you plan to use your grip strengthener in quiet environments, choose a model with silent or minimal noise operation. Spring-loaded models tend to make more noise than rubber or gel-based alternatives.

Physical Therapy Hand Exerciser – Forearm Exercise – The Handmaster Plus Physical Therapy Hand Exerciser is designed to increase grip strength, improve forearm muscle tone, and enhance hand flexibility. It strengthens all 18 hand muscles in a single exercise, helping to reduce pain, stiffness, and anxiety while promoting better blood circulation. Ideal for writers, athletes, rehab patients, and stress relief, this set includes a Firm Flex Ball (Orange) with 2 Soft Cords for progressive training. Made from high-quality, elastic, and skin-friendly material, it is durable, portable, and perfect for long-term use.

Cleaning & Maintenance :

Easy-to-clean materials help maintain hygiene and extend the life of your grip strengthener. Look for options with sweat-resistant coatings and removable parts for hassle-free maintenance.

D’Addario Accessories Hand ExerciserImprove Dexterity – The D’Addario Varigrip Hand Exerciser is designed to build strength and dexterity in your fingers, hands, and forearms. Featuring an ergonomic design with over-molded finger pads, it ensures a comfortable grip during conditioning workouts. The customized tension feature allows you to adjust resistance for each finger, preventing imbalances and improving control. For musicians, the removable grip reveals a simulated string surface, helping to develop and maintain finger calluses. Compact and portable, the Varigrip is perfect for on-the-go conditioning at home, work, or while traveling.

How to Use a Hand Grip Strengthener for Maximum Gains

Using a hand grip strengthener the right way ensures you get the most out of your training. Follow these steps to build strength effectively.

Choose the Right Grip Strengthener :

Selecting the right grip strength is crucial for effective training. There are different types available, including adjustable, fixed-resistance, and finger-specific strengtheners. Beginners should start with a lower-resistance model to avoid strain, while advanced users can opt for high-resistance or adjustable grip strengtheners for progressive training.

Maintain Proper Hand Position :

A correct grip ensures maximum muscle engagement and prevents strain. Hold the grip strengthener with your palm facing inward, placing your fingers on one side and your thumb on the other. Make sure your grip is firm but comfortable, allowing you to squeeze without discomfort. Proper positioning improves control and prevents wrist injuries.

Perform Controlled Squeezes :

Executing each squeeze with control is key to muscle activation. Slowly squeeze the grip strengthener, applying steady pressure, and hold the contraction for about 2–5 seconds. Then, release gradually instead of letting go abruptly. This controlled movement helps in developing grip endurance and prevents unnecessary stress on the tendons. Aim for 10–15 repetitions per hand for optimal results.

Increase Resistance Over Time :

Progressive overload is essential for muscle growth and endurance. As your grip strength improves, gradually increase the resistance of your hand grip strength. Many models come with adjustable tension settings, allowing you to challenge yourself without needing a new device. If you are using a fixed-resistance strengthener, consider upgrading to a higher-resistance model once you can easily complete your repetitions.

Train Regularly for the Best Results :

Consistency is key when training your grip. Aim to use your grip strengthener at least 3–5 times a week, integrating it into your regular workout routine. To achieve balanced strength, combine grip training with wrist curls, forearm exercises, and finger stretches. However, avoid overtraining, as excessive grip workouts can lead to muscle fatigue or strain.

Common Mistakes to Avoid When Using a Hand Grip Strengthener

Using a hand grip strengthener seems simple, but many people make mistakes that limit their progress or even lead to discomfort. To get the best results and avoid injury, steer clear of these common errors:

Using the Wrong Resistance Level :

Beginners often start with too much resistance, leading to fatigue and poor form. On the other hand, using low resistance for too long won’t build strength effectively. Choose a level that challenges your grip without causing strain.

Incorrect Hand Positioning :

Improper hand placement reduces effectiveness and increases the risk of injury. Ensure your fingers and palms are positioned correctly to distribute pressure evenly while squeezing.

Relying Only on Grip Strengtheners :

While a hand grip strengthener improves grip, relying solely on it won’t maximize results. Combine it with wrist, forearm, and finger exercises to build overall hand strength.

Skipping Warm-Ups and Cool-Downs :

Just like any other workout, your hands need a proper warm-up and cool-down. Stretching your fingers, wrists, and forearms before and after using a grip strengthener can prevent stiffness and injuries.

Overtraining Without Recovery :

Training grip strength daily without rest can lead to overuse injuries like tendonitis. Allow adequate recovery time and balance your workouts for consistent progress

Not Tracking Progress :

Many people use a hand grip strengthener without tracking their improvements. Keeping a log of resistance levels, repetitions, and duration helps measure progress and set new goals.

Commonly Asked Questions

1. Can grip strengtheners build forearm muscle?

Yes! A hand grip strengthener primarily targets the muscles in your hands and forearms. Regular use can lead to stronger and more defined forearm muscles over time. However, combining grip training with wrist curls and reverse curls will maximize forearm development.

2. How long does it take to see results?

Results vary based on consistency and resistance level. Most users notice improvements in grip strength within 2-4 weeks of regular training. Significant gains may take a few months, depending on your starting strength and training intensity.

3. Are grip strengtheners good for rehabilitation?

Absolutely! Hand grip strengtheners help improve mobility and strength in individuals recovering from hand or wrist injuries. They are commonly used for conditions like carpal tunnel syndrome, arthritis, and tendon injuries. However, always consult a physiotherapist before starting rehabilitation exercises.

Conclusion

A hand grip strengthener is a simple yet powerful tool that can improve grip strength, endurance, and overall hand health. Whether you’re an athlete, musician, office worker, or someone recovering from an injury, incorporating grip training into your routine can make daily activities easier and enhance performance. Start using a hand grip strengthener today and take your grip power to the next level!